Today we discuss subzero unit which can be built by anybody for low cost.
This is article from KPC forum archives.
Since many folk got RTX KPE card now, I see some activity talking about chilled setups. You can buy ready to go chillers off market, such as
Hailea HC-1000B or
Koolance EXC-800 but these will keep liquid loop temperature above ambient. What if you want moar cooling, to get that desired 2300MHz GPU clock in benchmarks?
Welcome to extreme systems :) It is possible to achieve subzero GPU temperatures with fraction of the real phase-change system cost, if you are OK to do some DIY, and understand how to handle subzero insulation.
Difficulty: easy to medium
Cost of parts: ~$50-250 USD
Time needed: one to few days.
Specs: 0 to -20°C on CPU/GPU's.
Skills: Just watercooling loop assembly, condensate insulation. nothing moreFirst we need to get one of the air conditioner units used (not split central-type one, we need just those which install in windows). If you visit local scrap-yard or air-conditioner repair shop you could get price ~20-150$ for used but still cooling unit. One we looking for should have 7000-9000BTU cooling power rating. It needs to be in good mechanical condition, working and cooling, no leaks or excessive noises. Evaporator fan, appearance and looks of exterior is irrelevant, we going to rip thing apart anyway.
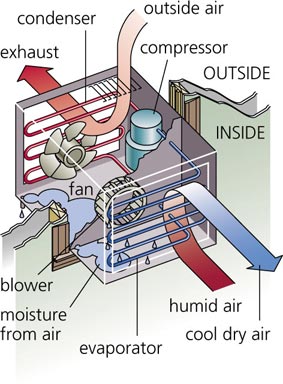
The principle of air-con unit cooling is very similar to stock phase-change CPU units, fridges and such stuff. Compressor pumps cooling agent gas (Freon, such as ozone-unfriendly R22, R404 or R134a) to condenser under high pressure, where it gives heat away and condensing itself into liquid form. R22 boiling point at 1 ATM is near -41°C, so after pressure drop device (few meters of capillary tube usually on these air-conditioners) it's injected into evaporator placed inside the cooling room and divided from hot chamber by insulation. Pressure in evaporator is low as it is connected to suction line of the compressor motor, and that get R22 boiling, taking loads of heat from air in result. Fans circulate air thru evaporator, giving chilled air on the exhaust vents as result.
The idea of this modification is simple. We don't need to cool air, but if we can make sealed tank with cooled evaporator in we can chill glycol liquid. Antifreeze liquid like those used for winter cooling loop of car will work great. This task don't require any phase-change loops HVAC knowledge, don't need to have tools for pipe work/brazing and Freon tanks to work (that may need licensing and such). All cooling/freezing stuff is already assembled and ready to go in these AC units as described earlier.
To be more practical, I will describe unit made by myself back in 2010.
It's some no-name 7000BTU unit, bought for ~$150 locally. 99.9% of such units have nice rotary compressor, and quite large condensers, with R22 gas fill near 1kg. Most of them tuned to max heat power near 2-5kW at near zero temps.
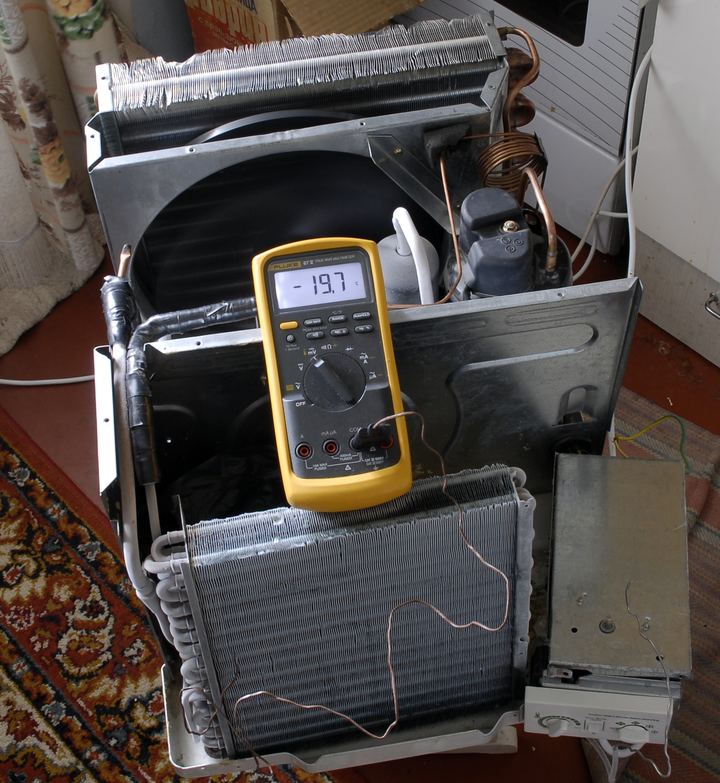
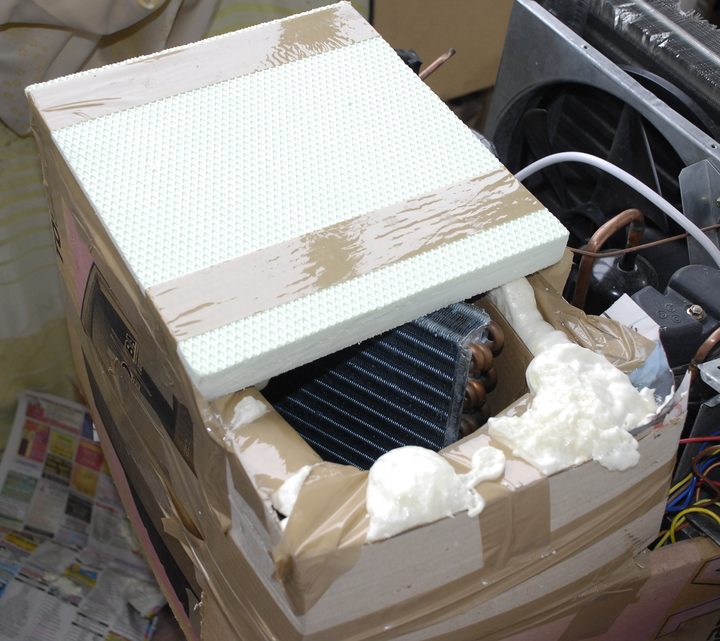
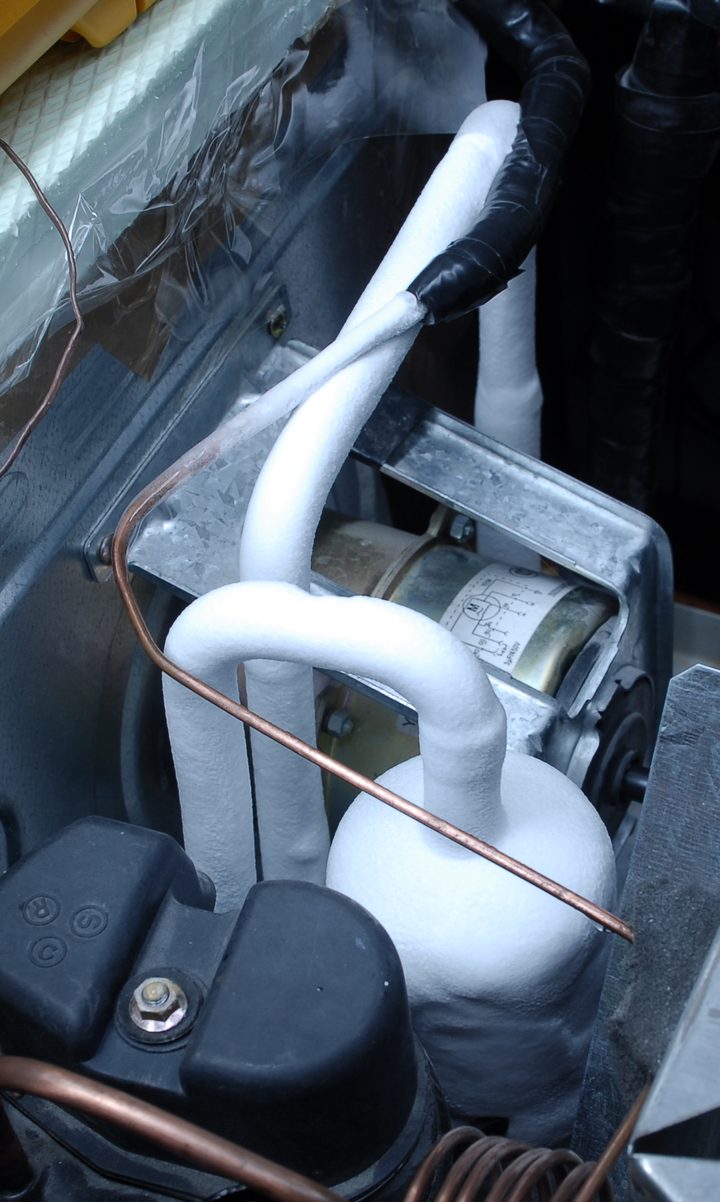
First we remove fan from evaporator side. On pic above it's smaller radiator on bottom of pic. We don't need fan here. Also we need to remove electrical circuits from control box, which set temp point to shutdown compressor. We need compressor working nonstop, so just wired it to power outlet directly via ON/OFF switch.
In result we get almost -20°C on evaporator, without any insulation, any gas/brazing works. Next thing - just put evaporator into sealed tank, and cool liquid down. Smart people don't need further instructions from this point, but I will describe all to the end.
Next task - measure size of evaporator, and go to market to get suitable tank
to fill all evaporator. I got only bit smaller one, but still show must go on.
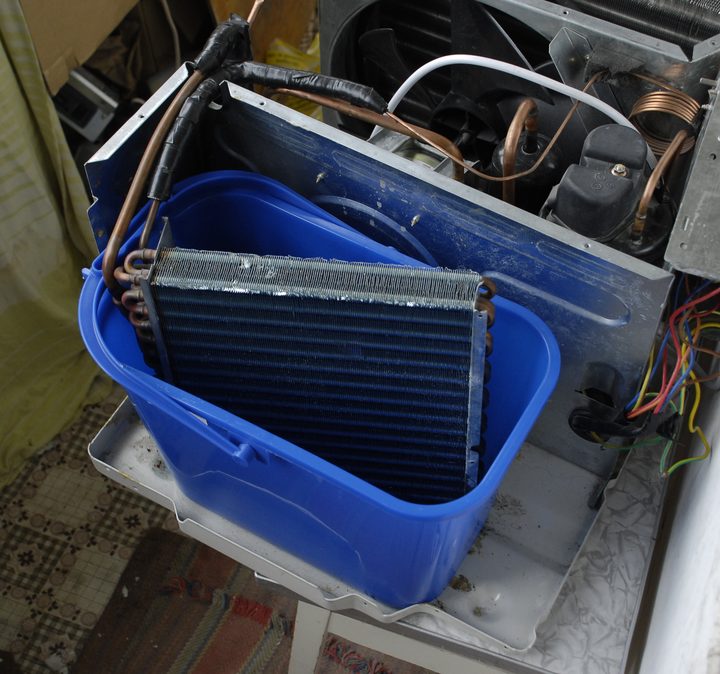
Then got glycol liquid, which have freezing point below -40°C (better lower). If we use water or usual watercooling liquid - we will have get just ice on evaporator, and no subzero liquid will be available. Do NOT use water in this chiller setup.
Use gloves and personal protection gear, have good ventilation in the area where all this is done. Glycol used in these Antifreeze liquids is a POISON. Do not leave this stuff unattended.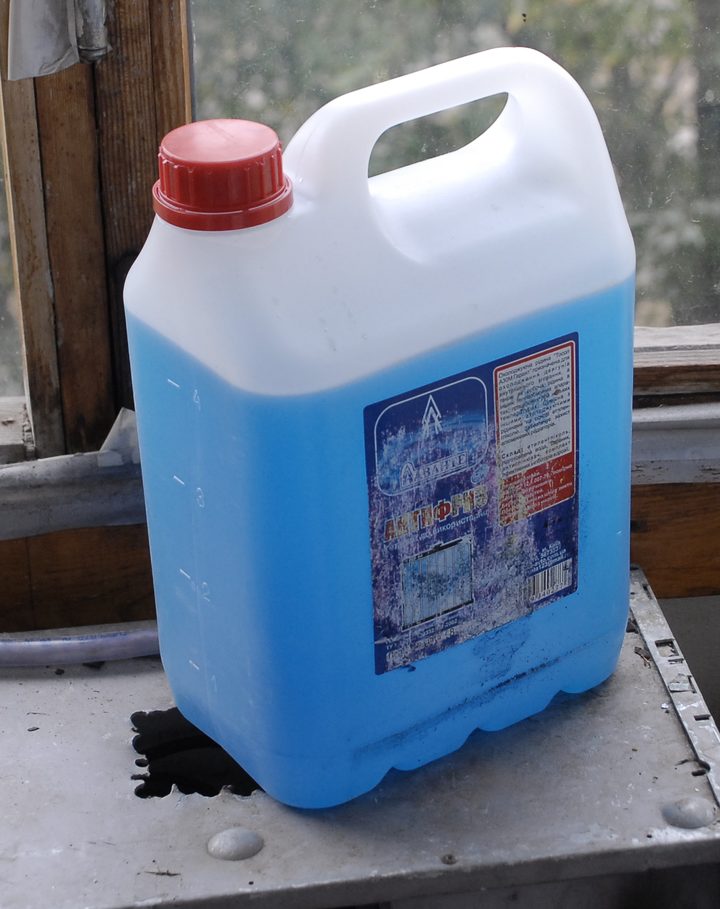
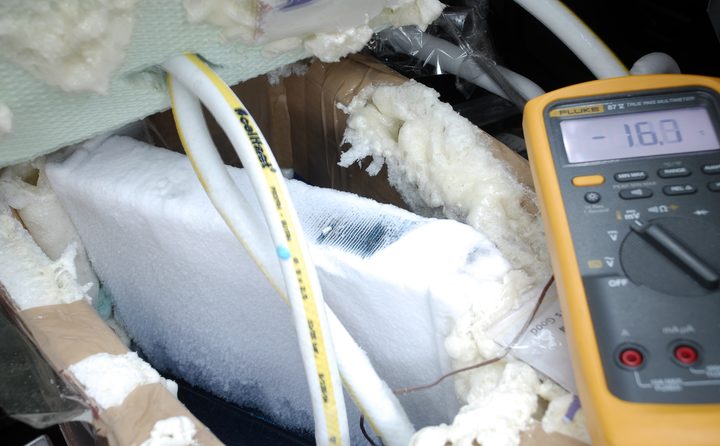
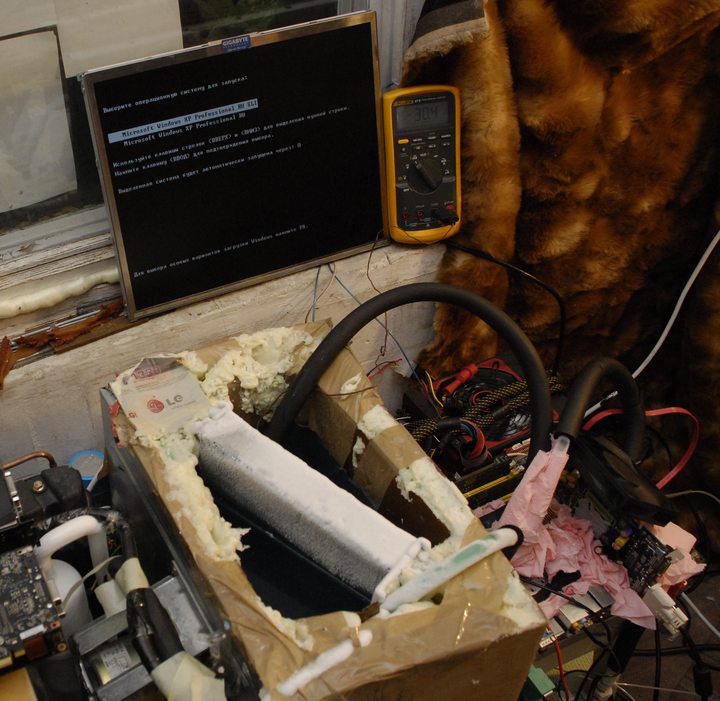
Next I made a paper box from old TV package (I hated TV's and never use it, put tank inside it and fill all air space between cage and tank with foam used in building thermal insulation. It's sold in spay bottles and have low cost (~10$ here). On top I've put some plates of 20mm thick insulation foam sheets to provide better isolation from ambient heat.
Next we just take usual watercooling system with CPU/GPU water-blocks and remove typical watercooling loop pump to bigger and more durable industrial pump that can operate at negative temperatures and provide good pressure. Glycol liquid is more dense than water, so typical PC pump will have hard time with flow rate.
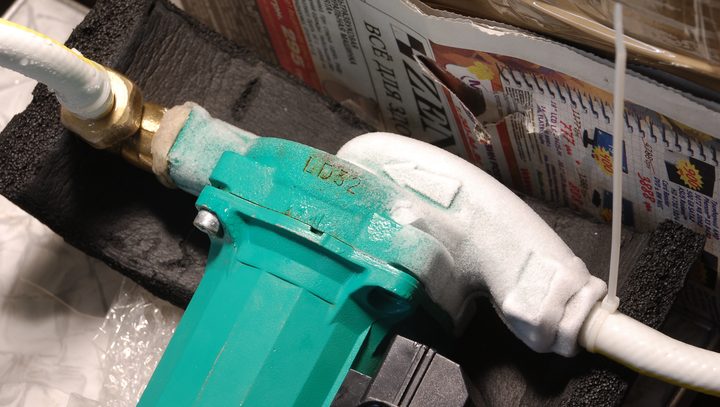
I've used
WILO R-star series pump, 30W with 3 speed selector. It's working noiseless, and have metal iron body. Need to insulate it too, but I was too lazy, so condensate was dripping everywhere.
We do NOT need any radiator of this waterchilled setup, because all cooling is already provided by chiller heat-exchanger tank. No need to point lots of condensation, so insulate all tubing and waterblocks stuff with K-flex and similar things, you would do for LN2/phase-change system.
For first try I've set all up and fire.
First frost arrives shortly, after 5-7min's of AC unit working. Tank was filled with 10L of glycol, so it need some time to cool down all that mass.
Then time to insulate all cold side piping in AC, to prevent ice frosting for prolonged runs
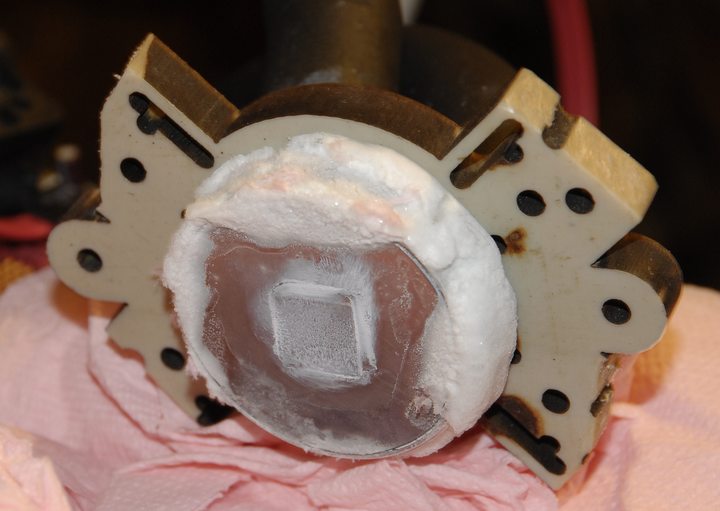
Here is what happens if we mix glycol with water:
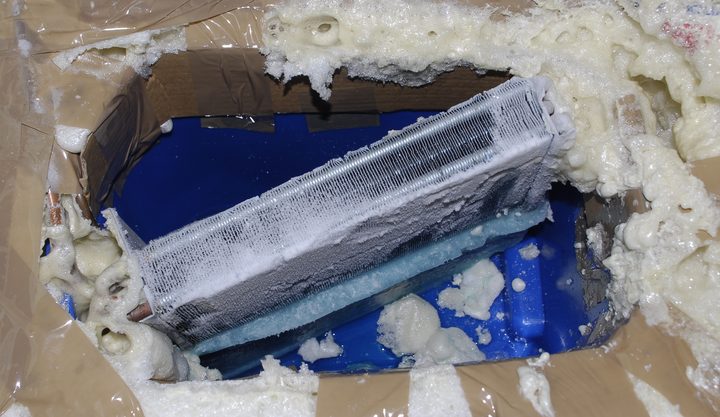
Water turned into ice on radiator, thus reducing heat exchange efficiency very fast.
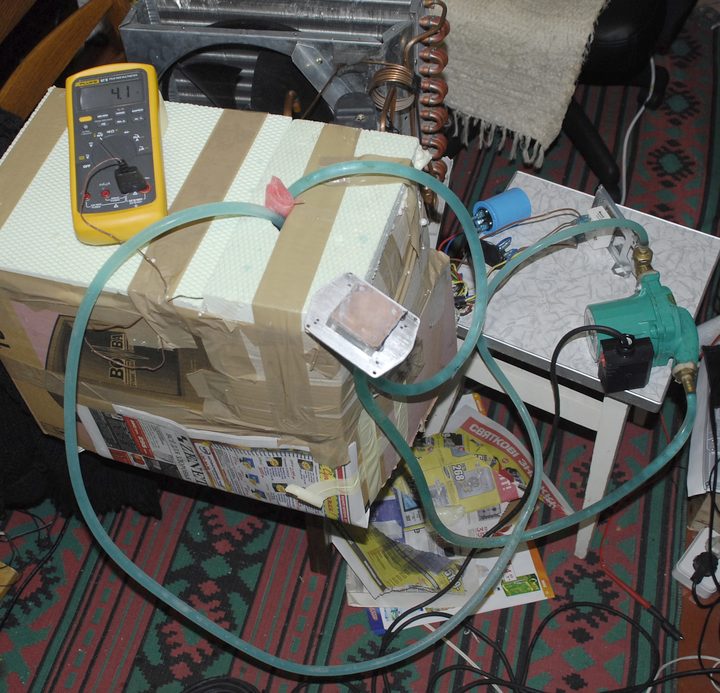
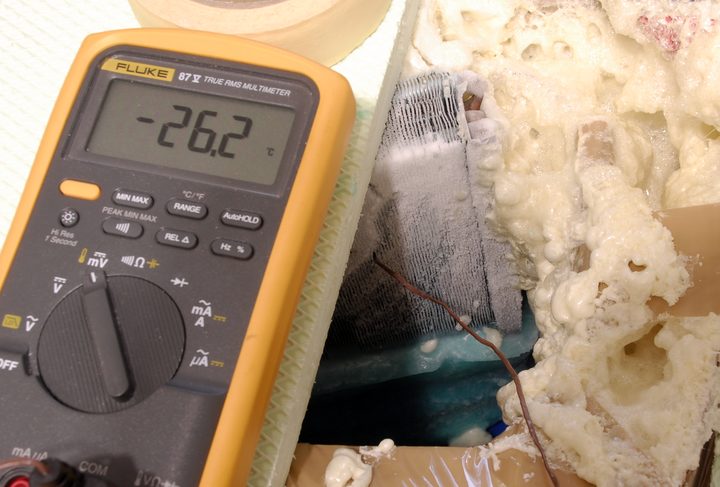
Next time after 1 hour of working, I've got -27°C liquid in unit
One more thing - more liquid in tank - less response from system in general. I mean if we use 1L of cold liquid pumping thru waterblocks - we will get fast temperature changes, during CPU/GPU intensive loads. But a/c will also chill heated liquid faster. More liquid - all will be more smoothy. Optimal is 10-15L, making possible even 32M SuperPi and few 3dmark06 runs with only 2-5°C raise of liquid. And better to cover as much evaporator as possible, to reduce show formation on opened areas.
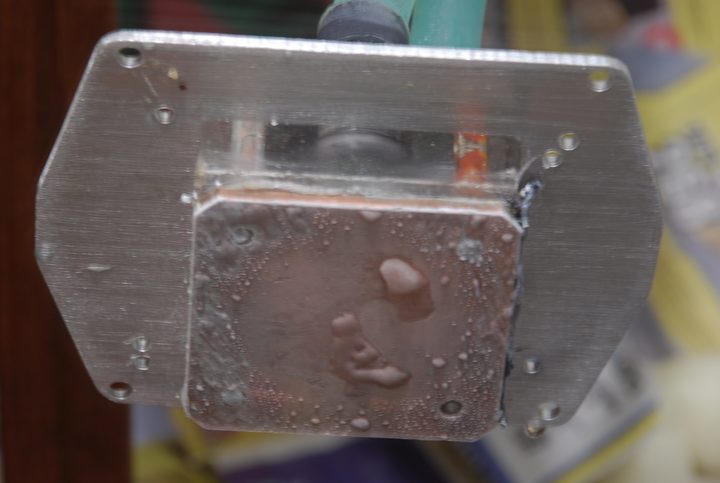
Remember, All we used to built unit - is basic things known by all watercooling builders. No phasechange HVAC knowledge needed. Lowest temp I've got with +2°C ambient temp is -33.8°C in liquid, Not bad for watercooling, huh?
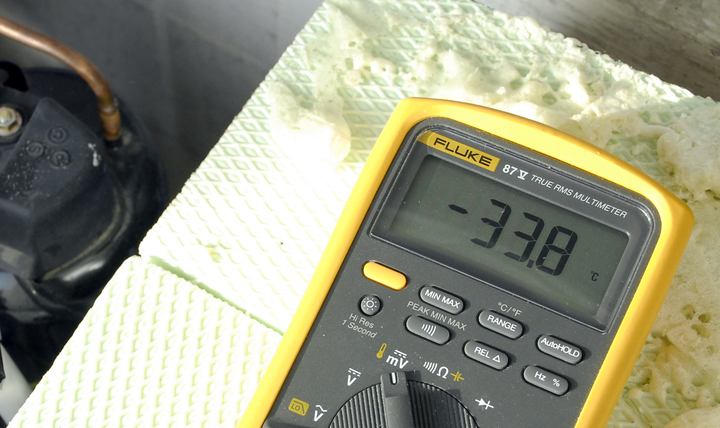
On such temps show arrive on every tube and water-block, so take care of insulation
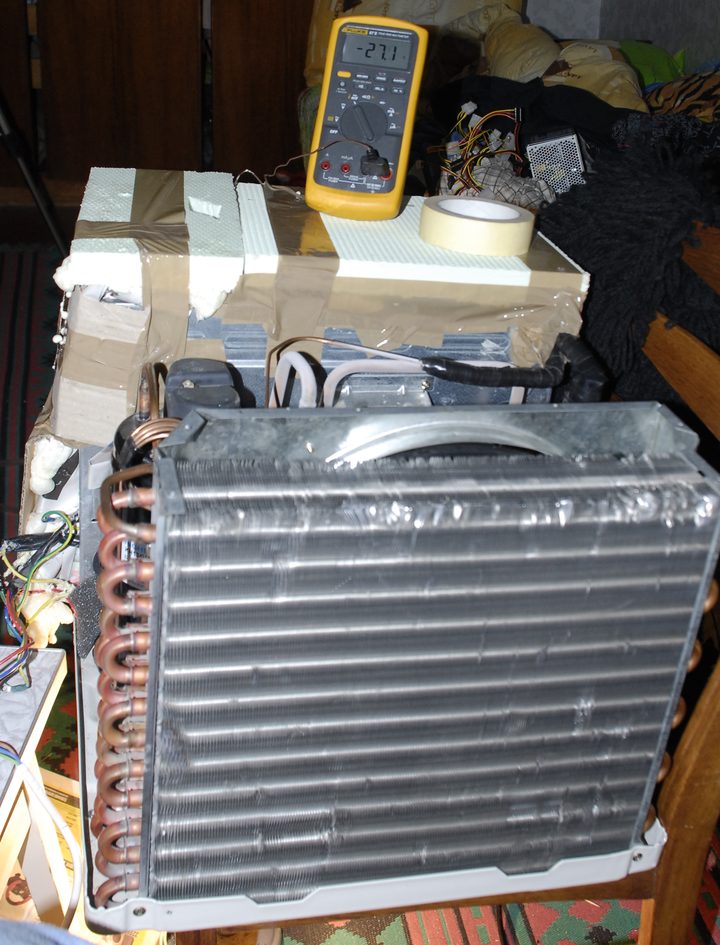
View of test rig with opened top of evaporator tank
So it's really easy to build, and only bit less comfortable to use comparing phasechange unit.
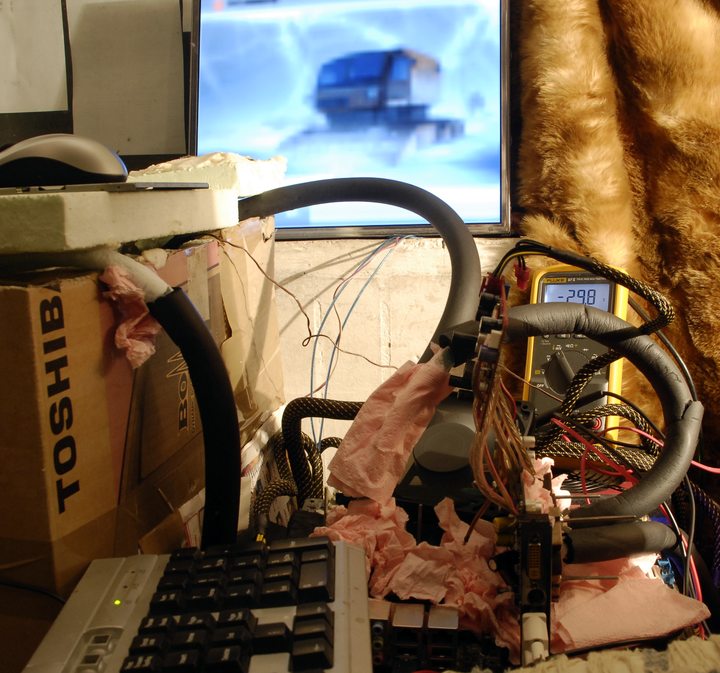
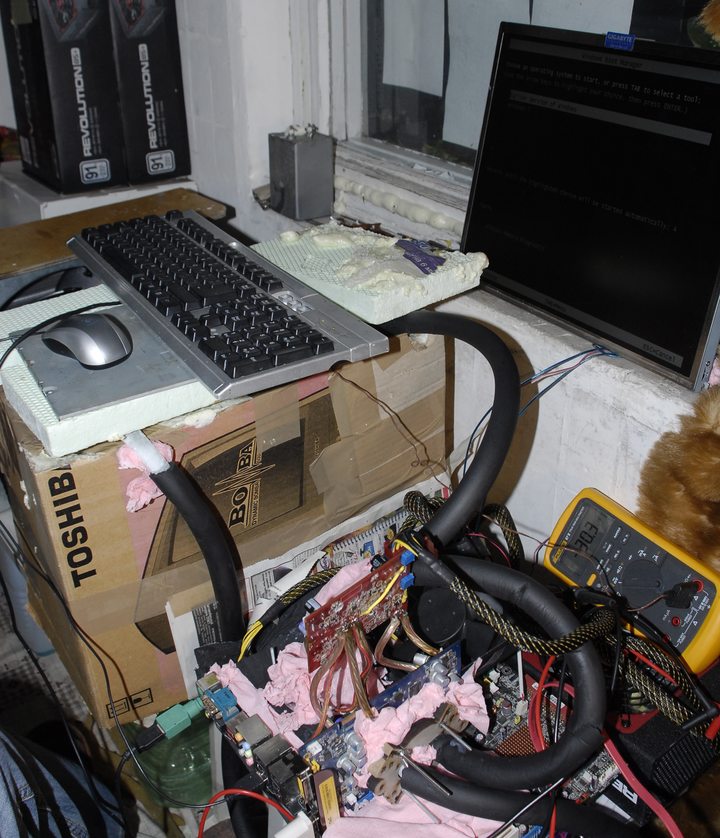
In the end I spent days benching 8600GT at -15°C, according to RivaTuner monitoring, 9500GT at -10°C, 7800GTX with -12°C, QX9650 quad-core CPU with -5°C, Xeon 3470 with -12°C. Unit was placed on balcony during winter, with monitor placed toward room window, with keyboard,mouse and RESET wired to warm living room, so I've benched that stuff in quiet and comfort, without lurking with LN2 pouring every minute. :)
Benefit of the chiller setup is easy ability to cool multiple CPU's/GPU's only with adding usual waterblocks. No need of custom evaporators/pots for every piece of hardware with dedicated mount hardware and copper pipe bending.
I've had also runs with 3-way SLI using GTX8800 Ultra, all vmodded + Xeon 3470 CPU on this chiller, and all time liquid in tank did not raise above -20°C during 3Dmark. It's about of 1000W of power total removed from system, keeping liquid temperature at -20°C. Larger tank volume also help to get more stable temperatures, so liquid volume acts as thermal buffer.
* Ability to easily cool all parts of PC, like CPU and multi-GPU setups. Only usual waterblocks + insulation needed!
* No phase-change cooling knowledge needed
* Available to any builder for low cost (~200$ for all parts possible)
* Good temps for sub ambient benching, -30°C is easy
* All parts stock available, no handmade stuff needed.
* Possible to run 24/7, no need special man to pour cryoliquids every minute
Cons
* Consume lot of space, comparing SS or usual watercooling, if using only 1 point cooling (1CPU/1GPU e.g).
* Produce noise from high-CFM fan and compressor motor
* Need lots of insulation all stuff, best to use Vaseline on VGA and motherboard PCBA to avoid corrosion/PCB damage.
* Less cooling efficiency comparing to SS, warmer temperatures
* Bit of ghetto horrid looking, but if you have access to suitable woodworking shop, one could still make it look nice.
post edited by TiN_EE - 2019/05/05 20:51:10