Spotswood
iCX Member

- Total Posts : 268
- Reward points : 0
- Joined: 2009/08/01 17:19:50
- Location: New Hampshire, USA
- Status: offline
- Ribbons : 7
This is a project/build log for a custom case to house both a storage server and gaming rig. This fairly compact case is designed to hold: - Two EATX motherboards
- Two ATX PSUs
- Twenty four 3.5-inch hard drives
- Six SSDs
- Two 120x3 water cooling radiators
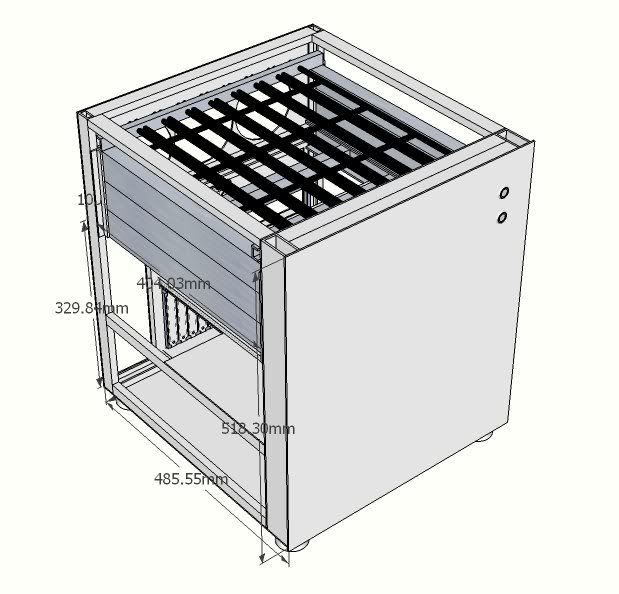 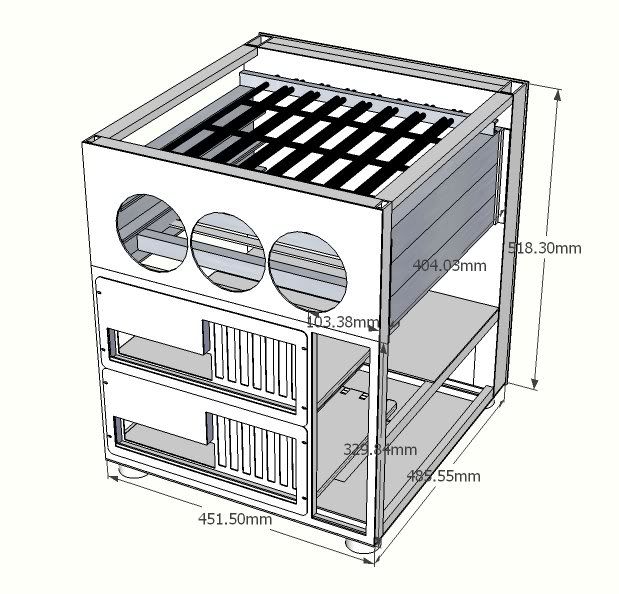 The size of the case is to be kept as small as possible, which is mostly driven by the size of the motherboard trays. But until those arrive, I fabricated the PSU mounting plate from some 2.5mm aluminum sheet. The cutouts were made via a hand held router fitted with a flush pattern bit, guided by a template. 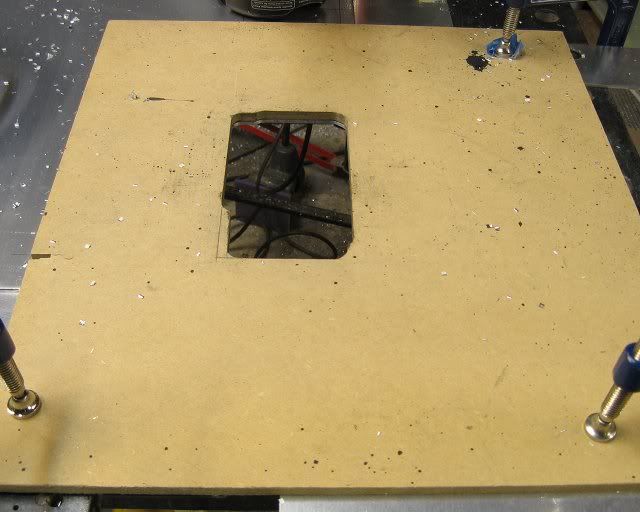 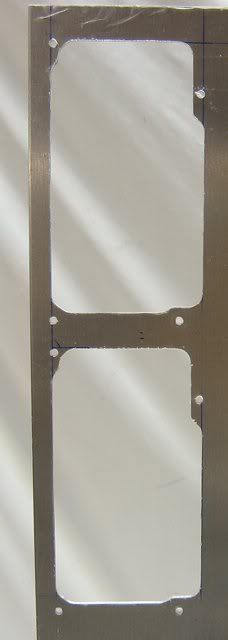 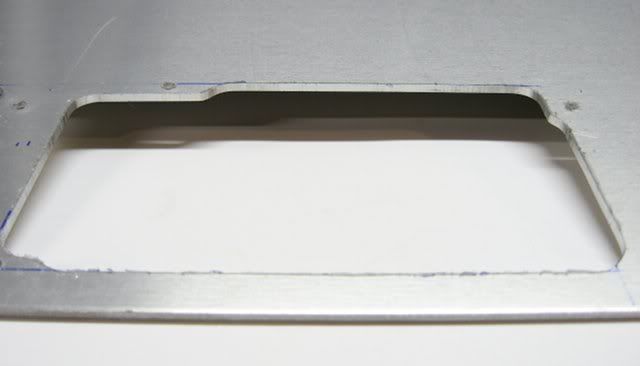 That's it for now!
post edited by Spotswood - 2011/04/13 21:29:46
|
cj3waker
SSC Member

- Total Posts : 881
- Reward points : 0
- Joined: 2007/12/17 00:02:46
- Location: tahoe
- Status: offline
- Ribbons : 11


Re:Project: Server and Gaming Case
2011/04/13 22:08:54
(permalink)
very nice man thats going to be an excellent use of space. hopefully your customer will upload some build pics when its done, but im excited about the case build too
|
LittleGuy
iCX Member

- Total Posts : 315
- Reward points : 0
- Joined: 2010/04/06 20:39:41
- Status: offline
- Ribbons : 4


Re:Project: Server and Gaming Case
2011/04/14 06:06:49
(permalink)
Wow nice. Can not wait to see this thing finished. What program do you use to make the drawings?
My Affiliate Code: 73ELXGWGG0
|
Spotswood
iCX Member

- Total Posts : 268
- Reward points : 0
- Joined: 2009/08/01 17:19:50
- Location: New Hampshire, USA
- Status: offline
- Ribbons : 7

Re:Project: Server and Gaming Case
2011/04/14 14:52:25
(permalink)
LittleGuy
Wow nice. Can not wait to see this thing finished. What program do you use to make the drawings?
Thanks. Sketchup.
|
Spotswood
iCX Member

- Total Posts : 268
- Reward points : 0
- Joined: 2009/08/01 17:19:50
- Location: New Hampshire, USA
- Status: offline
- Ribbons : 7

Re:Project: Server and Gaming Case
2011/04/15 16:48:02
(permalink)
|
Johnny-1987
iCX Member

- Total Posts : 268
- Reward points : 0
- Joined: 2009/12/14 08:28:40
- Status: offline
- Ribbons : 0


Re:Project: Server and Gaming Case
2011/04/20 05:23:41
(permalink)
Core i7-975 / 3x2GB 1866mhz Dominator Gt's / EX58-UD3R /
SLI GTX 295 Co-ops / 2x 128gb SSD's / Corsair HX-1000W /
Heatkiller Water Block
7/16 Primochill U/V Tubing
360GTX Black ice rad/ PA 120.3
D5-Vario Pump
EK-Multioption 250 Rev Reservoir
Primochill Non-Conductive Coolant
1/2 DD fatboy Fittings
|
Trelor
iCX Member

- Total Posts : 496
- Reward points : 0
- Joined: 2007/04/06 10:38:50
- Location: Northern, NJ
- Status: offline
- Ribbons : 7


Re:Project: Server and Gaming Case
2011/04/20 15:46:48
(permalink)
Spotswood
This is a project/build log for a custom case to house both a storage server and gaming rig.
This fairly compact case is designed to hold:
- Two EATX motherboards
- Two ATX PSUs
- Twenty four 3.5-inch hard drives
- Six SSDs
- Two 120x3 water cooling radiators
Going to install car engine mounts to move the thing lol? But seriously I look forward to seeing how this turns out.
Heatware: Trelor - I primarily use eBay which is attached to my heatware.
|
Spotswood
iCX Member

- Total Posts : 268
- Reward points : 0
- Joined: 2009/08/01 17:19:50
- Location: New Hampshire, USA
- Status: offline
- Ribbons : 7

Re:Project: Server and Gaming Case
2011/04/20 21:04:26
(permalink)
|
whodaddy
SSC Member

- Total Posts : 654
- Reward points : 0
- Joined: 2007/06/03 06:35:39
- Location: Arizona
- Status: offline
- Ribbons : 3


Re:Project: Server and Gaming Case
2011/04/21 05:26:57
(permalink)
E-759 CLASSIFIED & I7 920 DO B261
OCZ DDR 3 1600 Gold 6GS / TFC 480 and TFC 360 w KOOLANCE RAD SUPPORT 2x655 PUMPS IN SERIES/ BITS 150Z RES
EK FULL COVERAGE BLOCK / BITS COMPRESSION/ROTARY FITTINGS
EK HF SUPREME PLEXI COPPER CPU BLOCK 1/2X5/8 TUBING
2x GTX 470 SC W EK BLOCKS/WD 150 RADPTOR WD 300 RAPTOR WD 1TB CORSAIR 800D CASE/CORSAIR HX-1000 http://www.heatware.com/eval.php?id=67849 
|
Spotswood
iCX Member

- Total Posts : 268
- Reward points : 0
- Joined: 2009/08/01 17:19:50
- Location: New Hampshire, USA
- Status: offline
- Ribbons : 7

Re:Project: Server and Gaming Case
2011/04/24 17:13:48
(permalink)
The first step toward routing-out the motherboard cutouts in the back panel was to modify a standard size motherboard router template I had made some time ago. 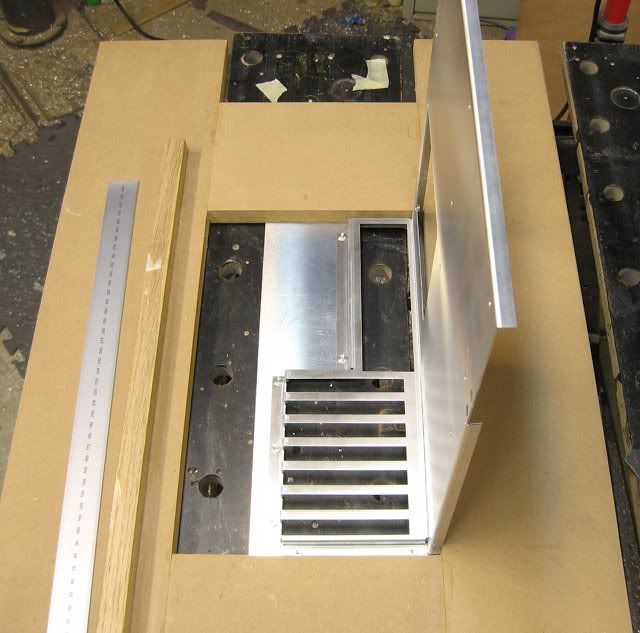 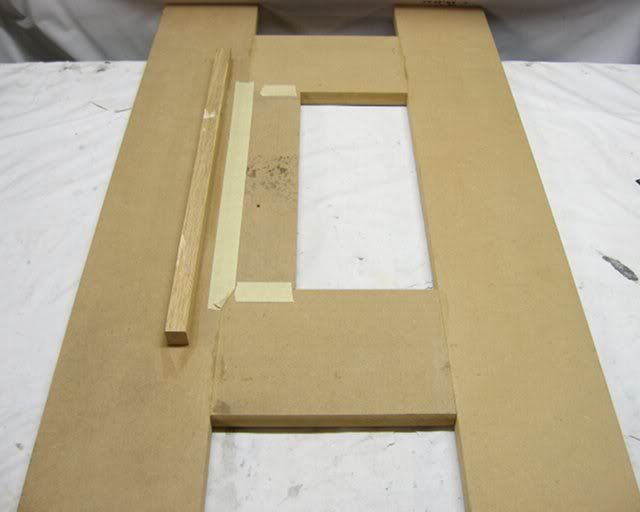 The modified template was used to create yet another template in 1/2-inch thick particle board. 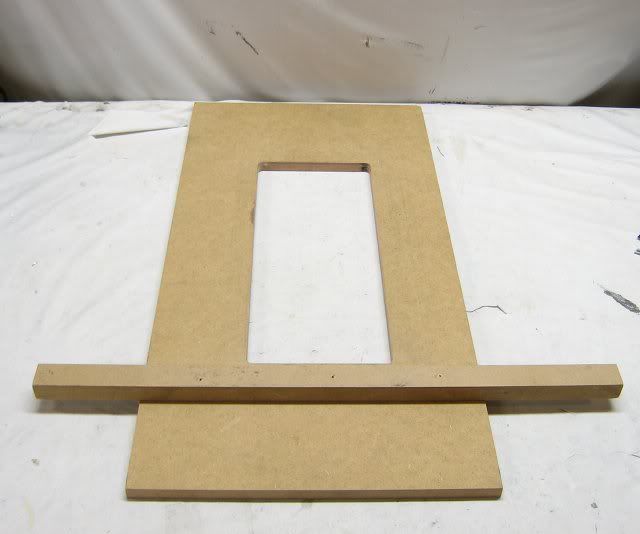 Unfortunately the router wobbled ever so slightly in one spot, but was quickly repaired with some autobody filler: 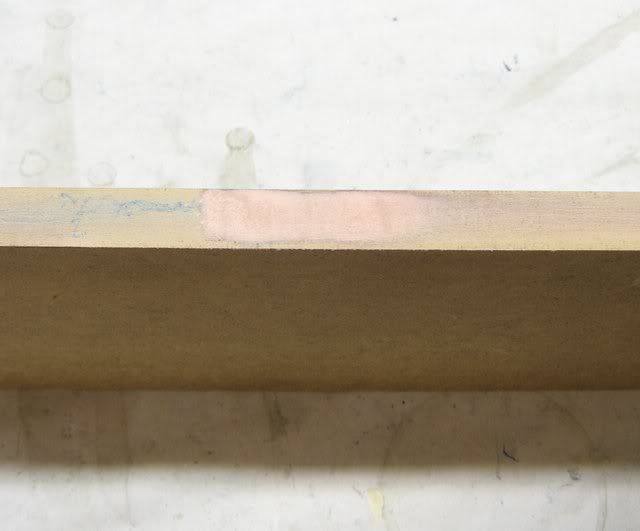 In order to save wear-and-tear on my flush cutting router bit a first pass was done freehand (gulp!) with a standard endmill. 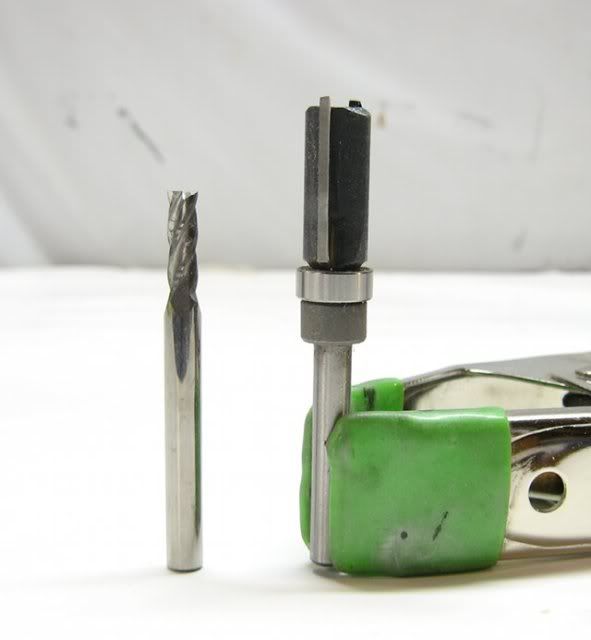 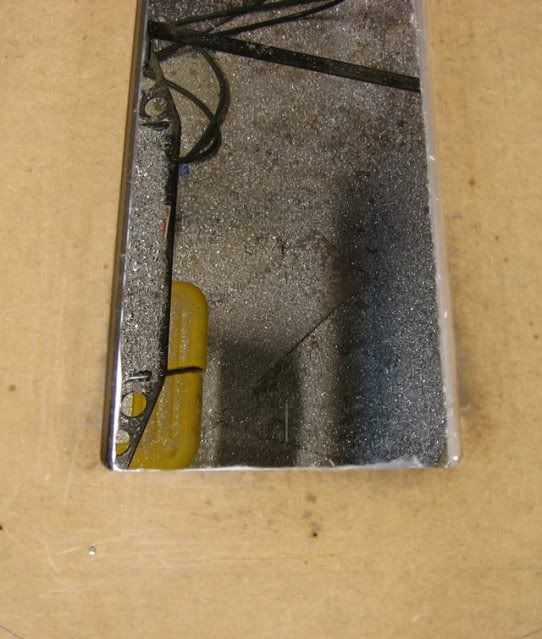 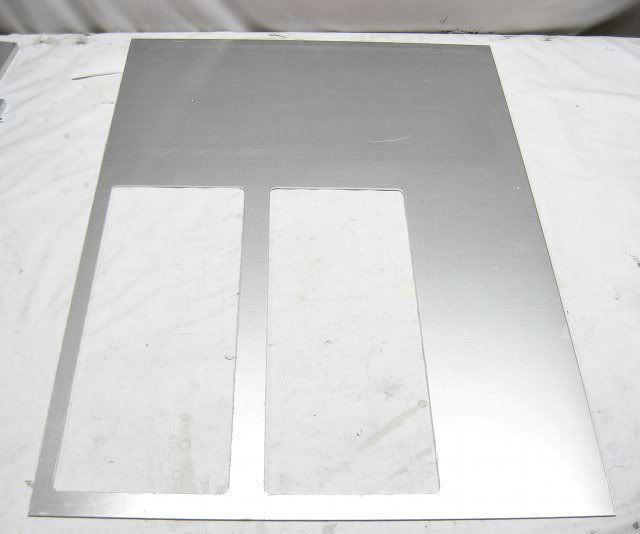
post edited by Spotswood - 2011/04/24 20:08:37
|
Tweaked
CLASSIFIED ULTRA Member

- Total Posts : 6505
- Reward points : 0
- Joined: 2006/08/12 12:24:15
- Location: Texas
- Status: offline
- Ribbons : 29

Re:Project: Server and Gaming Case
2011/04/24 17:56:59
(permalink)
Wow, can't wait to see it finished.

 EVGA DG-77/ EVGA 750 G2/ Gigabyte B450/ AMD Ryzen 5 3600/ 16gb Crucial Ballistix DDR4-3600/ RTX-2080 XC/ Dell S2716DG / Windows 11 64
|
Spotswood
iCX Member

- Total Posts : 268
- Reward points : 0
- Joined: 2009/08/01 17:19:50
- Location: New Hampshire, USA
- Status: offline
- Ribbons : 7

Re:Project: Server and Gaming Case
2011/04/27 17:57:28
(permalink)
I had to make a new router template for the PSUs cutout. A router guide template is quickly fashioned from some MDF held together with pocket screws. 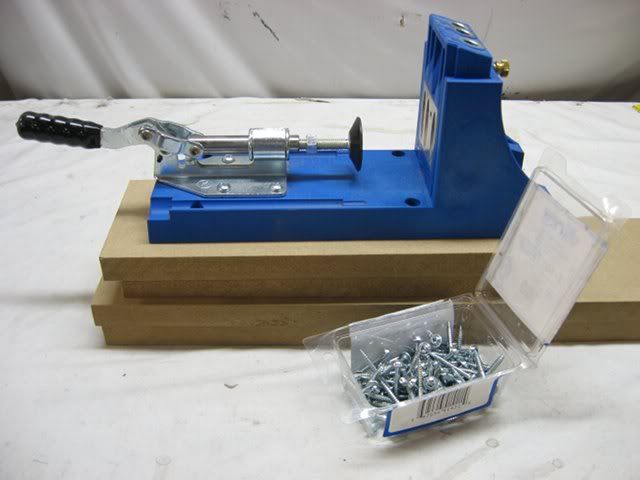 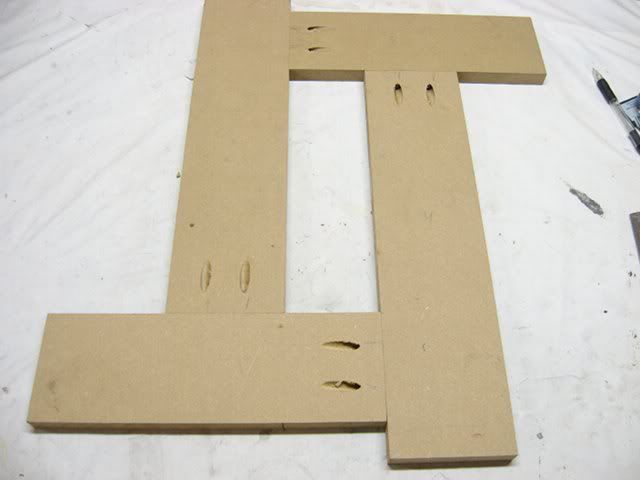 A mock-up of the back panel: 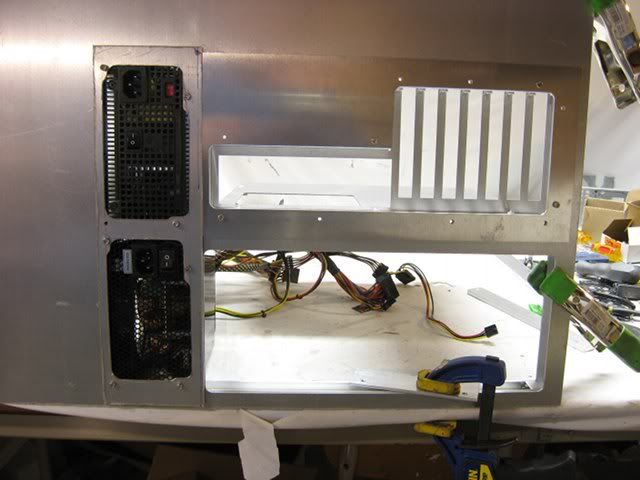
|
Spotswood
iCX Member

- Total Posts : 268
- Reward points : 0
- Joined: 2009/08/01 17:19:50
- Location: New Hampshire, USA
- Status: offline
- Ribbons : 7

Re:Project: Server and Gaming Case
2011/05/01 19:23:33
(permalink)
The posts for the front frame are made from .125 x .5 x 2-inch tubes. First thing was to stuff the bottoms with the screw blocks/nuts in order to eventually attach them to the bottom sheet. Following standard operating procedure, the aluminum was cut on my miter saw (fitted with a standard carbide tipped blade). The clamp that came with the saw is used to hold the material against the fence. 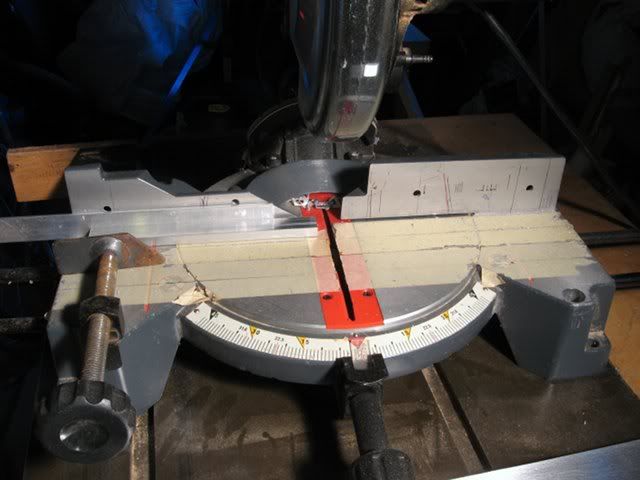 The blocks were then drilled on the drill press with the assistance of my self-centering vice (I love that thing because I don't have to waste time measuring for center). 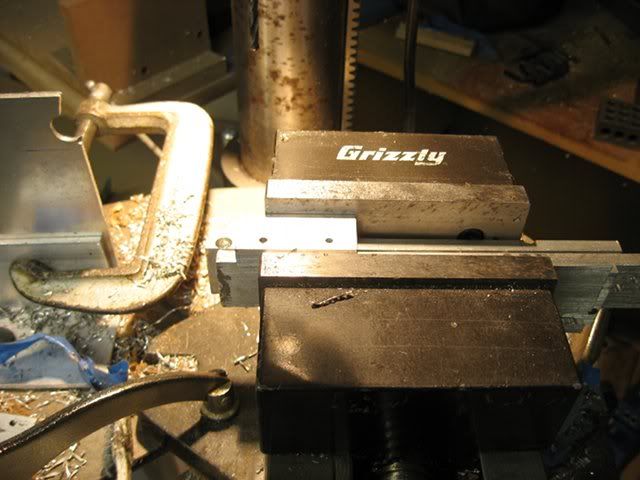 Threads were tapped via my bench mounted "hand" tapper. 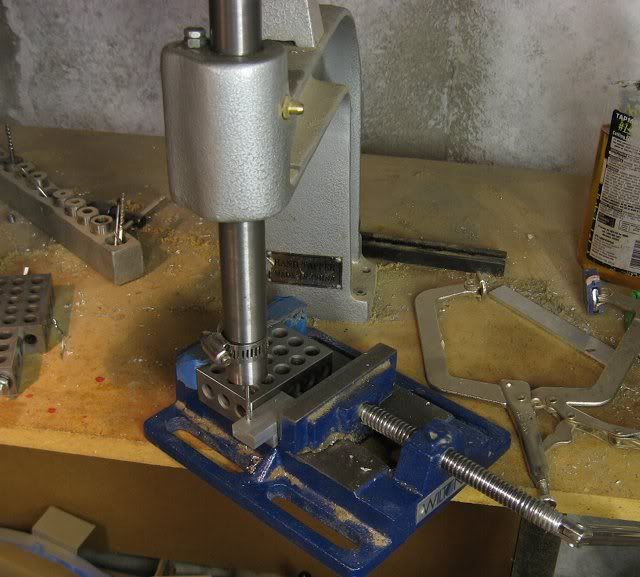 The blocks were pinned to the tubes with flat head self-tapping screws. 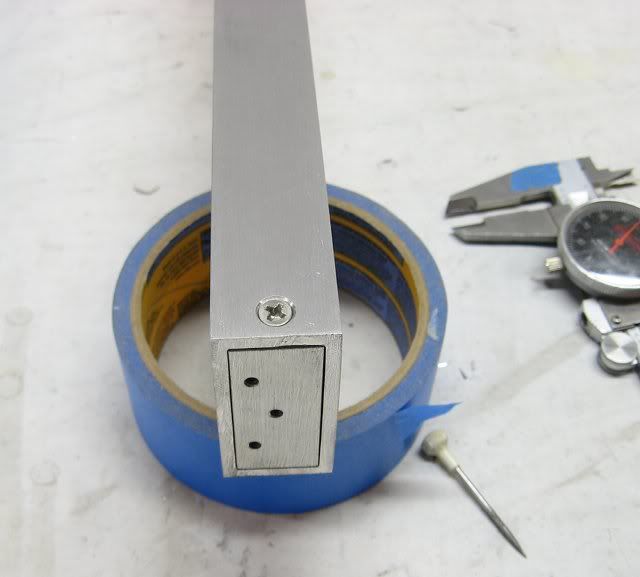 Always looking to improve my speed and quality, the cross supports offered the opportunity to use PEM cinch nuts. The nuts were pressed into the screw blocks. 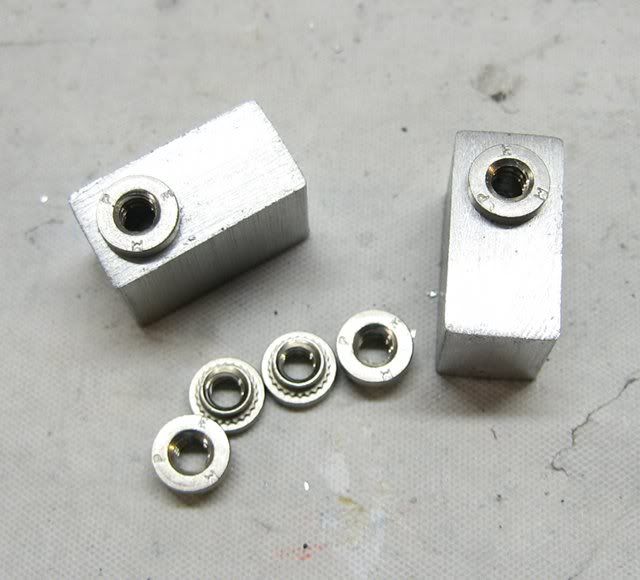 Which were then pinned inside .5 x 1-inch u-channel. 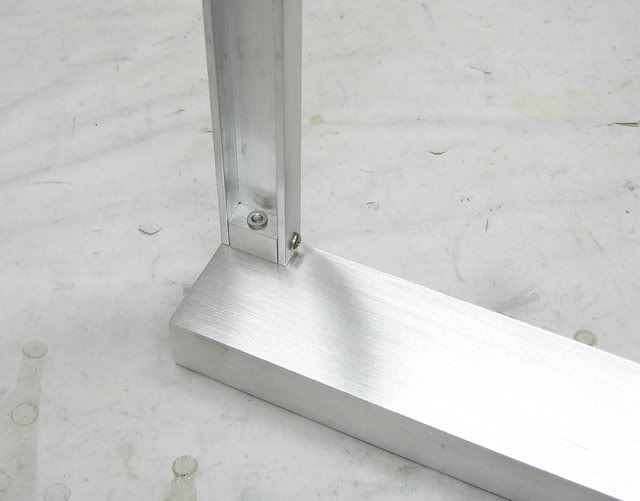 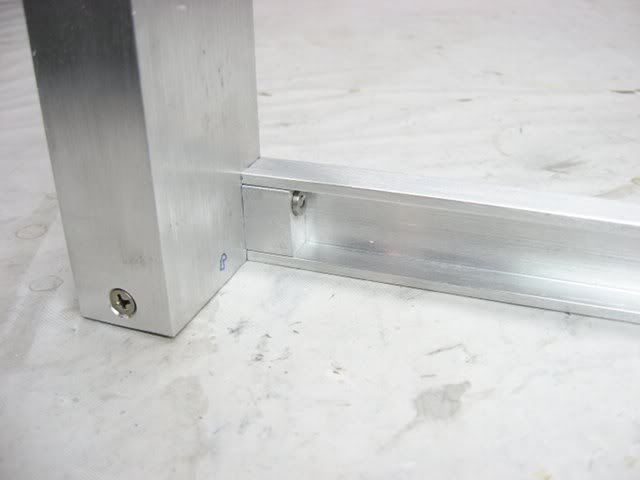 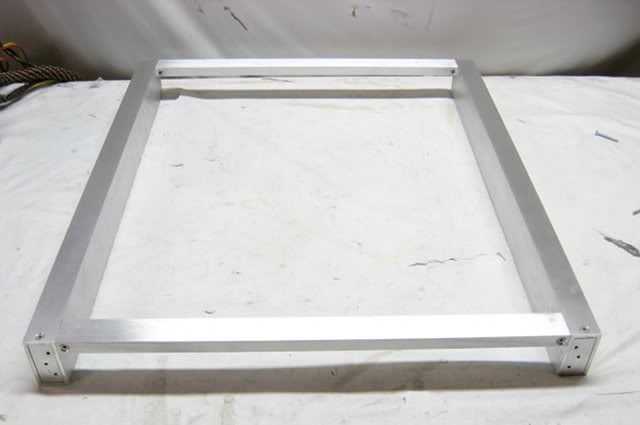 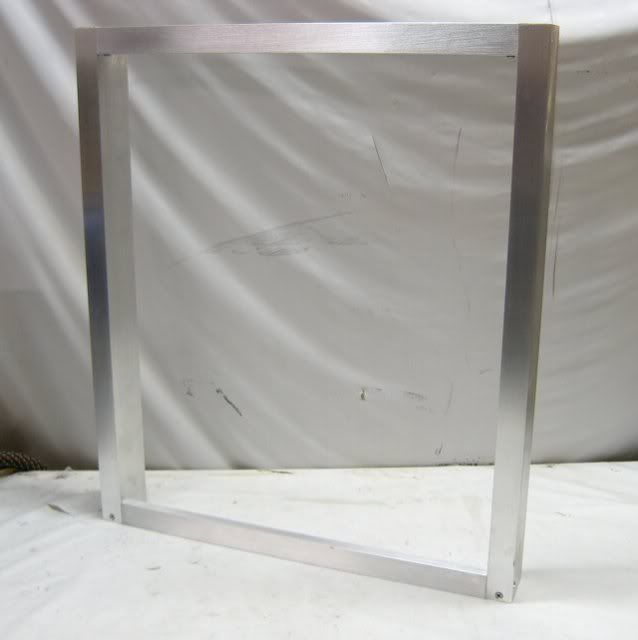
|
Spotswood
iCX Member

- Total Posts : 268
- Reward points : 0
- Joined: 2009/08/01 17:19:50
- Location: New Hampshire, USA
- Status: offline
- Ribbons : 7

Re:Project: Server and Gaming Case
2011/05/05 19:11:50
(permalink)
I added some "legs" to the motherboard trays so they'll rest nice and level on the workbench. 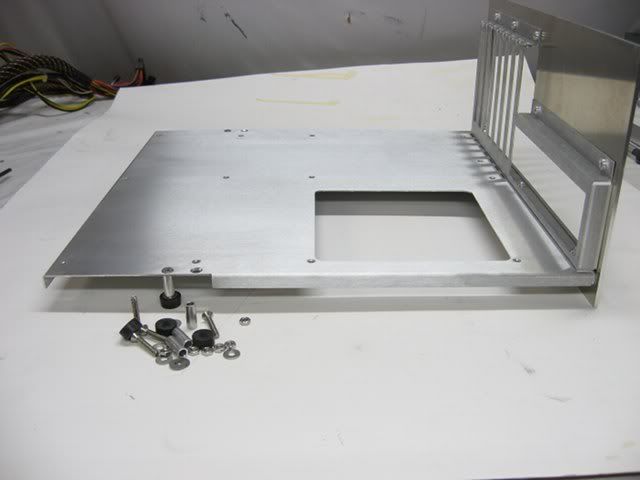 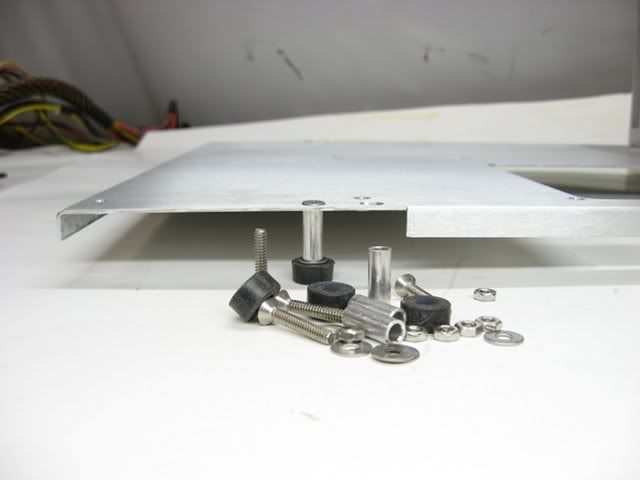
|
Spotswood
iCX Member

- Total Posts : 268
- Reward points : 0
- Joined: 2009/08/01 17:19:50
- Location: New Hampshire, USA
- Status: offline
- Ribbons : 7

Re:Project: Server and Gaming Case
2011/05/07 14:14:48
(permalink)
I spent the day correcting a big mistake, which was I relied on the incorrect posted dimensions of the Swiftech MCR320-DRIVE 3x120 radiator, and thus the case wasn't wide enough by 16mm. (Swiftech has since corrected the diagram on their website). 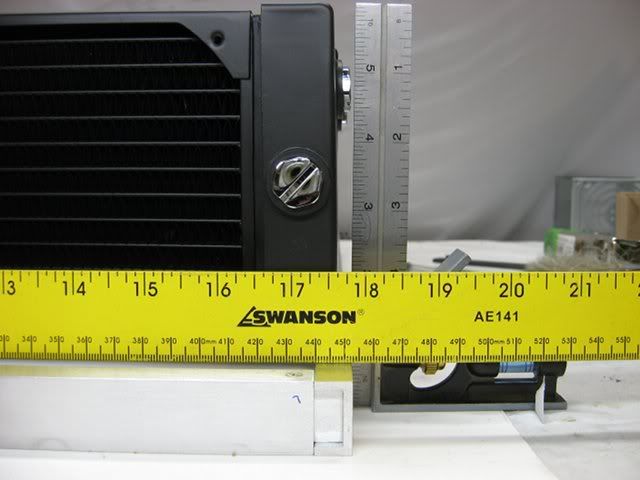 Actually, the case was exactly the width of the rads, but that might have resulted in some pump vibration getting transferred to the side panels. So the case had to be widened by one inch. To speedup the process of pinning the bolt blocks to the u-channel I switched to using split pins. 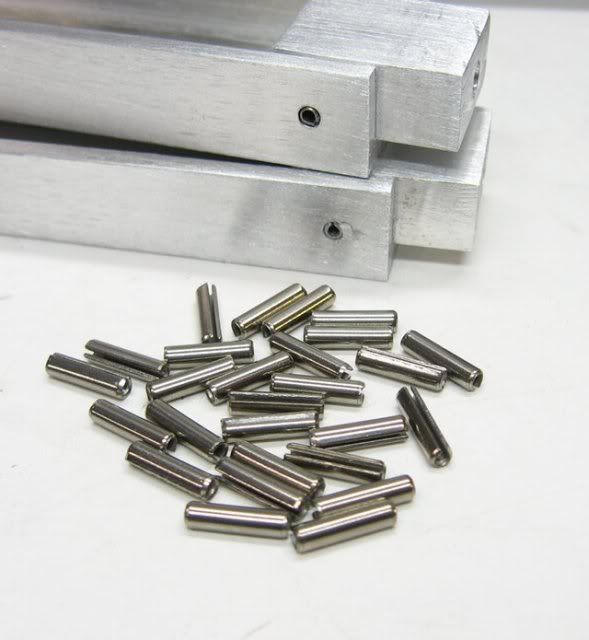 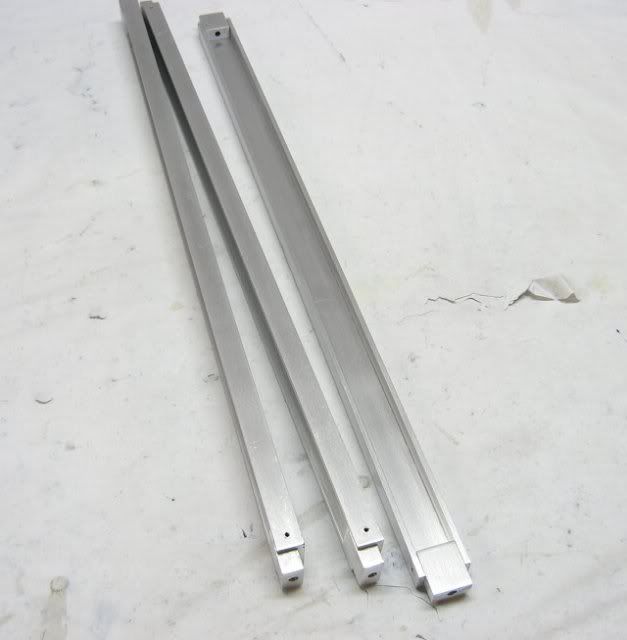 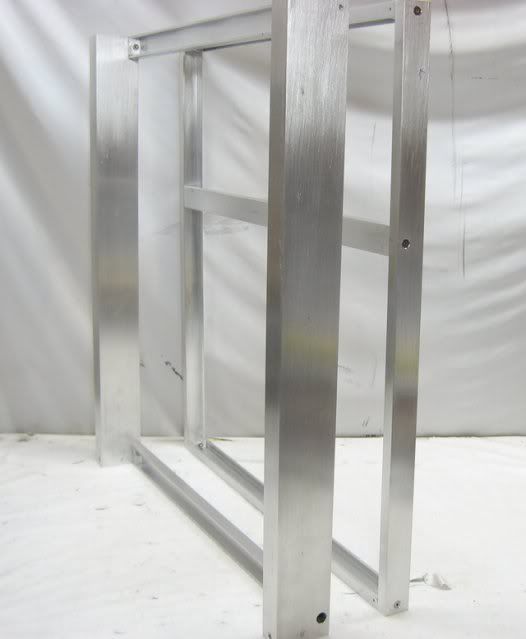 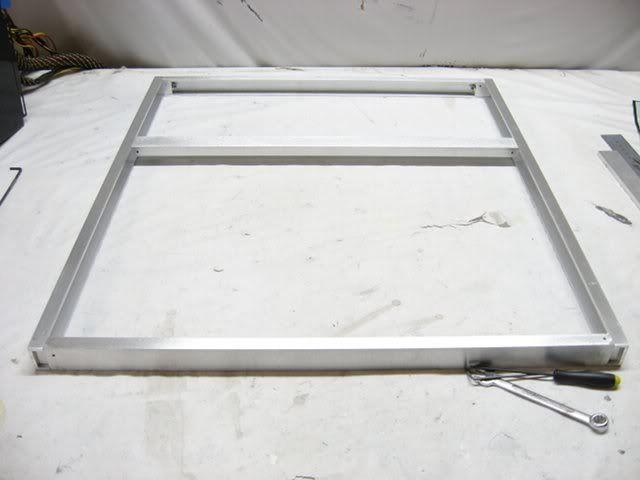 I also had to re-cut the back sheet. 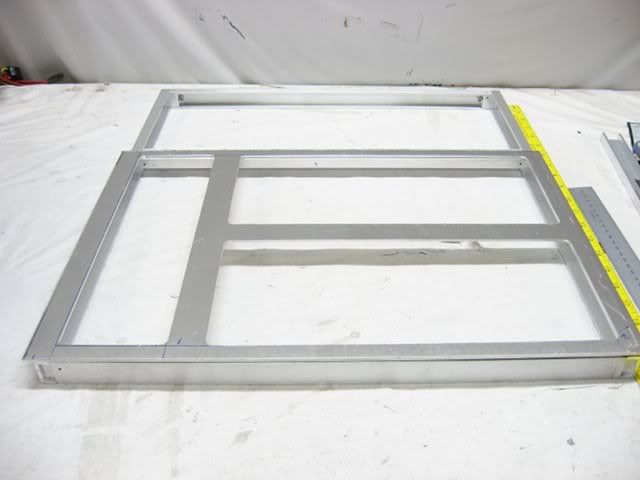 Altogether, it only took me about a third of the original amount of time. Phew!
post edited by Spotswood - 2011/05/07 16:04:11
|
DMIINC
CLASSIFIED Member

- Total Posts : 2955
- Reward points : 0
- Joined: 2007/03/02 11:12:22
- Location: Suwanee, GA
- Status: offline
- Ribbons : 32


Re:Project: Server and Gaming Case
2011/05/07 17:40:26
(permalink)
Awesome as always. I do enjoy reading your threads.
|
donta1979
Primarch

- Total Posts : 9046
- Reward points : 0
- Joined: 2007/02/11 19:27:15
- Location: In the land of Florida Man!
- Status: offline
- Ribbons : 73


Re:Project: Server and Gaming Case
2011/05/08 21:28:50
(permalink)
very nice cannot wait to see this finished.
Heatware
Retired from AAA Game Industry
Jeep Wranglers, English Bulldog Rescue
USAF, USANG, US ARMY Combat Veteran
My Build
14900k, z790 Apex Encore, EK Nucleus Direct Die, T-Force EXTREEM 8000mhz cl38 2x24 Stable"24hr Karhu" XMP, Rog Strix OC RTX 4090, Rog Hyperion GR701 Case, Rog Thor II 1200w, Rog Centra True Wireless Speednova, 35" Rog Swift PG35VQ + Acer EI342CKR Pbmiippx 34", EK Link FPT 140mm D-RGB Fans. Rog Claymore II, Rog Harpe Ace Aimlabs Edition, Cyberpunk 2077 Xbox One Controller, WD Black SN850x/Samsung 980+990 PRO/Samsung 980. Honeywell PTM7950 pad on CPU+GPU
|
Spotswood
iCX Member

- Total Posts : 268
- Reward points : 0
- Joined: 2009/08/01 17:19:50
- Location: New Hampshire, USA
- Status: offline
- Ribbons : 7

Re:Project: Server and Gaming Case
2011/05/22 16:39:29
(permalink)
|
{uZa}DOA
CLASSIFIED Member

- Total Posts : 3757
- Reward points : 0
- Joined: 2008/12/07 07:24:42
- Location: My Affiliate Code: 7B5PL3G722
- Status: offline
- Ribbons : 15


Re:Project: Server and Gaming Case
2011/05/22 19:54:13
(permalink)
looking good! Always wanted to build a custom case but, I definitely don't have the skills....
|
Tiger95
New Member

- Total Posts : 54
- Reward points : 0
- Joined: 2010/12/11 10:19:29
- Status: offline
- Ribbons : 0

Re:Project: Server and Gaming Case
2011/05/23 15:15:02
(permalink)
I really want to now how it will be the case finished to built. That's a very good project and in same case also very useful
|
Gone Cruising
SSC Member

- Total Posts : 754
- Reward points : 0
- Joined: 2008/02/17 23:10:31
- Location: Clearlake Oaks, CA
- Status: offline
- Ribbons : 45


Re:Project: Server and Gaming Case
2011/05/25 03:40:06
(permalink)
Looking great as always!!!!
Gigabyte Z390 Aorus Ultra Intel Core I9-9900K Corsair 32gb DDR4 EVGA RTX 2070 Super EVGA 850W Gold 2 x 1TB Samsung SSD 2 x 3TB HD's in Raid 1 Kustom Case https://www.heatware.com/u/67033/to 
|
Spotswood
iCX Member

- Total Posts : 268
- Reward points : 0
- Joined: 2009/08/01 17:19:50
- Location: New Hampshire, USA
- Status: offline
- Ribbons : 7

Re:Project: Server and Gaming Case
2011/05/26 20:25:38
(permalink)
|
Spotswood
iCX Member

- Total Posts : 268
- Reward points : 0
- Joined: 2009/08/01 17:19:50
- Location: New Hampshire, USA
- Status: offline
- Ribbons : 7

Re:Project: Server and Gaming Case
2011/05/28 12:20:33
(permalink)
|
Spotswood
iCX Member

- Total Posts : 268
- Reward points : 0
- Joined: 2009/08/01 17:19:50
- Location: New Hampshire, USA
- Status: offline
- Ribbons : 7

Re:Project: Server and Gaming Case
2011/07/01 16:27:14
(permalink)
A last minute design change was to go with SATA backplanes. This required having to route-out 24 phalanx shaped areas for the LED and power cables to pass through. 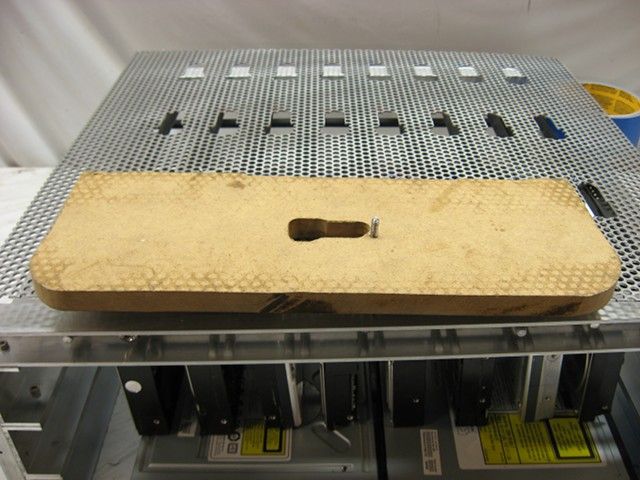 [These photos are just quick mockups, the perforate aluminum will eventually get mounted to the bottom of the drive cage. ] 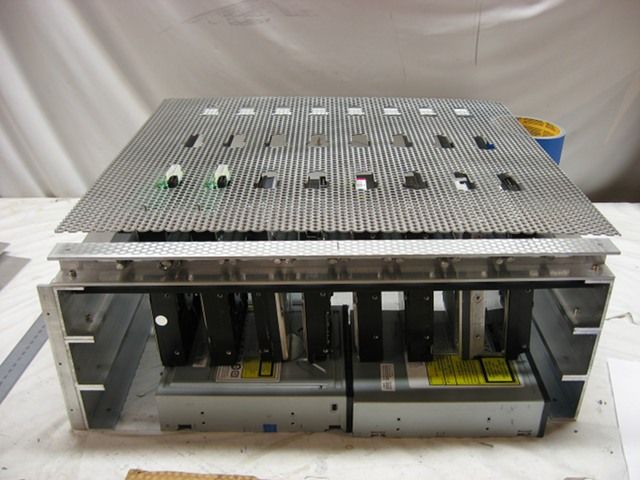 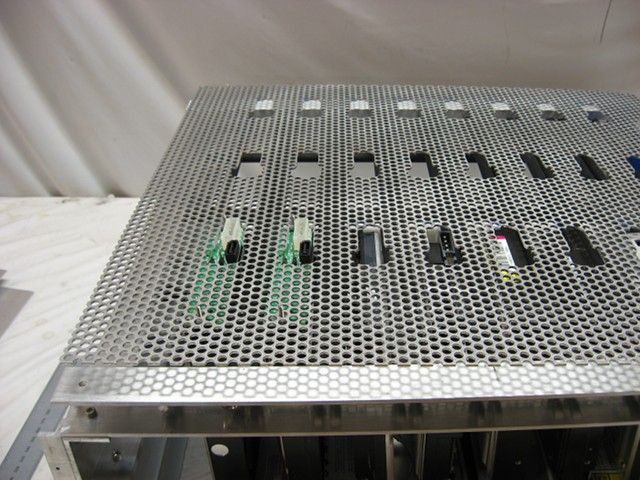 The backplanes rest on some soft rubber grommets and are attached via two #4 socket head cap screws. The 1/16-inch perforated aluminum was a good choice because I didn't have to drill a boat load of holes. 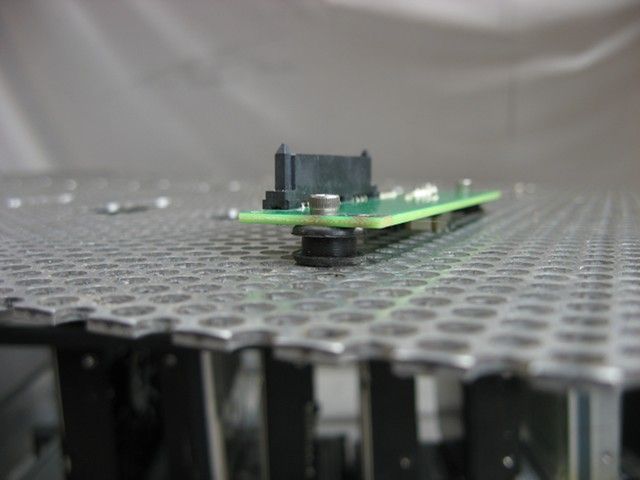 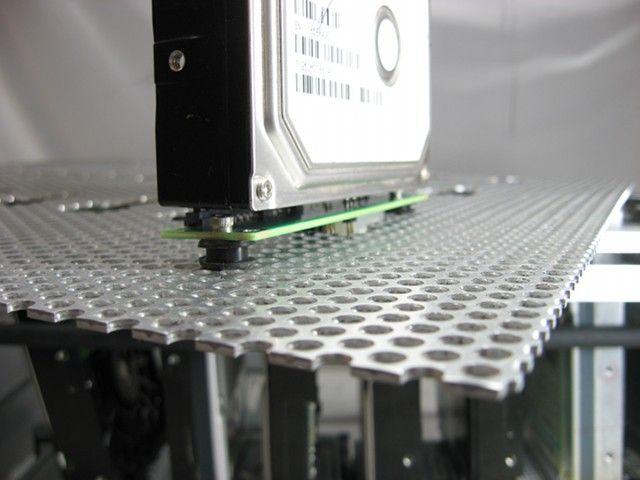
|
Hugh Jass
SSC Member

- Total Posts : 983
- Reward points : 0
- Joined: 2008/10/29 13:03:56
- Location: Los Angeles, CA
- Status: offline
- Ribbons : 3


Re:Project: Server and Gaming Case
2011/07/02 12:04:29
(permalink)
amazing milling you do,
superb job cant wait to see the end product
EVGA X58 E758 i7 930 4.2GHz EVGA GTX 660 heatWare
|
HeThing
CLASSIFIED ULTRA Member

- Total Posts : 6764
- Reward points : 0
- Joined: 2010/05/11 07:45:49
- Location: 6F4-72Y-6A8J <-- My Affiliate Code :D
- Status: offline
- Ribbons : 42


Re:Project: Server and Gaming Case
2011/07/03 19:34:25
(permalink)
|
Little Sister 
CLASSIFIED ULTRA Member

- Total Posts : 5929
- Reward points : 0
- Joined: 2011/06/06 08:01:11
- Status: offline
- Ribbons : 10

Re:Project: Server and Gaming Case
2011/07/03 19:40:02
(permalink)
INTEL I7 2600K - CORSAIR H100 - EVGA Z68 FTW - CORSAIR DOMINATOR GT 2000MHZ 16GB - EVGA GTX 580 3GB SLI X3 WESTERN DIGITAL BLACK 1TB X2 - CORSAIR FORCE GT 120GB X2 - PLEXTOR BLU-RAY BURNER - CORSAIR AX1200 ENERMAX FULMO GT - WINDOWS 7 ULTIMATE X64
|
slickric
CLASSIFIED Member

- Total Posts : 3295
- Reward points : 0
- Joined: 2007/07/18 19:27:16
- Location: Hollywood, Florida USA
- Status: offline
- Ribbons : 17


Re:Project: Server and Gaming Case
2011/07/03 19:44:33
(permalink)
{uZa}DOA
looking good! Always wanted to build a custom case but, I definitely don't have the skills....
Or the tools and time....
|
Spotswood
iCX Member

- Total Posts : 268
- Reward points : 0
- Joined: 2009/08/01 17:19:50
- Location: New Hampshire, USA
- Status: offline
- Ribbons : 7

Re:Project: Server and Gaming Case
2011/07/14 19:34:15
(permalink)
|
Spotswood
iCX Member

- Total Posts : 268
- Reward points : 0
- Joined: 2009/08/01 17:19:50
- Location: New Hampshire, USA
- Status: offline
- Ribbons : 7

Re:Project: Server and Gaming Case
2011/08/04 21:55:56
(permalink)
Finally managed to mount the HD cage to the case via 12 #6-32 stainless steel socket cap bolts. 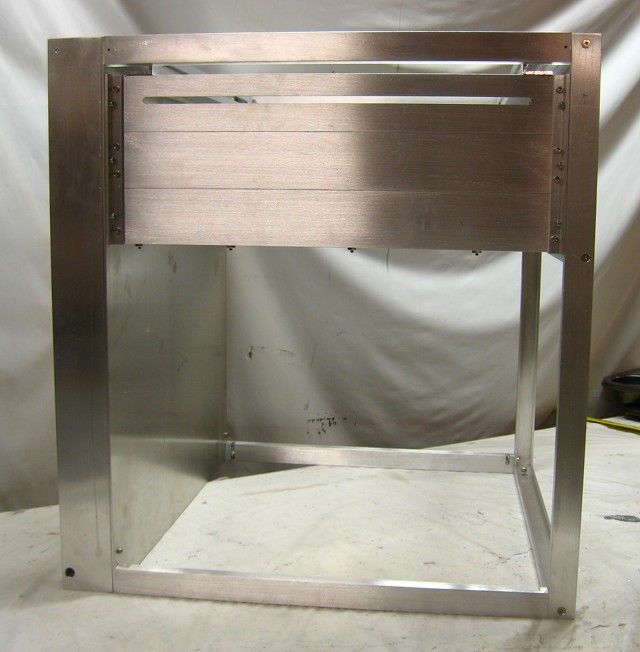
|