BlackArtz5133937
CLASSIFIED Member

- Total Posts : 2102
- Reward points : 0
- Joined: 2010/11/19 19:04:49
- Status: offline
- Ribbons : 4

Re:Project: Server and Gaming Case
2011/08/04 22:15:41
(permalink)
This looks promising! Keep us updated.
|
James_L
CLASSIFIED Member

- Total Posts : 4336
- Reward points : 0
- Joined: 2009/07/29 12:27:56
- Status: offline
- Ribbons : 46


Re:Project: Server and Gaming Case
2011/08/04 22:18:54
(permalink)
Another one I'll have to try and keep up with. Nice job so far!
|
refujiado
New Member

- Total Posts : 44
- Reward points : 0
- Joined: 2011/07/30 08:07:49
- Status: offline
- Ribbons : 0

Re:Project: Server and Gaming Case
2011/08/05 13:34:32
(permalink)
|
crazypilot
iCX Member

- Total Posts : 255
- Reward points : 0
- Joined: 2010/04/01 21:09:41
- Status: offline
- Ribbons : 0

Re:Project: Server and Gaming Case
2011/08/06 07:11:10
(permalink)
Wow +1.
You said its going to also be your gaming rig?
WOW.
|
Spotswood
iCX Member

- Total Posts : 268
- Reward points : 0
- Joined: 2009/08/01 17:19:50
- Location: New Hampshire, USA
- Status: offline
- Ribbons : 7

Re:Project: Server and Gaming Case
2011/08/09 17:55:25
(permalink)
|
James_L
CLASSIFIED Member

- Total Posts : 4336
- Reward points : 0
- Joined: 2009/07/29 12:27:56
- Status: offline
- Ribbons : 46


Re:Project: Server and Gaming Case
2011/08/09 18:40:43
(permalink)
Interesting. This just gets better and better. Can't wait to see more of it. 
|
muskie32
CLASSIFIED Member

- Total Posts : 3026
- Reward points : 0
- Joined: 2010/11/20 17:09:06
- Location: I'd tell you a UDP joke but you might not get it
- Status: offline
- Ribbons : 23


Re:Project: Server and Gaming Case
2011/08/09 20:57:51
(permalink)
|
Spotswood
iCX Member

- Total Posts : 268
- Reward points : 0
- Joined: 2009/08/01 17:19:50
- Location: New Hampshire, USA
- Status: offline
- Ribbons : 7

Re:Project: Server and Gaming Case
2011/08/09 21:15:40
(permalink)
crazypilot
Wow +1.
You said its going to also be your gaming rig?
WOW.
Thanks! No, its not my case. I'm just the builder.
|
Spotswood
iCX Member

- Total Posts : 268
- Reward points : 0
- Joined: 2009/08/01 17:19:50
- Location: New Hampshire, USA
- Status: offline
- Ribbons : 7

Re:Project: Server and Gaming Case
2011/08/12 20:53:18
(permalink)
The front inner sheet was turned into Swiss cheese via 9 holes for the 120mm intake fans. The holes were cut with a 1/2-inch flush trimming router bit, guided by a template. 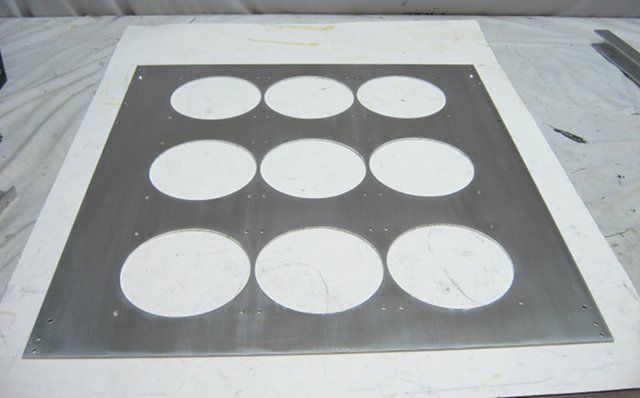 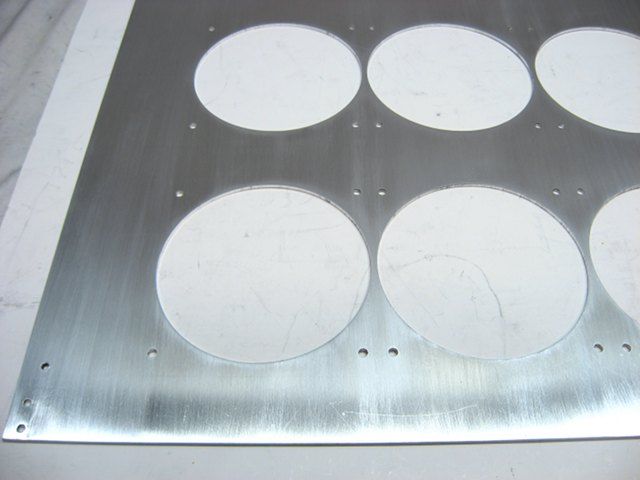
|
Spotswood
iCX Member

- Total Posts : 268
- Reward points : 0
- Joined: 2009/08/01 17:19:50
- Location: New Hampshire, USA
- Status: offline
- Ribbons : 7

Re:Project: Server and Gaming Case
2011/08/13 20:10:09
(permalink)
|
Spotswood
iCX Member

- Total Posts : 268
- Reward points : 0
- Joined: 2009/08/01 17:19:50
- Location: New Hampshire, USA
- Status: offline
- Ribbons : 7

Re:Project: Server and Gaming Case
2011/09/25 22:34:30
(permalink)
|
stratosrally
SSC Member

- Total Posts : 609
- Reward points : 0
- Joined: 2009/06/19 19:09:10
- Location: Austin, TX
- Status: offline
- Ribbons : 2


Re:Project: Server and Gaming Case
2011/09/26 00:25:20
(permalink)
Ah, your hard work is starting to really take shape!
Keep on pushing through, can't wait to see how it turns out.
That's going to be a real beast...
|
nikkocortez
CLASSIFIED Member

- Total Posts : 2625
- Reward points : 0
- Joined: 2010/02/01 10:04:03
- Status: offline
- Ribbons : 14


Re:Project: Server and Gaming Case
2011/09/26 05:35:26
(permalink)
Looks great! Can't wait to see it finished! 
|
mikehousley
New Member

- Total Posts : 78
- Reward points : 0
- Joined: 2009/04/06 16:09:17
- Location: Chattanooga, TN
- Status: offline
- Ribbons : 0

Re:Project: Server and Gaming Case
2011/09/26 10:27:44
(permalink)
Beautiful work, truly inspiring.
HeatWare / eBay  Mother board: 790i Ultra SLI 132-CK-NF79-A1 : CPU: BX80570E8500 Core 2 Duo E8500 3.16 (3.8) GHz 1333 (1600) MHz 6MB : CPU Cooler: Zalman CNPS9700 : Memory: Patriot Viper 4GB (2 x 2GB)DDR3 1600(PC3 12800)PVS34G1600LLK : Video1: EVGA 01G-P3-1373-AR GeForce GTX 460 SC EE : Video2: EVGA 512-P3-N801-AR GeForce 8800GT : Sound: X-Fi XtremeGamer Fatality Pro : OS HDD: WD3000GLFS VelociRaptor 300GB : DVD: LITE-ON LH-20A1S : OS: Windows 7 Pro 64bit : Case: COOLER MASTER RC-1100-KKN1-GP Cosmos S : Power Supply: ABS Tagan ITZ Series ITZ700 700W ATX12V S ~All Air Cooling~ Mother board: 790i Ultra SLI 132-CK-NF79-A1 : CPU: BX80570E8500 Core 2 Duo E8500 3.16 (3.8) GHz 1333 (1600) MHz 6MB : CPU Cooler: Zalman CNPS9700 : Memory: Patriot Viper 4GB (2 x 2GB)DDR3 1600(PC3 12800)PVS34G1600LLK : Video1: EVGA 01G-P3-1373-AR GeForce GTX 460 SC EE : Video2: EVGA 512-P3-N801-AR GeForce 8800GT : Sound: X-Fi XtremeGamer Fatality Pro : OS HDD: WD3000GLFS VelociRaptor 300GB : DVD: LITE-ON LH-20A1S : OS: Windows 7 Pro 64bit : Case: COOLER MASTER RC-1100-KKN1-GP Cosmos S : Power Supply: ABS Tagan ITZ Series ITZ700 700W ATX12V S ~All Air Cooling~
|
Spotswood
iCX Member

- Total Posts : 268
- Reward points : 0
- Joined: 2009/08/01 17:19:50
- Location: New Hampshire, USA
- Status: offline
- Ribbons : 7

Re:Project: Server and Gaming Case
2011/10/10 21:30:00
(permalink)
My client selected some nice low-profile casters (with 2-inch wheels) which I mounted right away since the case is all nice and square. 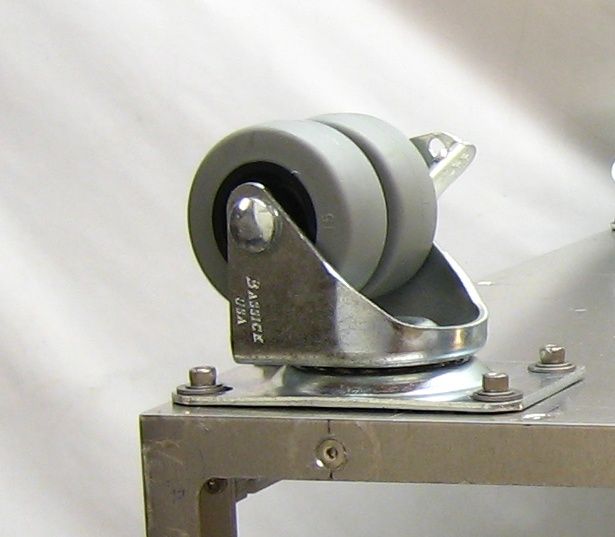 Three of the #8-32 stainless steel bolts were screwed directly into the frame via hand tapped holes. 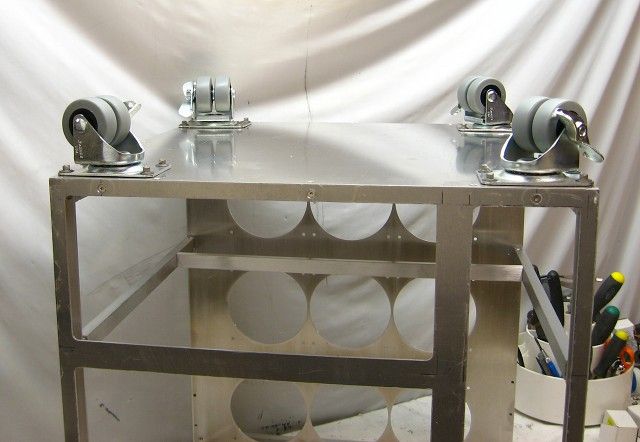 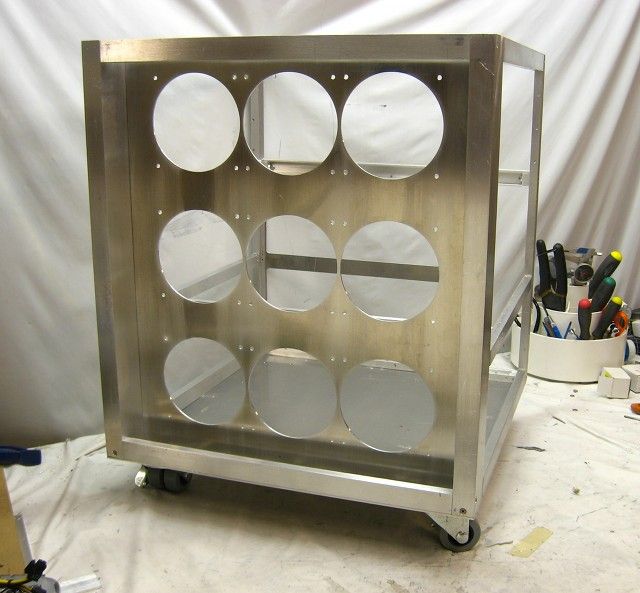
|
voodoo do-er 
CLASSIFIED Member

- Total Posts : 4418
- Reward points : 0
- Joined: 2011/09/02 10:20:58
- Location: 1934~2012 Eduard Khil
- Status: offline
- Ribbons : 9

Re:Project: Server and Gaming Case
2011/10/10 22:31:50
(permalink)
this is looking good man  
|
pyrebuilder
SSC Member

- Total Posts : 544
- Reward points : 0
- Joined: 2010/03/06 14:02:36
- Location: South Lake Tahoe, CA
- Status: offline
- Ribbons : 5


Re:Project: Server and Gaming Case
2011/10/11 03:19:58
(permalink)
you said the backplanes had LED wires? im looking hard for anything that will give each hard drive of mine an activty light, where did you get those?
Computer builder, rocket flier, D&D player. EVGA SR-X, 2x Xeon E5-2687W 64 GB ECC RAM 1600Mhz
|
Spotswood
iCX Member

- Total Posts : 268
- Reward points : 0
- Joined: 2009/08/01 17:19:50
- Location: New Hampshire, USA
- Status: offline
- Ribbons : 7

Re:Project: Server and Gaming Case
2011/10/11 22:17:34
(permalink)
pyrebuilder
you said the backplanes had LED wires? im looking hard for anything that will give each hard drive of mine an activty light, where did you get those?
http://www.frys.com/product/5983504
|
Spotswood
iCX Member

- Total Posts : 268
- Reward points : 0
- Joined: 2009/08/01 17:19:50
- Location: New Hampshire, USA
- Status: offline
- Ribbons : 7

Re:Project: Server and Gaming Case
2011/11/14 09:30:02
(permalink)
I attached the .1-inch thick side and front panels with 6 stainless steel flat head socket cap screws. The front panel extends past the tops of the side panels by .10-inch in order to hide the top's front edge. 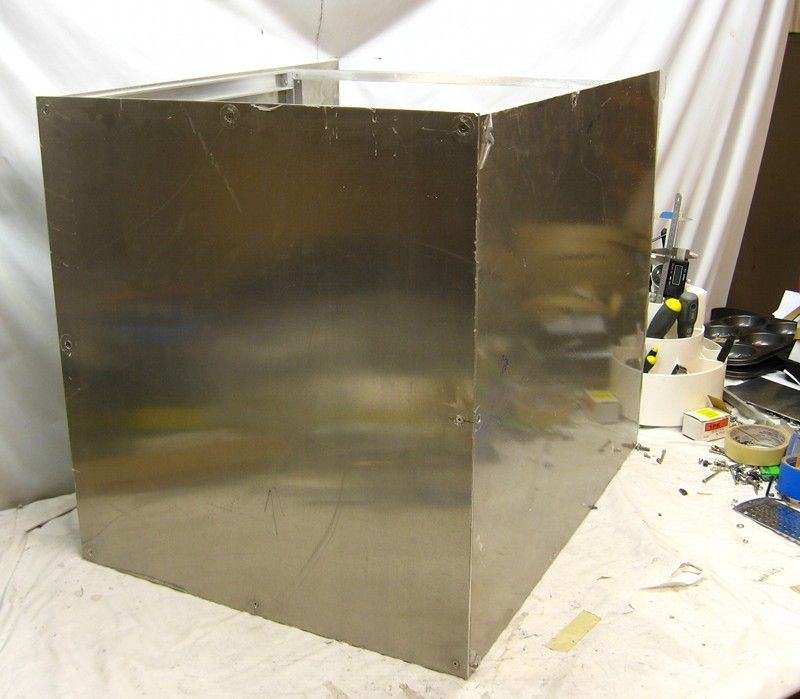 The process to attach the panels is: - Drill pilot holes along the edges of the panel
- Clamp the panel to frame and use the pilot holes to drill tap holes into the frame
- Remove the panel and tap the frame holes
- Countersink the panel holes
The side panels extend past the top of the frame by the thickness of the hinge. These will later be scribed and cut to length along the back of the case. 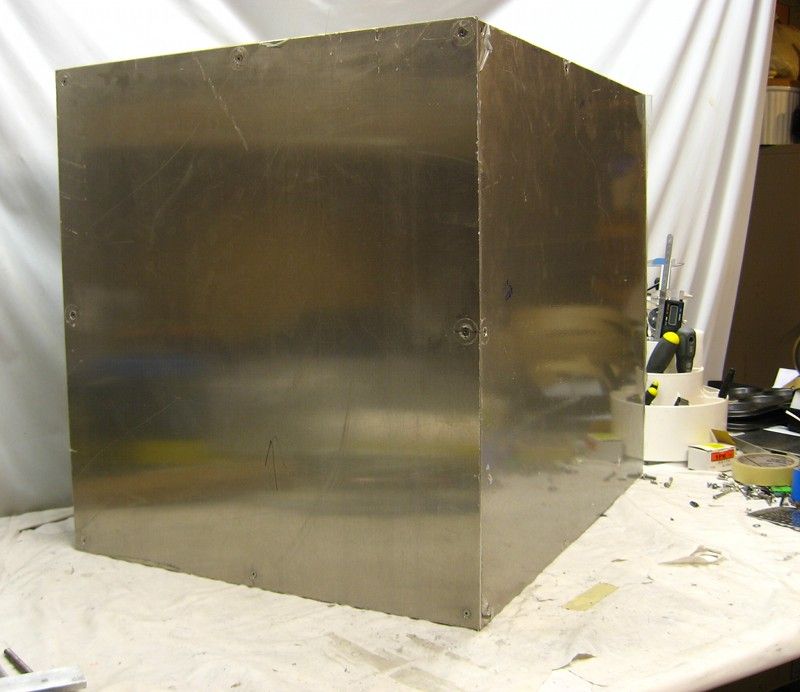
|
Spotswood
iCX Member

- Total Posts : 268
- Reward points : 0
- Joined: 2009/08/01 17:19:50
- Location: New Hampshire, USA
- Status: offline
- Ribbons : 7

Re:Project: Server and Gaming Case
2012/02/19 18:59:19
(permalink)
|
v1ral
iCX Member

- Total Posts : 483
- Reward points : 0
- Joined: 2008/07/23 01:11:26
- Status: offline
- Ribbons : 0


Re:Project: Server and Gaming Case
2012/02/25 01:33:12
(permalink)
|
gregryjb
Superclocked Member

- Total Posts : 102
- Reward points : 0
- Joined: 2011/08/11 00:07:05
- Status: offline
- Ribbons : 0

Re:Project: Server and Gaming Case
2012/02/27 10:27:26
(permalink)
Very cool idea... Can't wait to see final build.
"Say it with your chest!" ____________________________________________________________________
Intel i7 3770K @ 4.6 GHz - ASUS Sabertooth Z77 - EVGA GTX 680 SC+ - Silverstone Raven RV02-BW 2x Samsung 830 128GB RAID - Noctua NH-D14 - OCZ ZX1250 eBay My World
|
nickbaldwin86
SSC Member

- Total Posts : 643
- Reward points : 0
- Joined: 2009/12/05 16:03:16
- Location: Scappoose Oregon
- Status: offline
- Ribbons : 5


Re:Project: Server and Gaming Case
2012/02/27 13:45:21
(permalink)
-EGC-Ripley My Affiliate Code: QJPC2FGYYT
|
Spotswood
iCX Member

- Total Posts : 268
- Reward points : 0
- Joined: 2009/08/01 17:19:50
- Location: New Hampshire, USA
- Status: offline
- Ribbons : 7

Re:Project: Server and Gaming Case
2012/04/26 20:01:48
(permalink)
The hinge for the top was cut slightly undersized and centered with a some old business cards used as spacers. 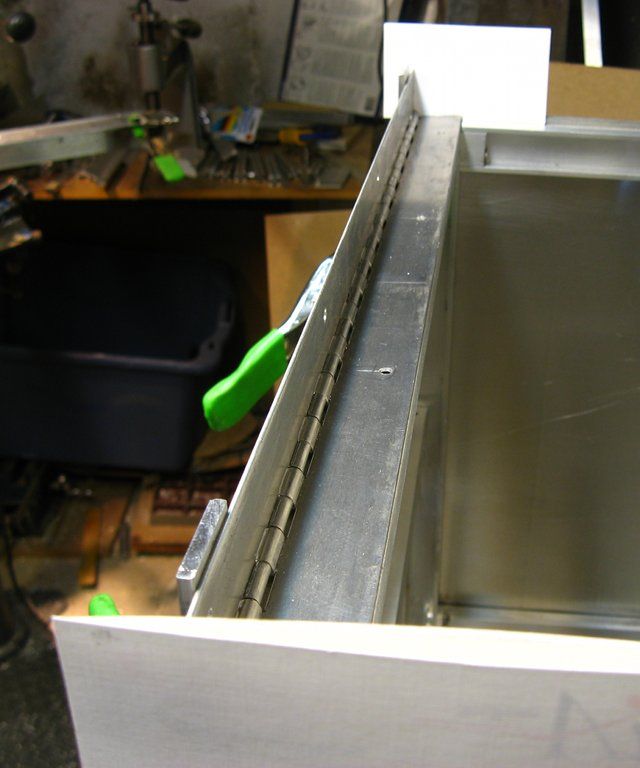 Dimples of aluminum had to be removed from the frame in order to make room for the nuts holding the top sheet to the hinge. 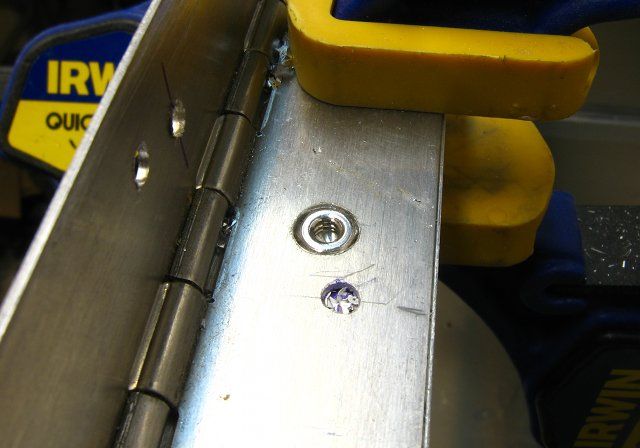 With only a 2.5mm gap between the leaves of the hinge, button head cap screws were used to attach the hinge to the frame. 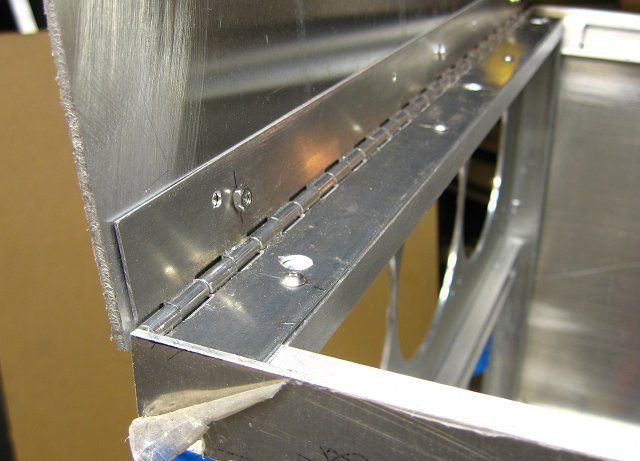 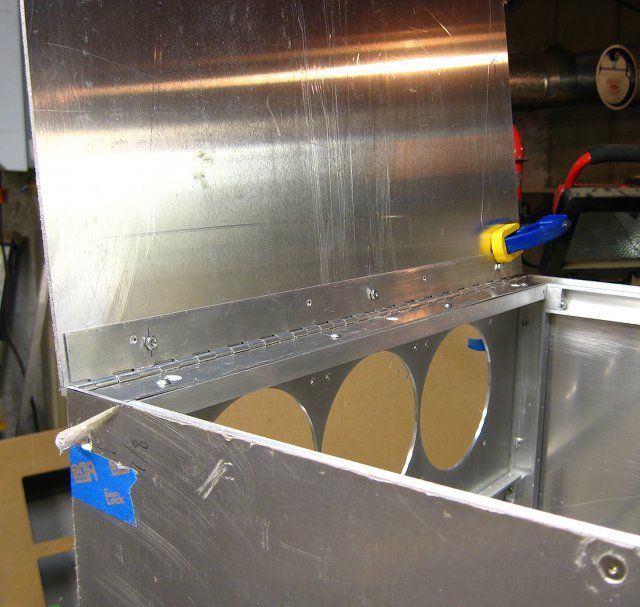 The hinge aligns perfectly with the top sheet, which in turn aligns with the back sheet. 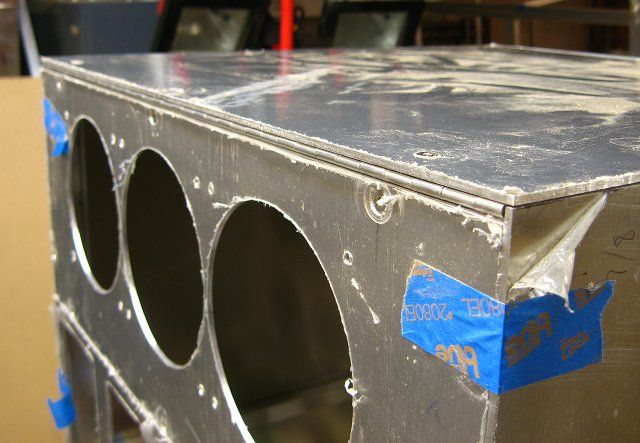
|
blood4guts
iCX Member

- Total Posts : 419
- Reward points : 0
- Joined: 2009/10/20 16:14:21
- Location: Here
- Status: offline
- Ribbons : 0


Re:Project: Server and Gaming Case
2012/04/26 20:24:32
(permalink)
Nice build so far. I have a love/hate relationship with countersinking holes and threading them... but the final product can't really be beaten.
|
killerjas
FTW Member

- Total Posts : 1274
- Reward points : 0
- Joined: 2011/10/06 20:13:36
- Location: Pierceton, IN
- Status: offline
- Ribbons : 4


Re:Project: Server and Gaming Case
2012/04/26 20:52:25
(permalink)
Its so nice. I wish I could have something like that.. I just cant afford anything.
|
Spotswood
iCX Member

- Total Posts : 268
- Reward points : 0
- Joined: 2009/08/01 17:19:50
- Location: New Hampshire, USA
- Status: offline
- Ribbons : 7

Re:Project: Server and Gaming Case
2012/04/26 21:00:36
(permalink)
blood4guts
Nice build so far. I have a love/hate relationship with countersinking holes and threading them... but the final product can't really be beaten.
Thanks. Yeah, I always try to avoid threading countersunk bolts, preferring to fasten them with a nut.
|
Spotswood
iCX Member

- Total Posts : 268
- Reward points : 0
- Joined: 2009/08/01 17:19:50
- Location: New Hampshire, USA
- Status: offline
- Ribbons : 7

Re:Project: Server and Gaming Case
2012/05/13 16:43:07
(permalink)
On the bottom of the case, a large slot was cutout which will allow fresh air to enter the front air duct. Following standard operating procedures, a router pattern/template was made at the same size as the desired opening. 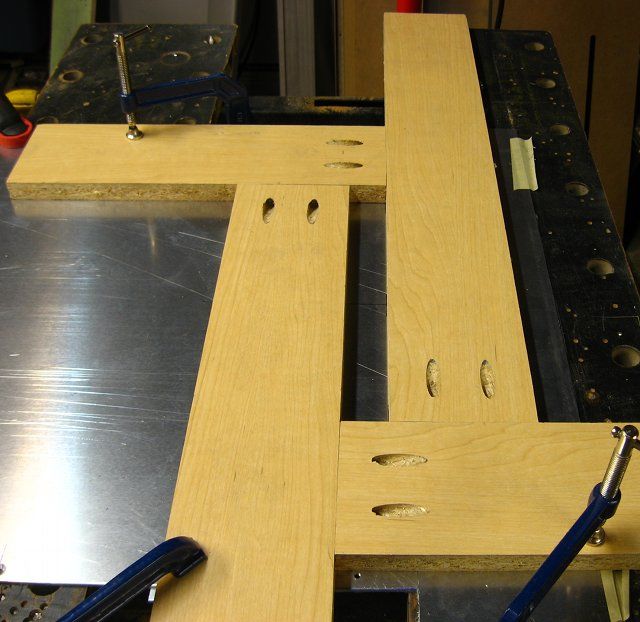 The aluminum was removed with my trusty handheld router in two passes, once with a over-hanging pattern bit and another with a flush-cutting pattern bit. 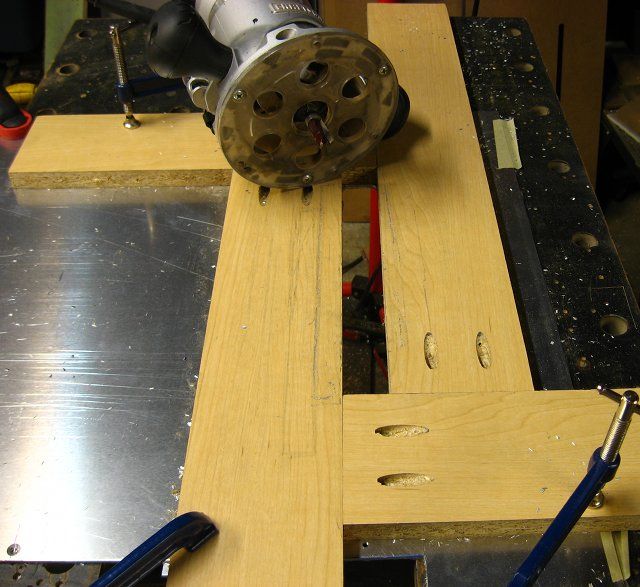 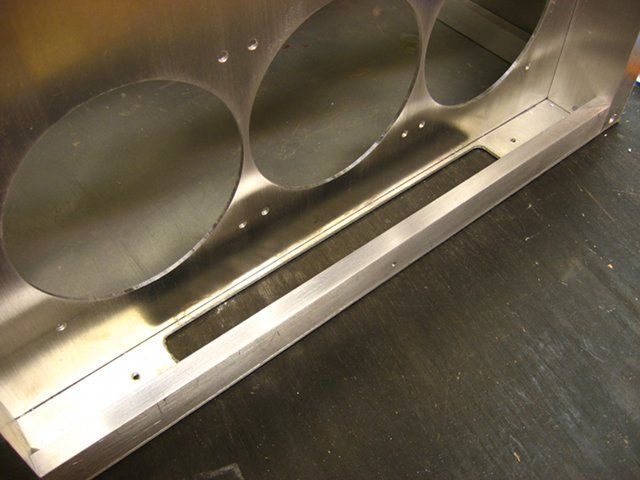
|
w4ss4b3
CLASSIFIED Member

- Total Posts : 3935
- Reward points : 0
- Joined: 2011/12/31 04:50:57
- Location: Please use MY Affiliate code: JHMQJKA3CM
- Status: offline
- Ribbons : 21

Re:Project: Server and Gaming Case
2012/05/13 17:18:17
(permalink)
Man this build is coming along nicely. Looks sick! +1
|
willem445
CLASSIFIED Member

- Total Posts : 4184
- Reward points : 0
- Joined: 2010/05/25 17:30:49
- Status: offline
- Ribbons : 13


Re:Project: Server and Gaming Case
2012/05/13 18:20:57
(permalink)
|