the original post is here but i reworked it a bit and thought id bring it over to the new format for everyone.
http://forums.evga.comarchive/tm.asp?m=100843249&mpage=1&key=
maybe a nice mod will sticky it in the index

Other TIM DIY's were not as detailed as i would have liked i decided to make a more step by step DIY for those who are still worried about doing this. please note that this
WILL NOT void your warranty with EVGA as long as you do not physically damage the PCB (printed circuit board) or remove the serial number sticker on the back of the card. This DIY is intended for people who have never done it before and would like to replace the TIM (Thermal Interface Material) or heatsink paste. It does involve disassembly of your graphics card heatsink to do this. So make sure you read the DIY completely and are absolutely sure you want to do this BEFORE you start. This will not void your warranty as long as you do not remove the serial number sticker from the card or cause physical damage to the card.
Why TIM substrates are used is to fill the microscopic imperfections in the gpu heat spreader and heatsink surfaces, thus improving thermal conductivity across these two. Without TIM's hot spots would form and cause damage to the gpu/cpu core.
The reason for replacing the factory TIM here is to improve cooling for your graphics card. The TIM thats on the card from the factory is known for having less than stellar performance and in some cases was too heavily applied. Most people who have replaced the TIM have noticed a 5-7c drop in temps across the board.
The DIY is for a GTX 275 but can be used for all 200 series cards.
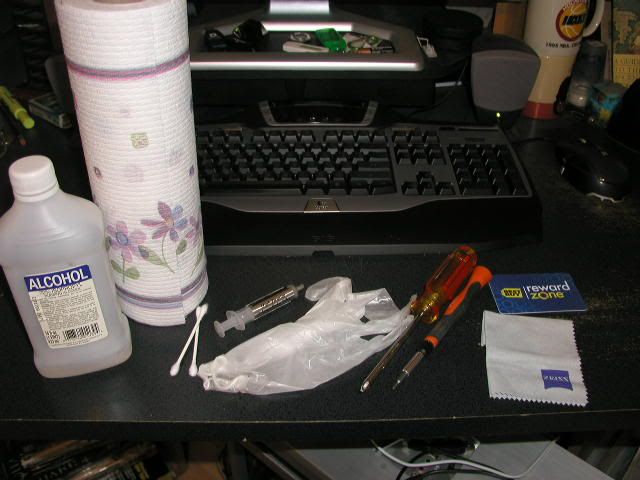
First you will need a few things.
you will need:
1 small tip Phillips screwdriver
1 standard Phillips screwdriver (depending on case mounting)
Some paper towels (very good quality low lint kind)
or
Paper coffee filters
Rubbing alcohol
or
ArctiClean Thermal Material Remover
An old credit card
Lint free towel (like you get with glasses or screen protectors)
Q-tips
Latex gloves (this isn't a requirement but is recommended)
AS5 or other high performance TIM
Thermal gap pads (at least 2 sheets)
a clean well lit work environment
small container to hold the screws
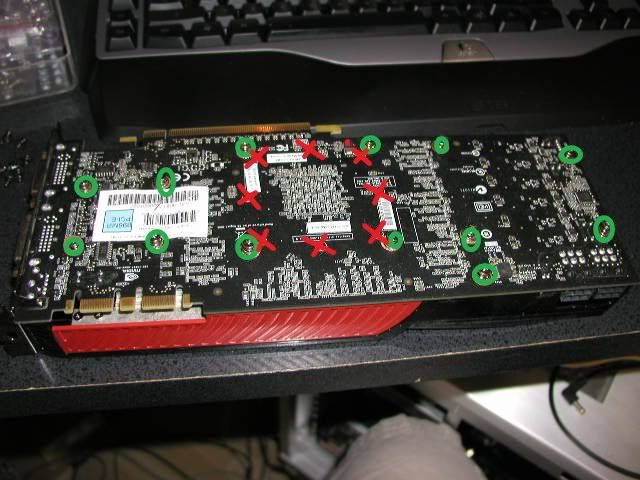
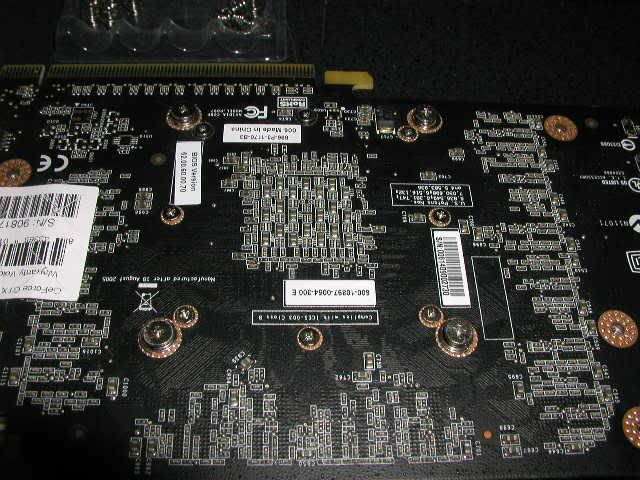
Now pull the card and remove the silver spring screws only from the back of the card. This is the back of a GTX 275 most GTX 200 models have some sort of backplate, but the disassembly is pretty much the same. you will also see 8 smaller non-spring screws around the center of the card. DO NOT REMOVE THEM. these hold the trim ring around the gpu core in place.
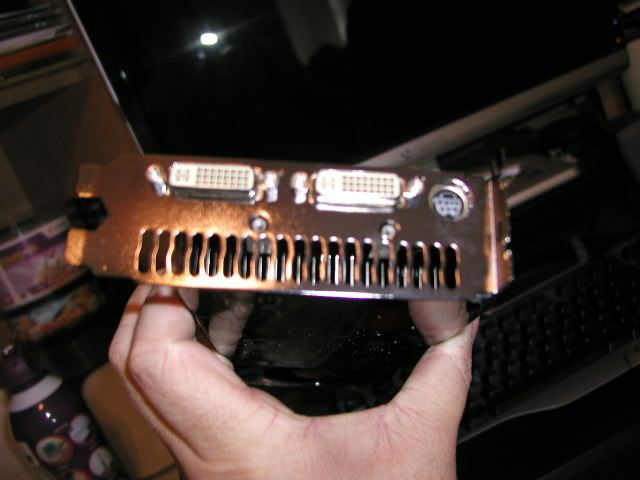
There are also two screws on the mount bracket that need to be removed.
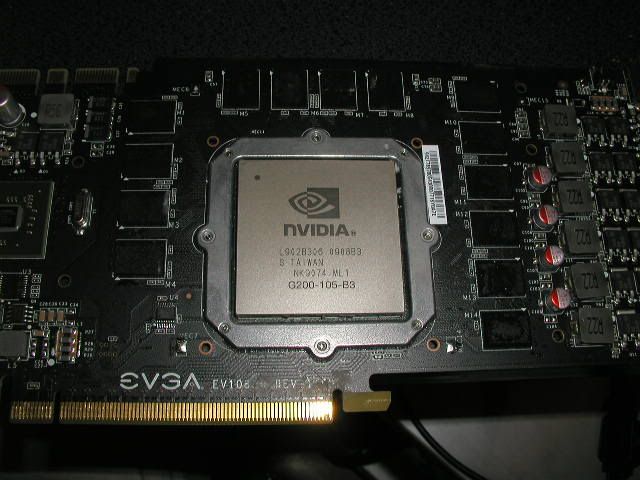
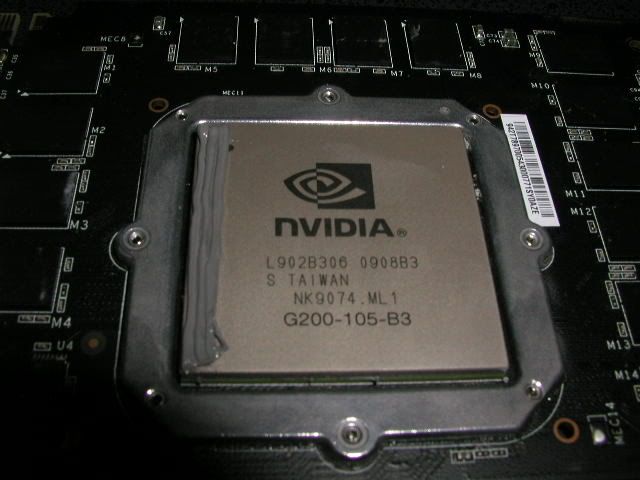
now give the card and heatsink a gentle twist to break the bond between the gpu core and heatsink. BE CAREFUL, you do not want to damage the thermal pads that contact the memory and other components. once the old TIM gives gently pull the card and heatsink apart to reveal this.

Gently disconnect the fan power cable, it might be a little tough to remove but it will come apart. Now inspect the thermal pads on both parts. Make sure that none of them have rolled out of position. If they have using the small screwdriver gently put them back into a flat position. the ones you want to look for are in the green boxes in the pic above. It is probably a good idea that you replace the thermal pads for the memory since they basically get crushed during the install of the heatsink. I didnt but have some on the way and will replace mine soon.
Notice the R22 chips (in the red area) on older models of the GTX 275 some might come with white thermal pads on them, but newer models do not have them. So I removed mine since they don't actually make contact with the heatsink shown in the red zone highlighted in the pic.
Now it's time to clean up the old TIM. Using the paper towels (dry) wipe off as much of the old TIM as you can from both mating surfaces. Now using the alcohol and more paper towels wipe the surfaces again so it looks like this.
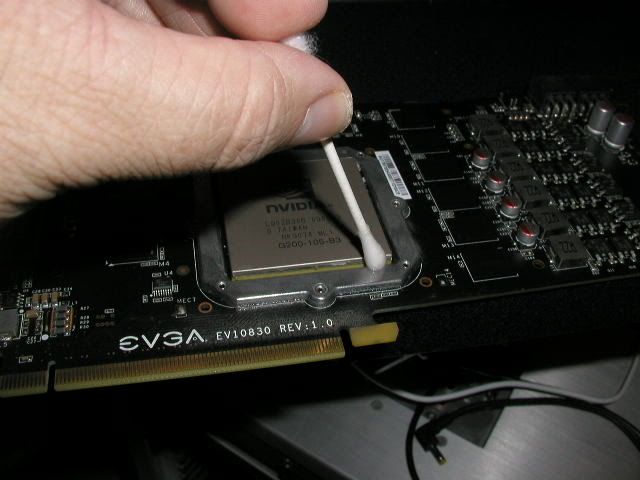
Grab the Q-tips and clean around the GPU edge.
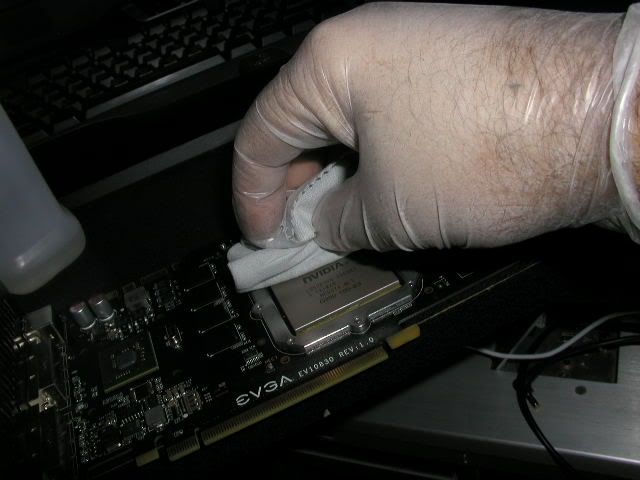
once this is done grab the lint free towel. **note once you use this it will ruin the towel** make a couple dry passes across the gpu
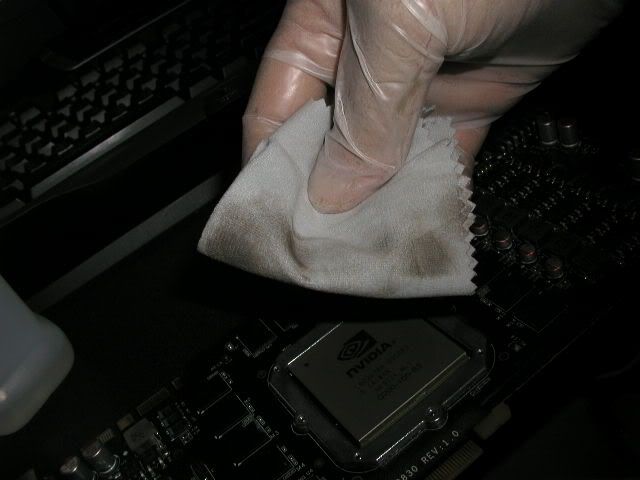
take a look.. you will see how much of the old TIM it removes that the paper towels left behind.
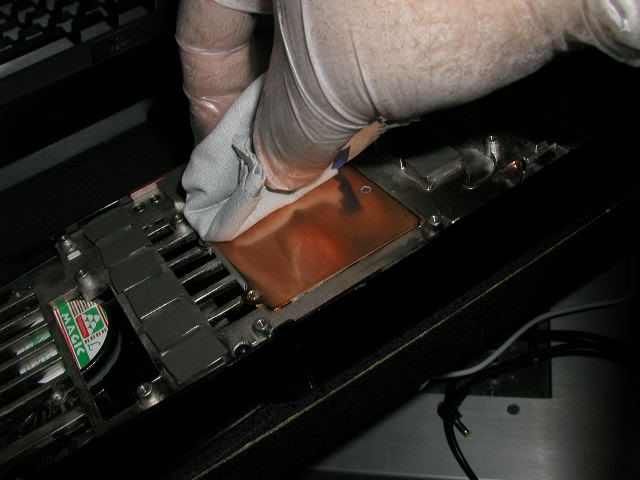
repeat this on the copper pad on the heatsink. I'm betting you will not get much if any residue from this.
now it's time to apply the TIM. I'm using AS5 (arctic silver 5) but you may use what you wish as long as it's a high performance material. DO NOT use thermal epoxy glue based TIM's as they will permanently bond the gpu and heatsink together!
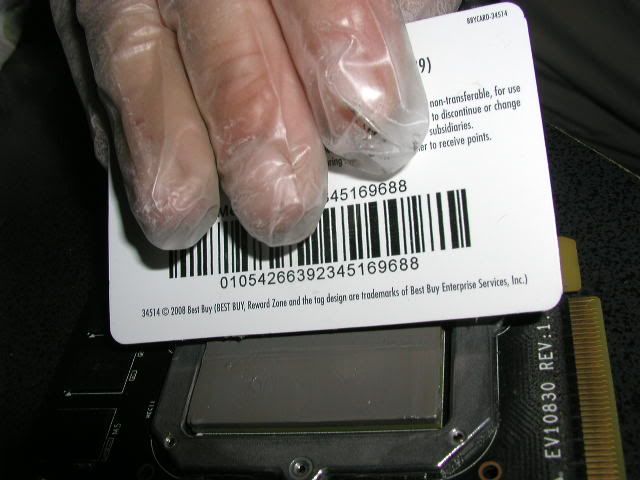
the method I prefer is the credit card way. others like to use their finger (thus the gloves to spread the TIM across the gpu. either works but make sure you use the card to create a smooth, thin and even layer of TIM across the entire gpu surface.
DO not use the TIM on the memory chips.. it's not designed to cover large gaps that would be there. that's what the thermal pads are for.
for the CC method using AS5 apply several beads of TIM on one edge of the gpu. Other TIM's that are not as thick and hard to spread as AS5 is and spread much easier with less compound thus do not require as much to be applied. If you choose a different TIM like MX-2 or MX-3 you most likely will use about half of what is needed for AS5.
use the credit card and start to smooth the TIM across the GPU
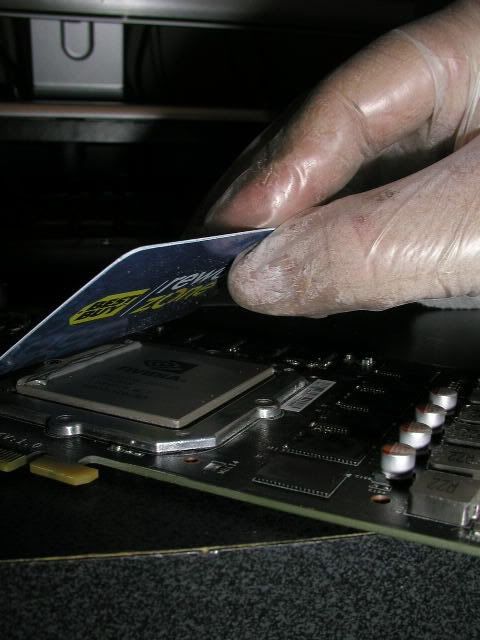
this is what you want it to look like as you spread it across. make sure to use firm but even pressure so you dont incorporate air bubbles in the TIM. air bubbles trap heat and heat kills gpu's. You can also spread the TIM with your gloved finger first but make sure that when you spread it out that you do not lift your finger from the gpu till you are done. Also be sure to make a pass over it with a cc to smooth it out and remove any air bubbles that might have been trapped.
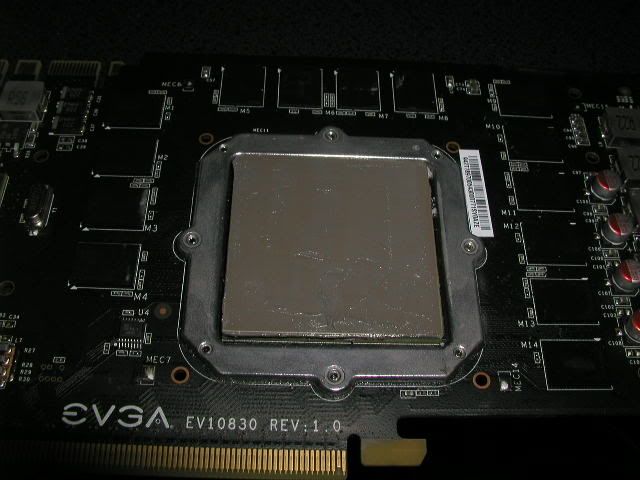
Once you have the TIM coating the entire GPU it should look like this. a nice smooth and very thin layer across the entire GPU.
for TIM's such as OCZ Freeze or MX-2/3 the C.C. method does not work very well since these TIM's do not spread like AS5. so its best to employ the strip method for TIM application for the GPU. its simple just apply 5 thin but even beads across the gpu leaving about a 1/4" gap from the edge as shown in the pic below.

Now it's time to reassemble the card. Make sure none of the thermal pads have rolled during the cleaning or TIM install, if they have reposition them. It's best to replace them if you have the pads, but if not, be sure that you fix the old ones.
** Very Important Note**
If you should choose to use an aftermarket waterblock (
shown in the pic above) or aftermarket air cooler, make sure that following the manufacturers instructions is done to the letter. Some manufacturers of aftermarket blocks engineer the needed spacing into their blocks for the use of TIM. If using the factory cooler or the instructions for the Aftermarket block do not suggest/instruct or recommended the use of TIM where Pads had been previously,
DO NOT put TIM on the pads of memory chips in place of the pads. the TIM is not designed for this type of gap and the PCB will actually bow slightly when the screws are seated casuing impropper mating with the GPU and heatsink pad. Now reconnect the fan power cord and carefully reseat the card and heatsink together. now set the card fan side down and look in the screw holes to make sure they all line up. Chances are they don't, so gently push down on the card as you hold the heatsink and twist the card till the holes line up. Now insert the four screws around the GPU first. tighten them about halfway and start the rest of the spring screws but don't tighten them. go back the 4 spring screws and snug them down in a cross pattern.
now you can tighten the rest down. use care since the screws will strip if you use too much force.
Lastly reinstall the two end bracket screws and double check your work. make sure you didn't not miss any screws.
reinstall the card and power the system up.
check temps with precision. Depending on what kind of TIM you use you might not notice an immediate drop in temps and a cure time might need to take place first.
Done..
Thank you for looking at ehis DIY I hope it helps clear up some questions you might have about the proccess of replacing the TIM on your graphics card.
post edited by Porpoise Hork - 2009/11/05 10:40:29