DrunkMexican
Superclocked Member

- Total Posts : 121
- Reward points : 0
- Joined: 2015/10/23 09:20:22
- Location: Portland, OR
- Status: offline
- Ribbons : 3

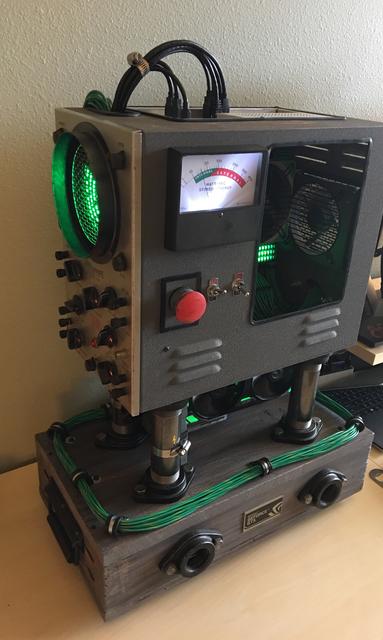
About 11 years ago I saw an old Oscilloscope from the 1960's in a flea market and I immediately fell in love with the design and thought it would be awesome to put a computer in one of them. When I got back home I looked on eBay for an inexpensive Oscilloscope and found one for sale near Salem Oregon. So I drove down from Portland to buy it, and then I stored it for over 10 years. Multiple times I almost gave up on the dream, but finally after I finished my last mod I felt confident enough to try a project of this magnitude. The Original Oscilloscope from the late 50's un-modded: 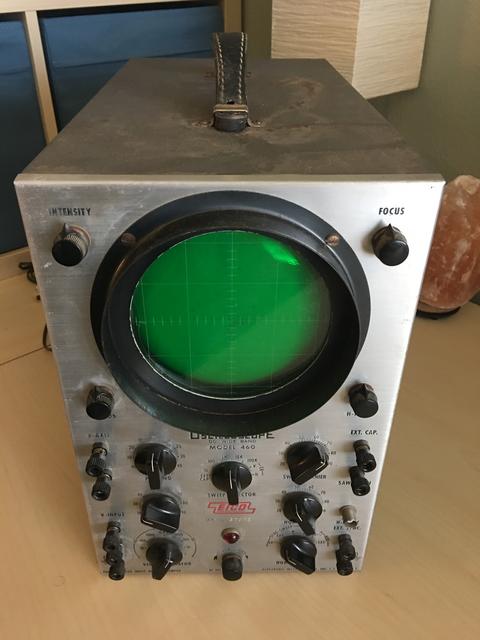 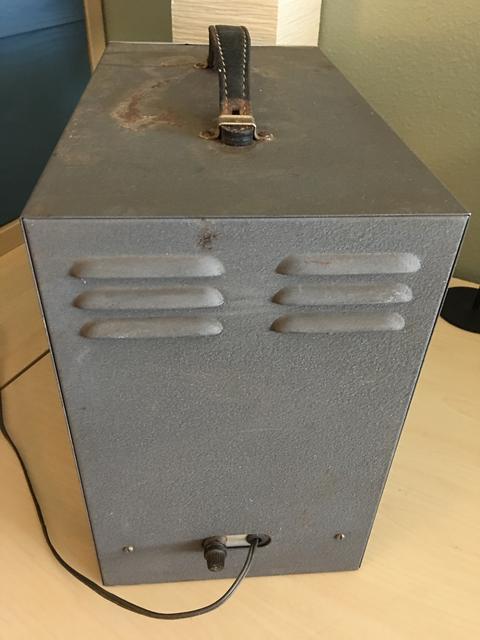 After I started the mod, I decided to add a base to the main box. The base started out looking like this: 
|
DrunkMexican
Superclocked Member
- Total Posts : 121
- Reward points : 0
- Joined: 2015/10/23 09:20:22
- Location: Portland, OR
- Status: offline
- Ribbons : 3

Re: High Voltage (Oscilloscope Mod)
2019/04/26 10:32:01
(permalink)
|
DrunkMexican
Superclocked Member
- Total Posts : 121
- Reward points : 0
- Joined: 2015/10/23 09:20:22
- Location: Portland, OR
- Status: offline
- Ribbons : 3
Re: High Voltage (Oscilloscope Mod)
2019/04/26 10:35:43
(permalink)
The Power Supply This is by far one of my favorite parts of this mod. A distressed Power Switch Box from a house: 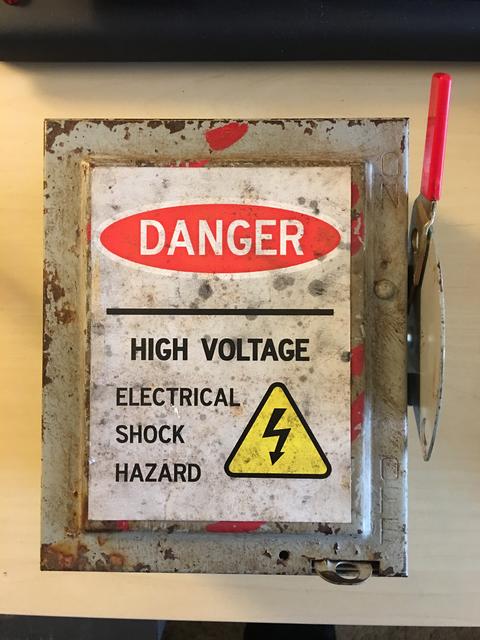 Cut a hole in the back for the fan intake:  Cut a hole on the side for the exhaust vent, power cord and power switch:  Added a Fan Grill and U-Channel Rubber Trim from MNPCTECH: 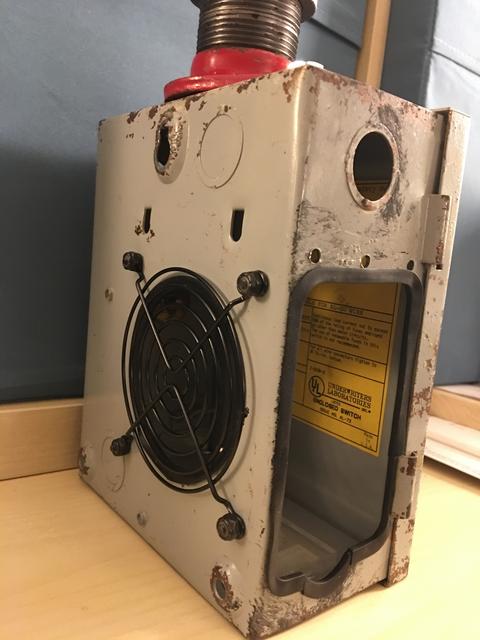  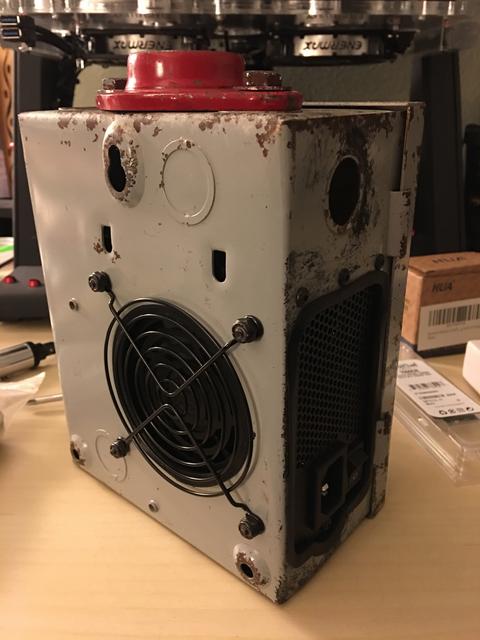 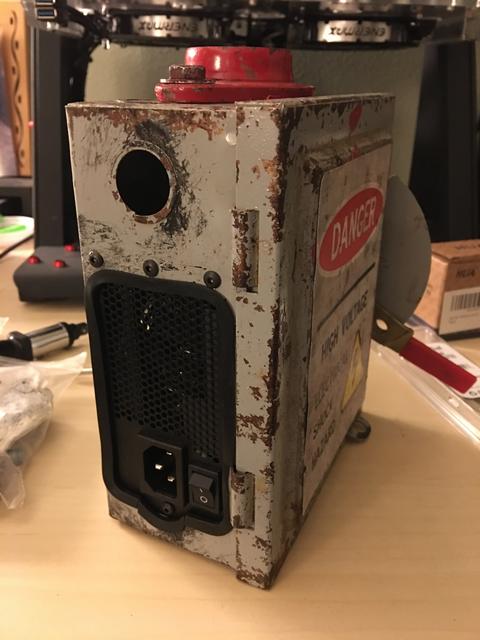 Time to rest... Time to rest... 
|
DrunkMexican
Superclocked Member
- Total Posts : 121
- Reward points : 0
- Joined: 2015/10/23 09:20:22
- Location: Portland, OR
- Status: offline
- Ribbons : 3
Re: High Voltage (Oscilloscope Mod)
2019/04/26 10:39:25
(permalink)
Cutting top and side panels on the main box Time to cut the box! Using a removable motherboard tray from a Lian-Li case 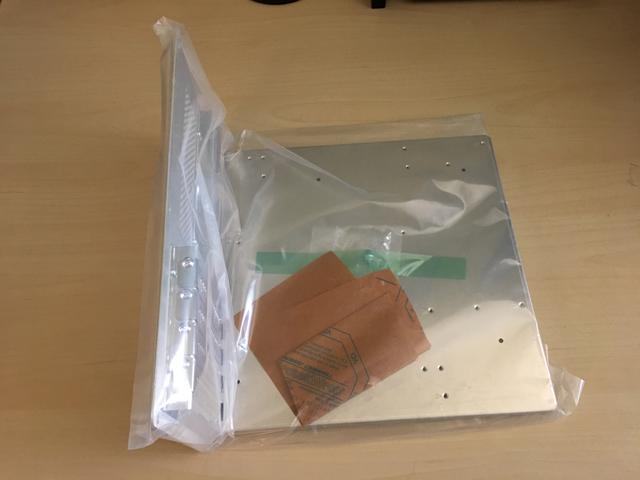 The rear I/O panel on the motherboard tray will be on top of the modded box. I first made several stencils out of paper until I got the fit to be perfect, then placed it over the metal box, made my marks and began cutting. 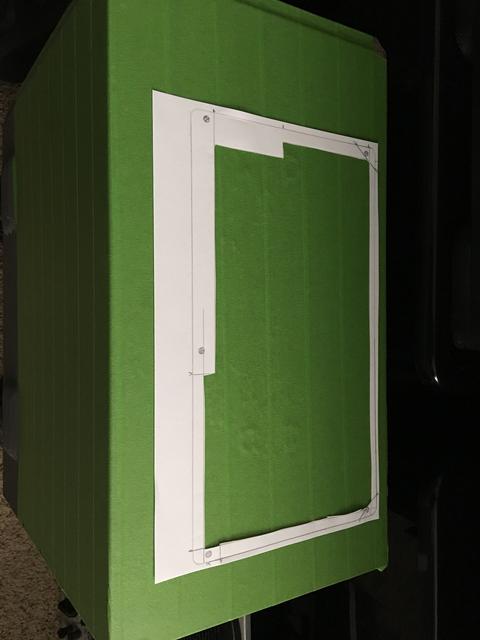 And also cut the rear fan exhaust 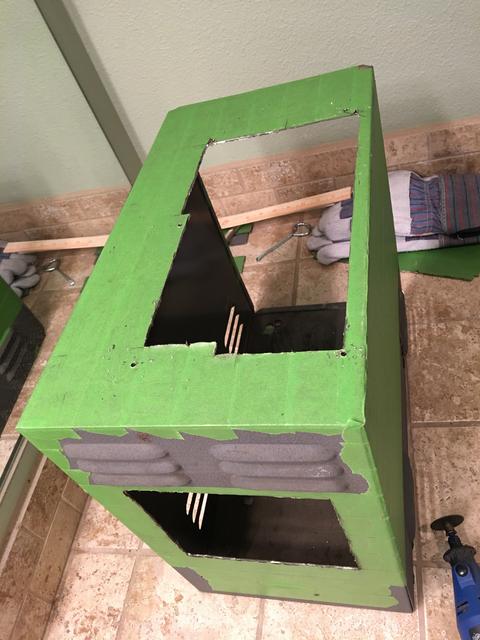 Next the window and a hole for a large gauge  It pays to measure multiple times, perfect fit!  Next I made Glow-in-the-Dark paint by mixing Glow Pigment with Matte Medium. I used about twice the amount of pigment so that it would have some extra glow! 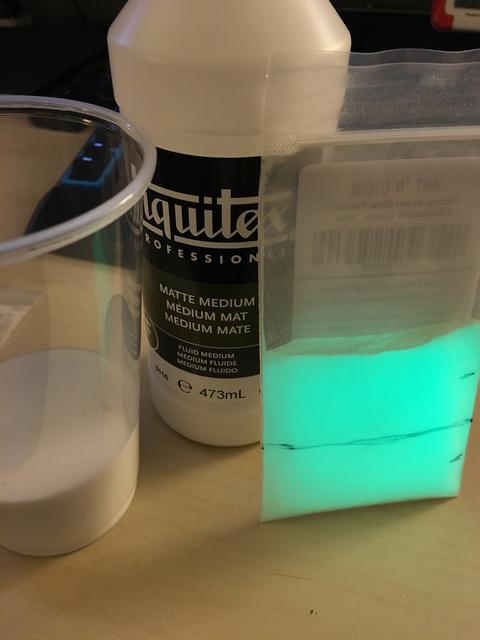 I painted the inside of the case with the glow paint. The idea was that the PC lights would charge up the paint, and when I turn off my PC the case would reaming glowing on the inside. Below are pictures of the bare case in a pitch black room, with the only light coming from the glow-in-the-dark paint inside the case. 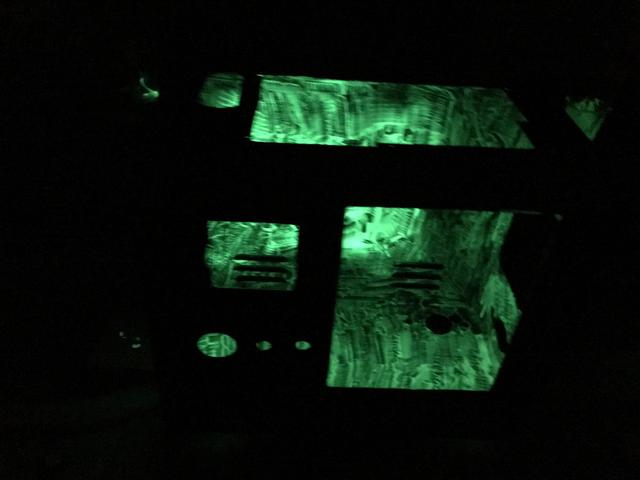 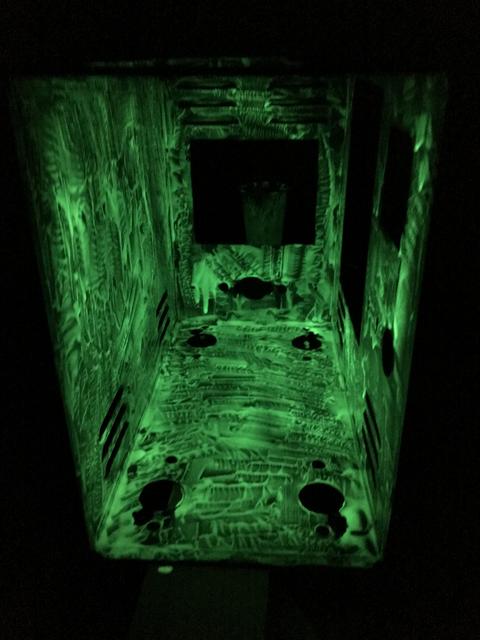 This is the Gauge I was planning on adding to the side. I really wanted to mod more that I ever had before, so I purchased single LEDs and wired a white LED into this gauge so it would be illuminated when the PC was on. 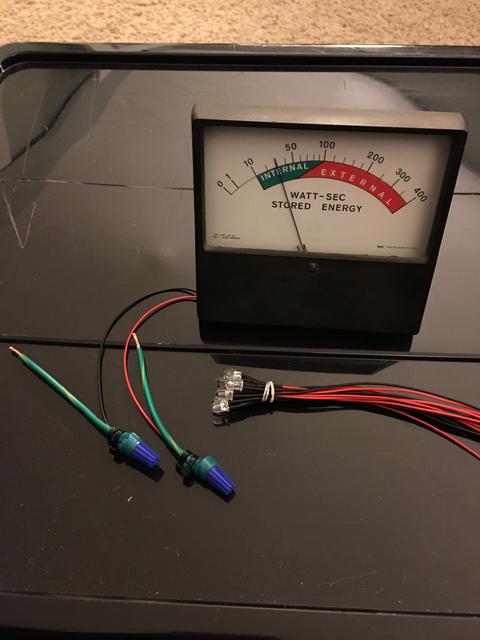  Installation InstallationUsed Liquid Nails (strong glue) to attach the gauge. The big red button will be the power button for the computer, and the toggle switches for the lighting 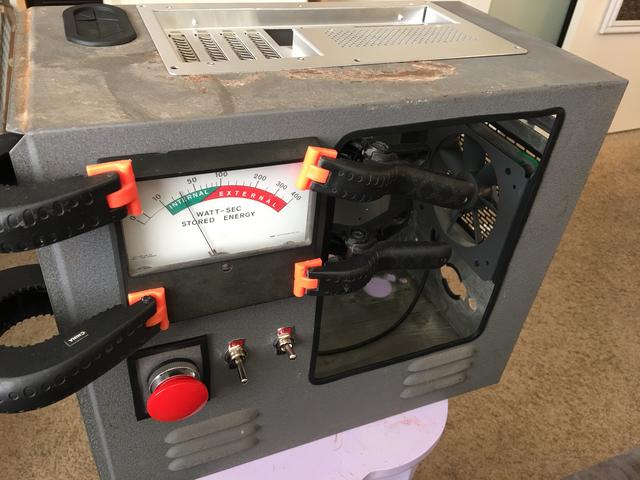 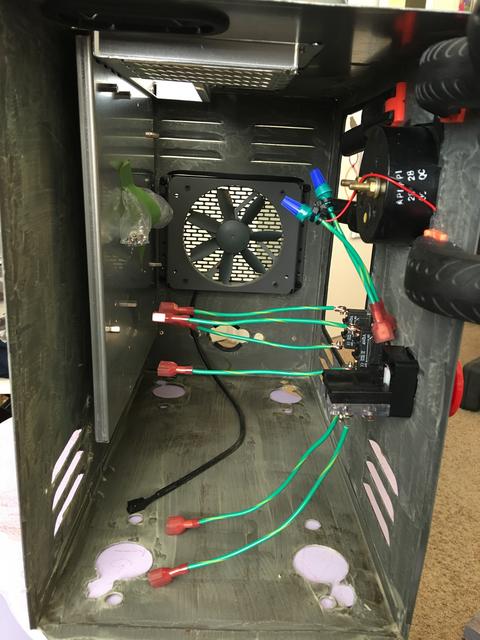
|
DrunkMexican
Superclocked Member
- Total Posts : 121
- Reward points : 0
- Joined: 2015/10/23 09:20:22
- Location: Portland, OR
- Status: offline
- Ribbons : 3
Re: High Voltage (Oscilloscope Mod)
2019/04/26 10:41:48
(permalink)
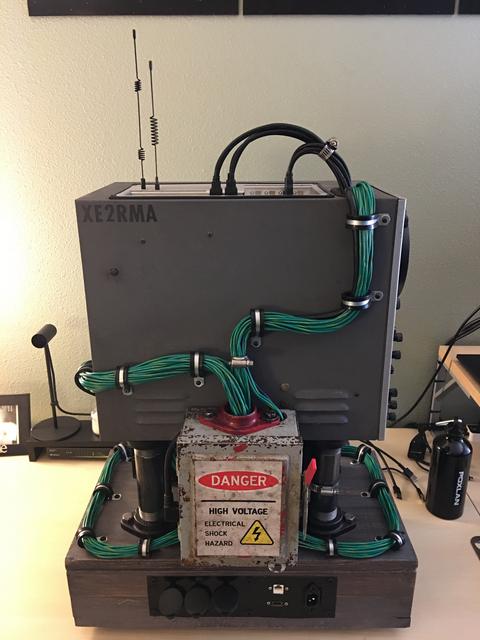
The Wiring & GPU I had never made my own wires before but I wanted ALL of this Mod to be made by me this time. So although I was going to need custom wires, I didn't want anything fancy that would look new and not match the time period or rugged look of the mod. I searched online through a ton of different options and found this fantastic Green with Yellow 16 AWG striped wire that looked great against the gray, and fit the time period of the mod perfectly. I used for the entire mod. 24 Pin ATX, 8 Pin EPS (CPU), 2 x 8 Pin PCIe (VGA), and a SATA Power Connector for the Fans and Lightning. I ended up using 250 Feet of wire throughout the entire mod.Custom Wire   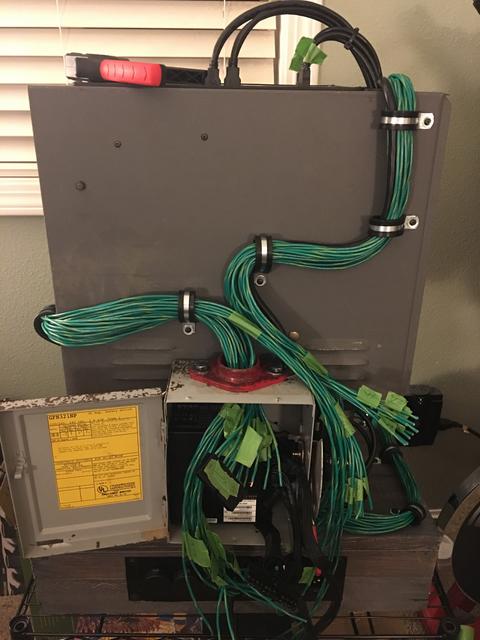 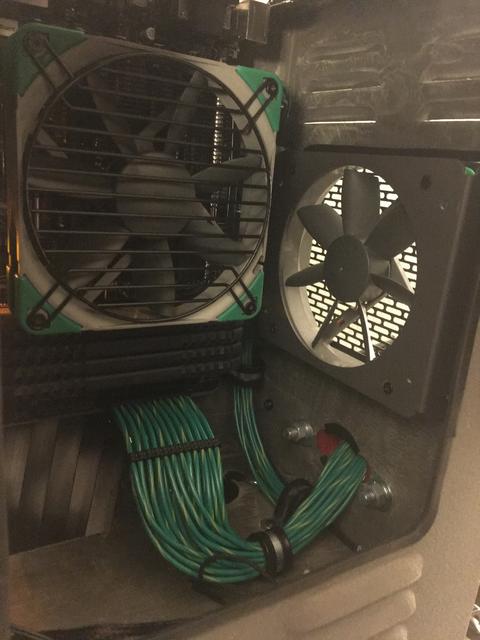 Mounted the GPU between the base and the case using MNPCTECH Vertical GPU Mount. In case you want to check it out: https://mnpctech.com/vertical-gpu-video-card-installation-mount/The Vertical GPU Mount was ionized black, so I painted it chalk-gray, then smudged it with chalk-black after that.   The green cables going around the perimeter of the base are the actual power cables for the GPU. They go from the GPU, all the way around the base, into the base, up the pipes into the top case, out the top of the case and back down into the Power Supply. GPU Power Cables alone was 136 Feet of wiring. 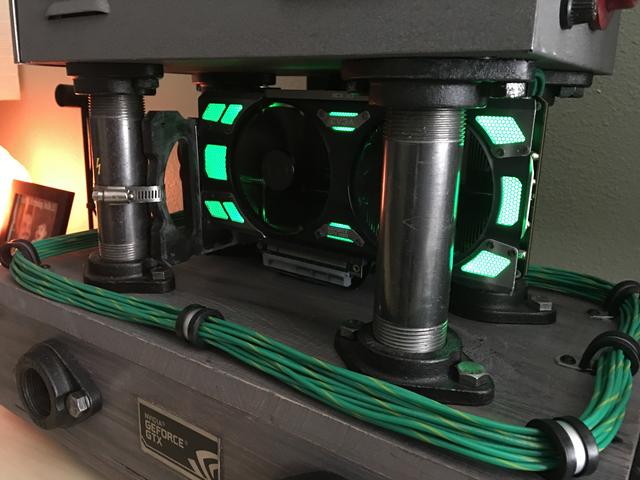 ATX and EPS (CPU) Power Cables come out the back of the top box 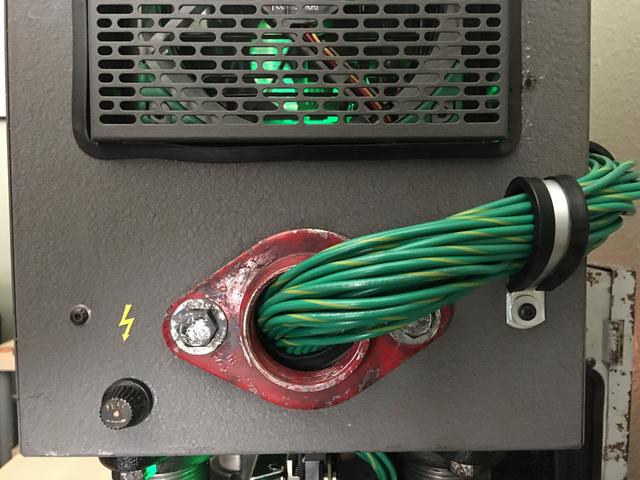
|
DrunkMexican
Superclocked Member
- Total Posts : 121
- Reward points : 0
- Joined: 2015/10/23 09:20:22
- Location: Portland, OR
- Status: offline
- Ribbons : 3
Re: High Voltage (Oscilloscope Mod)
2019/04/26 10:43:58
(permalink)
The Fans and The Lighting I used CaseLabs ( RIP :cry: ) FlexBay Fan/Radiator Mounts for the fans in the front and the rear of the case so they would match and would look like they belong together. The gun metal color matched the mod exactly, and I love the unusual grill pattern they used to use (reminds me of Star Wars). 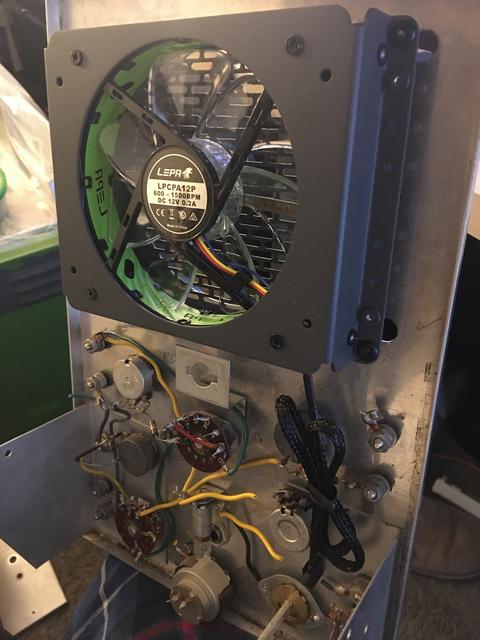 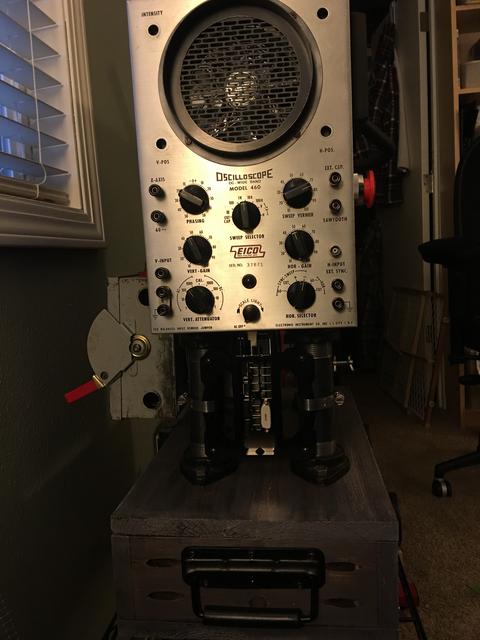 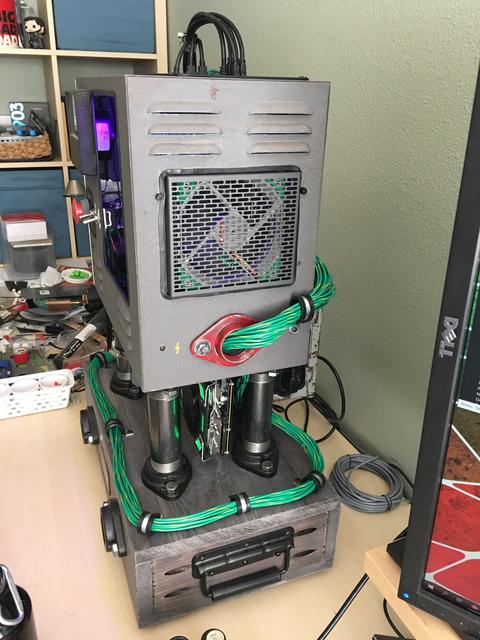 For the front intake fan, I used the Lepa Chopper in green, and it looks AMAZING! 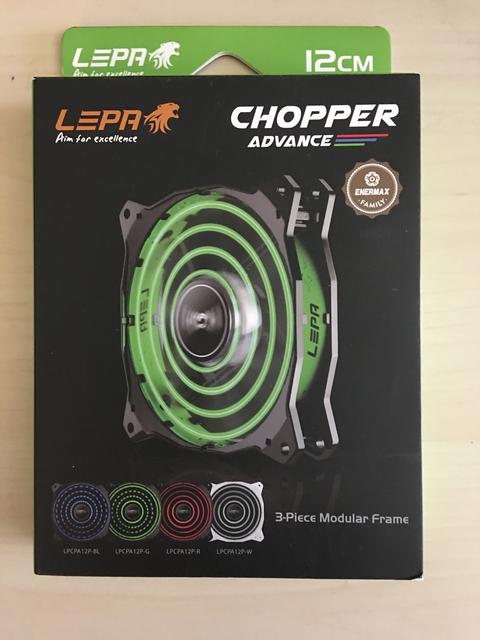 I did all custom wiring, even for the lighting. I used 3 Nanoxia UV Rigid Light Strips, cut off the ends, wired them together and then used my own wire to power them from a single power source routed through the toggle switch on the side of the case. 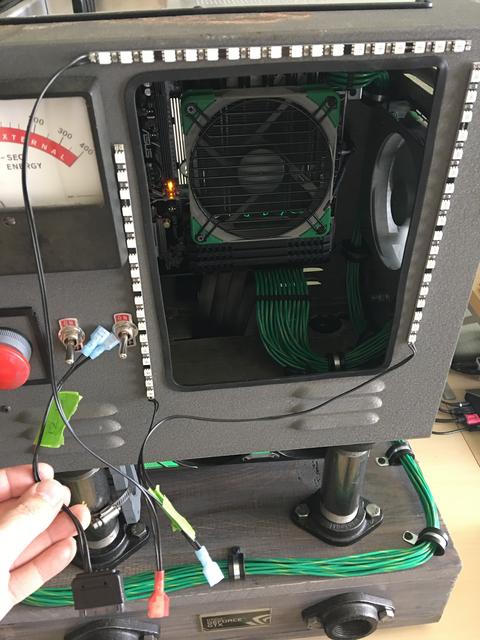  * Big Red Button Powers the PC * 1st Toggle Switch controls the white LED on the big power gauge * 2nd Toggle Switch controls the Nanoxia UV LED Strips 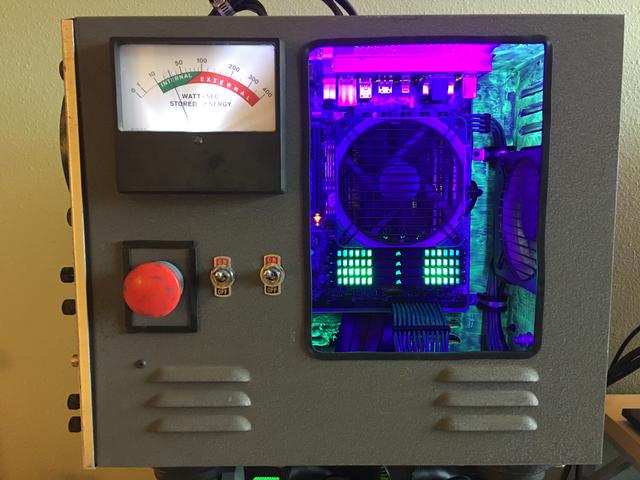 The UV Lights charge up the glow-in-the-dark paint, which looks really great when you turn them off 
|
DrunkMexican
Superclocked Member
- Total Posts : 121
- Reward points : 0
- Joined: 2015/10/23 09:20:22
- Location: Portland, OR
- Status: offline
- Ribbons : 3
Re: High Voltage (Oscilloscope Mod)
2019/04/26 10:46:55
(permalink)
Completed Work  Epic Cable Management Epic Cable Management
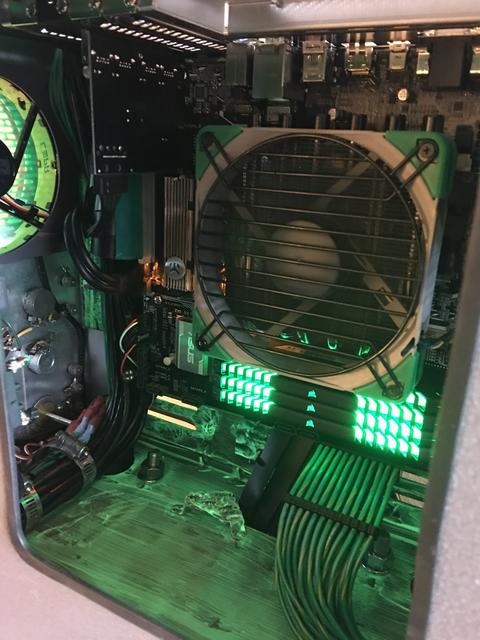   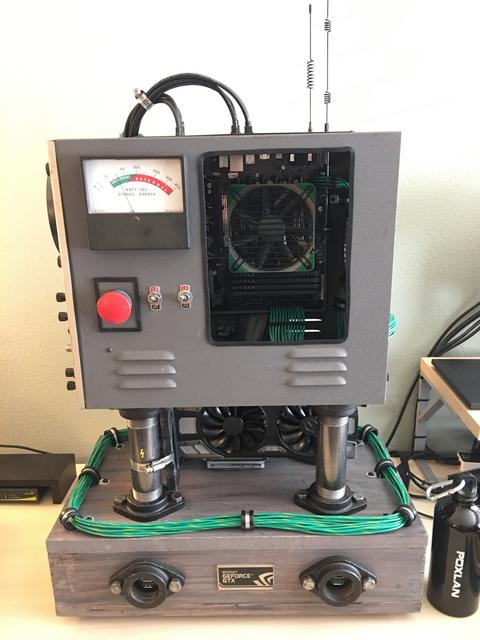 Specs: Specs:Asus H270M-Plus Motherboard Intel i7 7700k Corsair Vengeance RGB 32GB DDR4 EVGA GeForce GTX 1080 FTW Toshiba/OCZ 500 GB M.2 NVMe (OS Drive) Crucial MX500 1TB M.2 SATA (Games Drive) EVGA SFX 650W Power Supply
|
DrunkMexican
Superclocked Member
- Total Posts : 121
- Reward points : 0
- Joined: 2015/10/23 09:20:22
- Location: Portland, OR
- Status: offline
- Ribbons : 3
|
notfordman
Omnipotent Enthusiast

- Total Posts : 10345
- Reward points : 0
- Joined: 2007/08/09 23:52:23
- Location: In a van, down by the
- Status: online
- Ribbons : 28
Re: High Voltage (Oscilloscope Mod)
2019/04/26 21:05:21
(permalink)
I like every bit of it. Quite imaginative, that's why you won. Very cool! I started to like it when you made the connectors housed by the pipe connector. You have many different building skills and it shows, nice job. Pretty epic win, congrat's! 
|
DrunkMexican
Superclocked Member
- Total Posts : 121
- Reward points : 0
- Joined: 2015/10/23 09:20:22
- Location: Portland, OR
- Status: offline
- Ribbons : 3
Re: High Voltage (Oscilloscope Mod)
2019/04/28 23:39:58
(permalink)
notfordman
I like every bit of it. Quite imaginative, that's why you won. Very cool! I started to like it when you made the connectors housed by the pipe connector. You have many different building skills and it shows, nice job. Pretty epic win, congrat's!
Thank you! 
|
rjohnson11
EVGA Forum Moderator

- Total Posts : 102262
- Reward points : 0
- Joined: 2004/10/05 12:44:35
- Location: Netherlands
- Status: offline
- Ribbons : 84
Re: High Voltage (Oscilloscope Mod)
2019/05/02 09:35:01
(permalink)
Very original and innovative
|