Boddaker
iCX Member

- Total Posts : 316
- Reward points : 0
- Joined: 2007/02/09 17:13:09
- Location: Where the beer flows like wine
- Status: offline
- Ribbons : 18


Hello everyone, I'm bringing you a new scratch build project that I've been wanting to do for awhile now. I'll be making Rey's Speeder Bike from Star Wars: The Force Awakens. And as luck would have it, Cooler Master's case mod contest was just announced, so I thought I'd enter! So without further ado, let's get started! 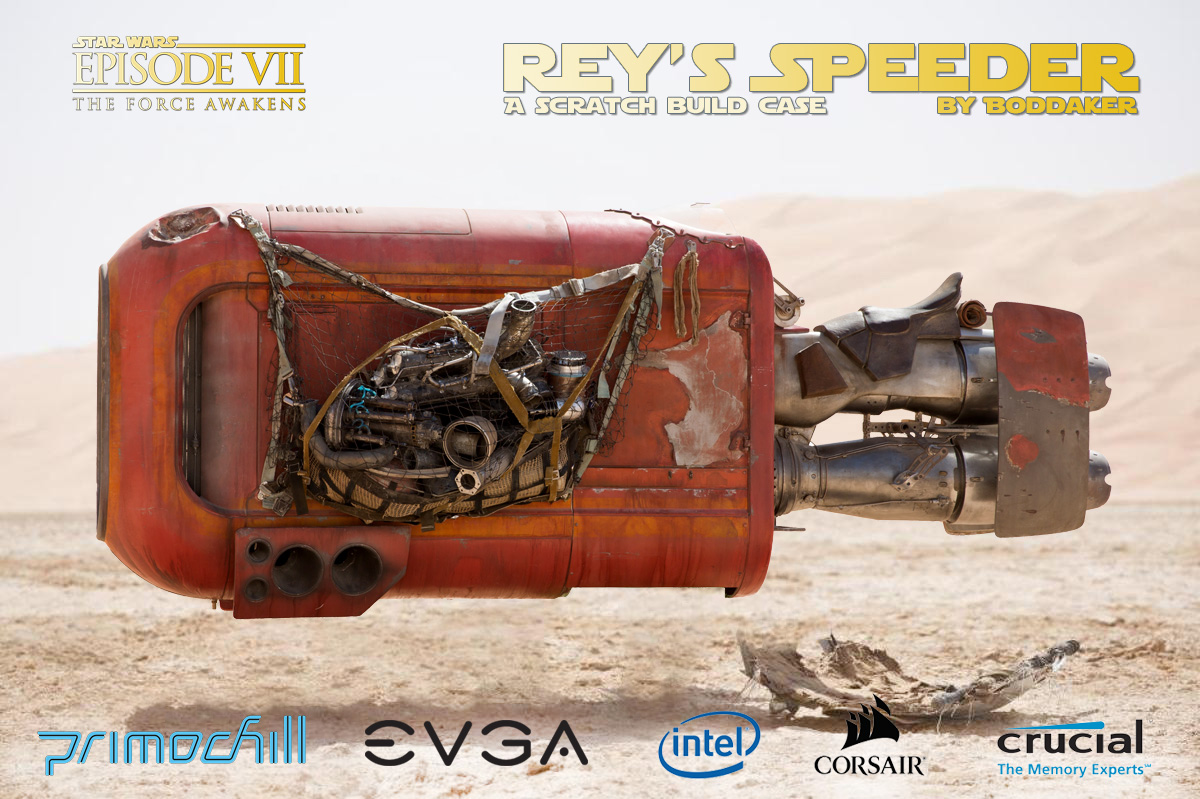 About a year ago, my family and I went to Disneyland, and they had lots of Star Wars props on display, including a life-size speeder that Rey used. As soon as I saw it, I knew it would make a great themed case. I took a bunch of reference pics while I was there, and I also scoured the web for more. Using those pics for scale, I whipped up a quick model in Sketchup to figure out component placement and get an overall sense of size. 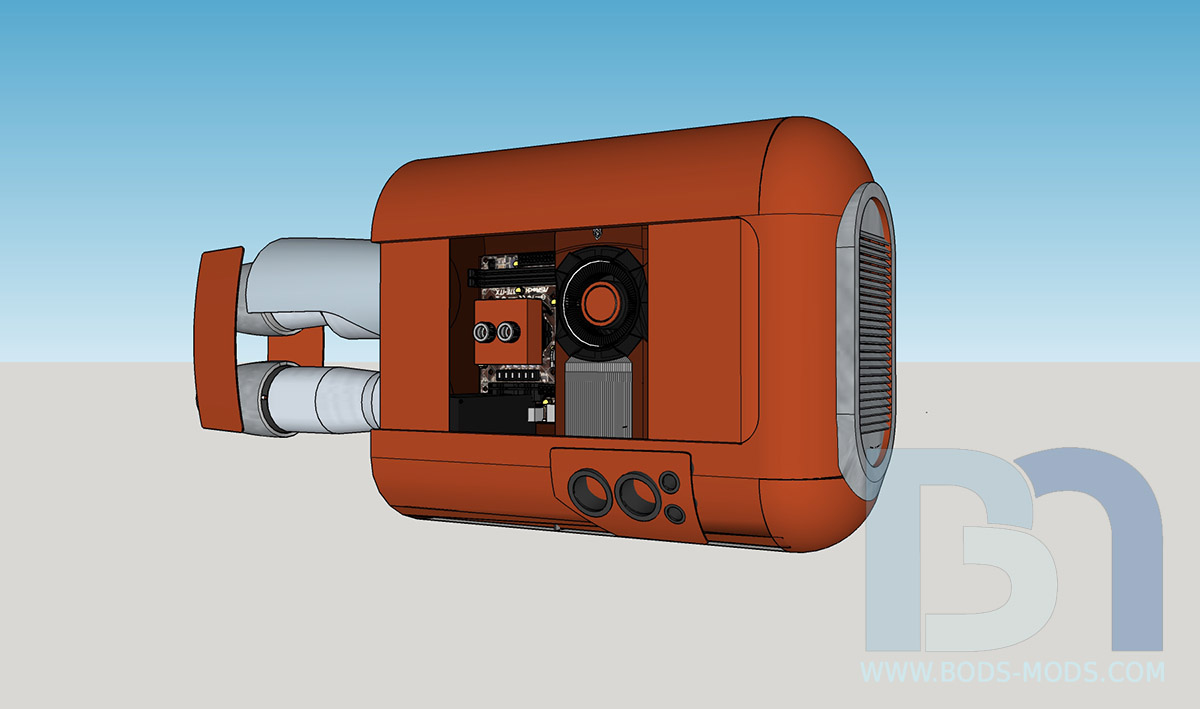
-----------------------------------------------------------------Hardware List:
Processor - Intel i7 7700K
Motherboard - EVGA Z270 Stinger mITX
Memory - Crucial Ballistix Elite DDR4 16Gb kit
Storage - Crucial MX300 SSD 525Gb x2
Graphics - NVIDIA GTX1080ti
PSU - Corsair SFX 600w
WC - Primochill tube, fittings, pump-res, cpu block
Peripherals - Corsair RGB Strafe keyboard, M65 Pro mouse, RGB fans, RGB Node Lighting kit
Qualifying product - Cooler Master XtraFlo 120mm fan
-----------------------------------------------------------------
I'll be going with an ITX format, so the case will be fairly small and lightweight. For materials, I'll be scavenging pieces from my scrap pile as much as possible, much in the same way Rey constructed her speeder from scavenged starship parts. :)  Once I got the sizing down, I could finally start construction, starting with the basic frame. I cut the rear bulkhead from an old Lian Li V2000 case panel ;-) 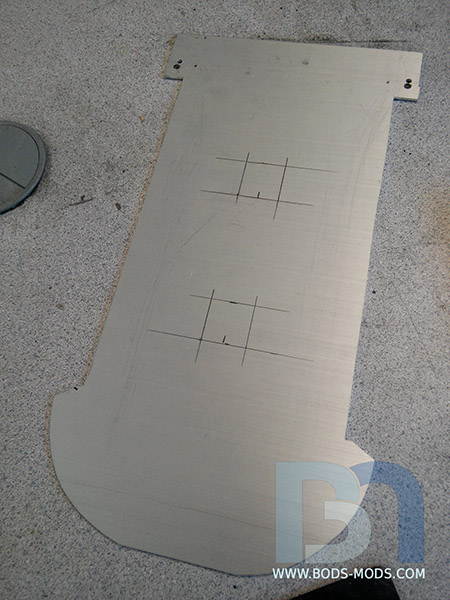 These square tubes will serve as internal support pieces for the rear engines. 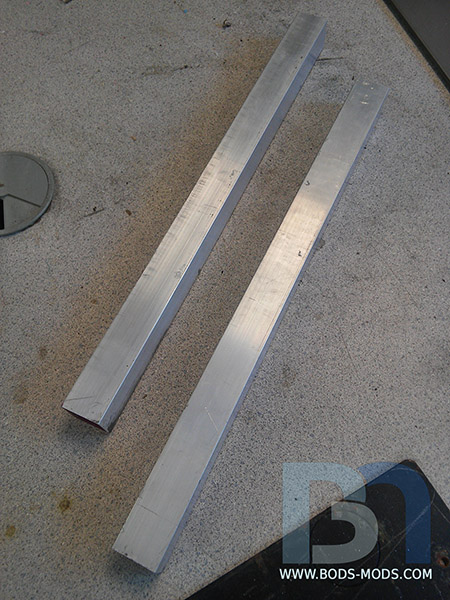 I'll be attaching the ends to the bulkhead with steel angle brackets. 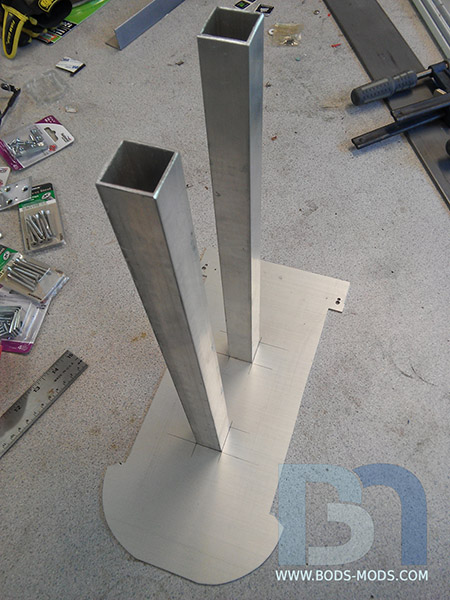 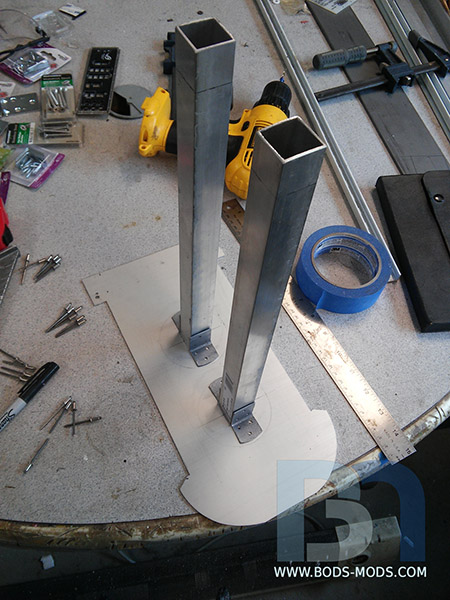 Brackets pop-riveted into place. 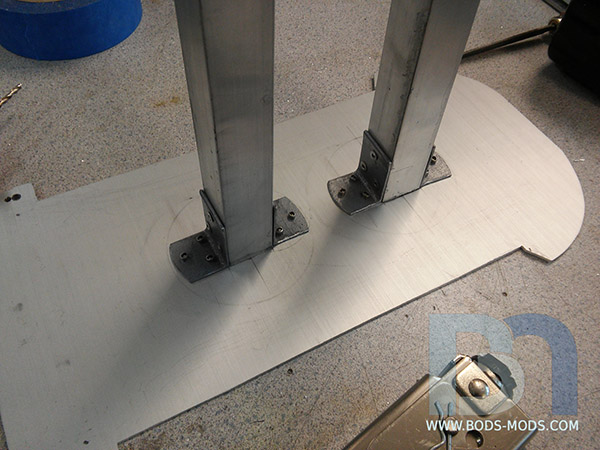 Here's the front side of the bulkhead after fastening the tubes. 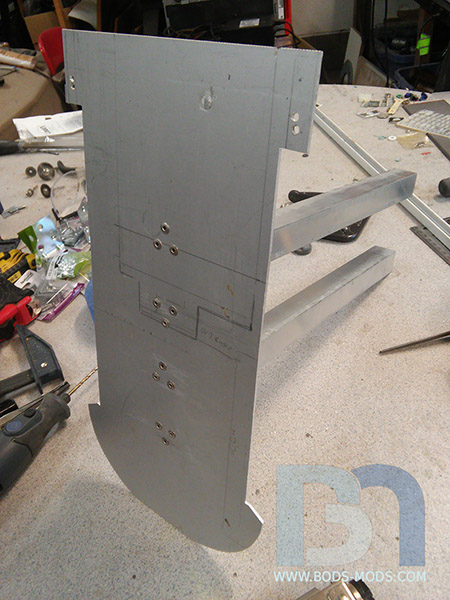 Next is the main frame construction.. I'm repurposing these aluminum shelving supports. Cutting V notches allows me to simply bend it into a rectangle. 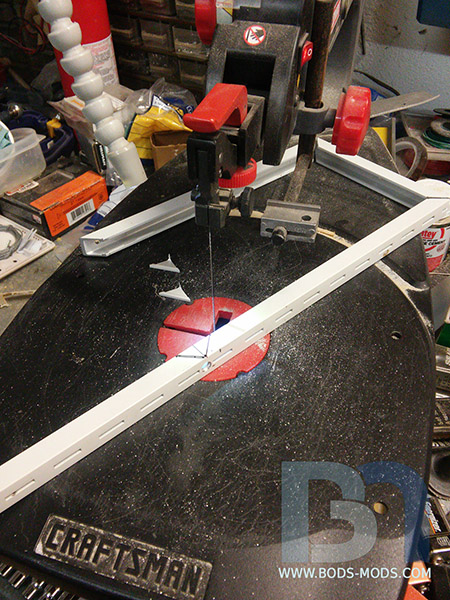 All notches cut and piece bent! 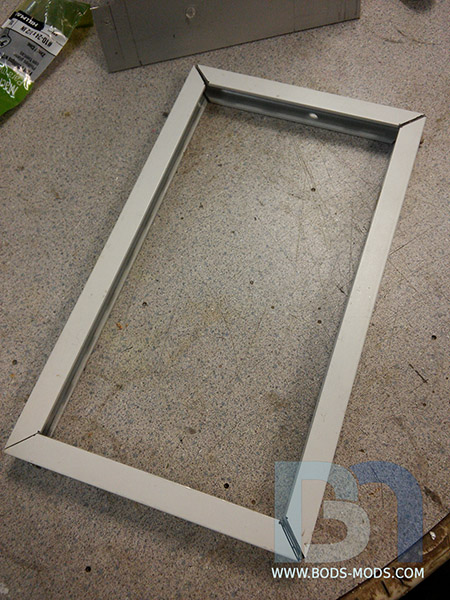 Placed on the bulkhead.. 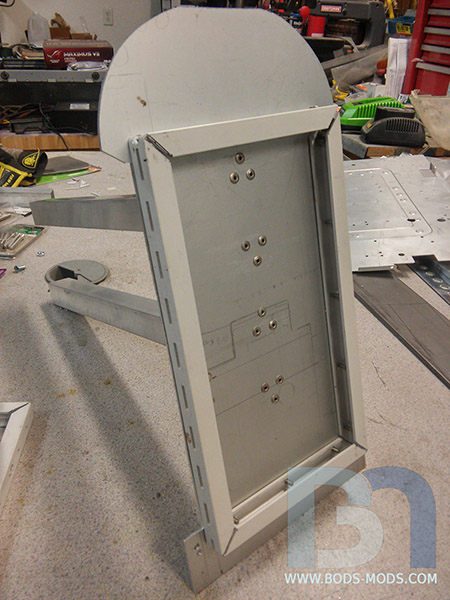 Dont mind the pencil markings, that was from an old mod made a long long time ago, in a garage far far away. :P 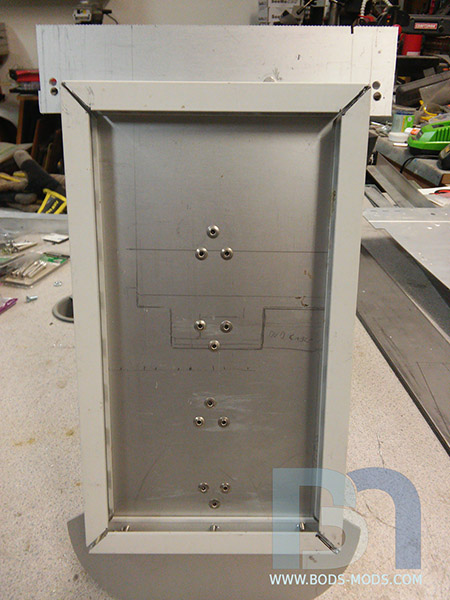 2nd one done.. 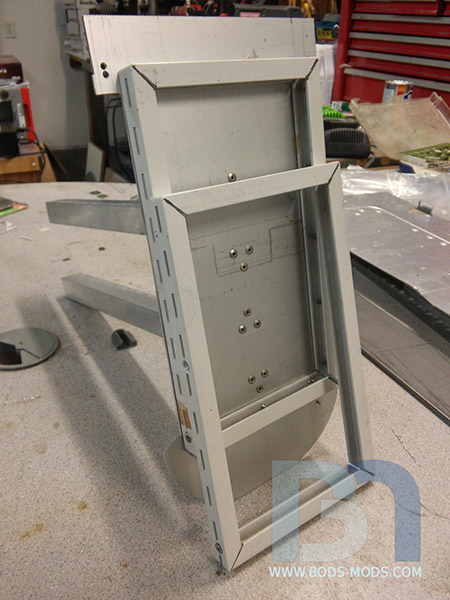 Next up will be connecting both frame ends together with cross beams to complete the main part of the frame. Hopefully, I'll be able to tackle that tonight!
post edited by Boddaker - 2017/03/09 10:32:03
|
the_Scarlet_one
formerly Scarlet-tech

- Total Posts : 24581
- Reward points : 0
- Joined: 2013/11/13 02:48:57
- Location: East Coast
- Status: offline
- Ribbons : 79
Re: Scratch Build: Rey's Speeder
2017/02/27 15:45:39
(permalink)
This looks exciting! Cant wait to see more.
|
NordicJedi
EVGA Forum Moderator

- Total Posts : 12570
- Reward points : 0
- Joined: 2007/07/16 21:05:08
- Status: offline
- Ribbons : 77
Re: Scratch Build: Rey's Speeder
2017/02/28 10:32:20
(permalink)
"I assure you, Lord Boddaker. My men are working as fast as they can!"
|
rjohnson11
EVGA Forum Moderator
- Total Posts : 102231
- Reward points : 0
- Joined: 2004/10/05 12:44:35
- Location: Netherlands
- Status: online
- Ribbons : 84
Re: Scratch Build: Rey's Speeder
2017/03/01 11:50:38
(permalink)
This is going to look great.
|
XrayMan
Insert Custom Title Here
- Total Posts : 73000
- Reward points : 0
- Joined: 2006/12/14 22:10:06
- Location: Santa Clarita, Ca.
- Status: offline
- Ribbons : 115
Re: Scratch Build: Rey's Speeder
2017/03/01 20:10:10
(permalink)
Have fun. 
My Affiliate Code: 8WEQVXMCJL Associate Code: VHKH33QN4W77V6A   
|
Boddaker
iCX Member
- Total Posts : 316
- Reward points : 0
- Joined: 2007/02/09 17:13:09
- Location: Where the beer flows like wine
- Status: offline
- Ribbons : 18
Re: Scratch Build: Rey's Speeder
2017/03/02 10:05:46
(permalink)
Thanks guys! I can't wait to get to all the details and weathering. That will take the most time. :) Got more framing done over the last couple nights. I pilfered a motherboard tray from an old case and cut it down.. 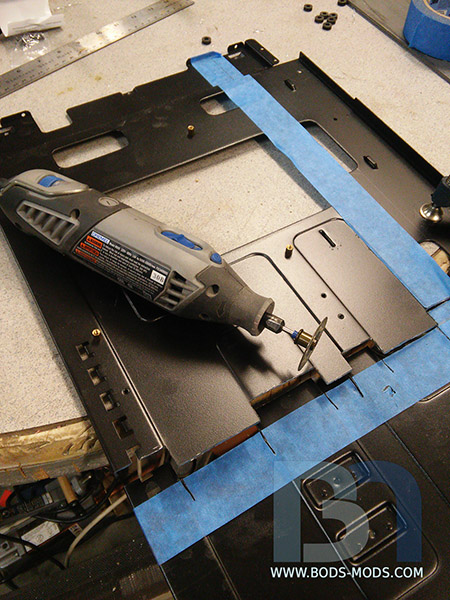 I trimmed away all the exraneous parts, leaving enough material to make mounting tabs on the edges. 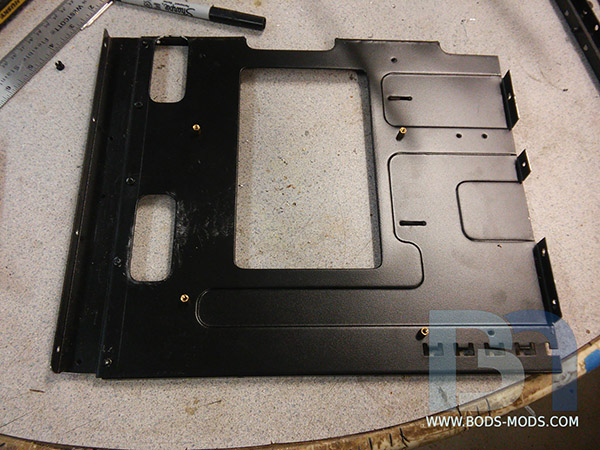 Aluminum angle bar makes up the basic frame in the center.. 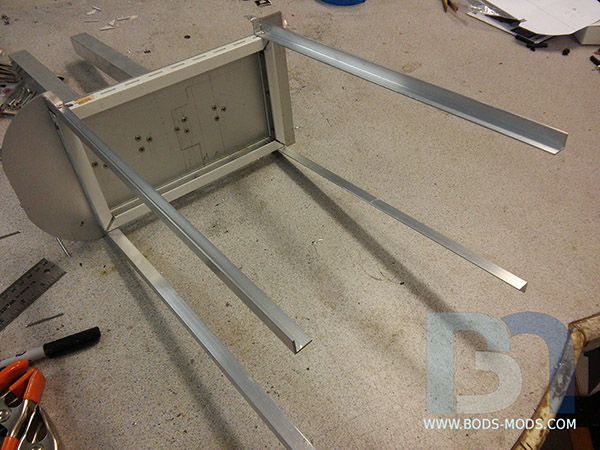 ..and the motherboard tray provides rigidity. Pop rivets will be used to secure it to the frame. 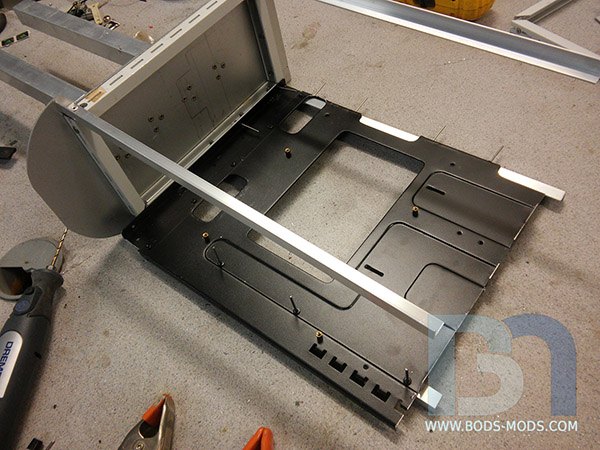 Next up will be finishing the frame with the second C-channel piece, which will also serve as the radiator support.
|
rjohnson11
EVGA Forum Moderator
- Total Posts : 102231
- Reward points : 0
- Joined: 2004/10/05 12:44:35
- Location: Netherlands
- Status: online
- Ribbons : 84
Re: Scratch Build: Rey's Speeder
2017/03/04 14:18:43
(permalink)
Interesting. Very interesting.
|
Zenator
Superclocked Member

- Total Posts : 219
- Reward points : 0
- Joined: 2015/06/21 01:52:17
- Location: Canberra AUS
- Status: offline
- Ribbons : 8
Re: Scratch Build: Rey's Speeder
2017/03/05 04:21:06
(permalink)
I'm watching, Looking good mate. :)
|
Boddaker
iCX Member
- Total Posts : 316
- Reward points : 0
- Joined: 2007/02/09 17:13:09
- Location: Where the beer flows like wine
- Status: offline
- Ribbons : 18
Re: Scratch Build: Rey's Speeder
2017/03/06 09:44:24
(permalink)
Got the front part of the frame fabbed up over the weekend.. Started with a paper template, derived from my Sketchup model. 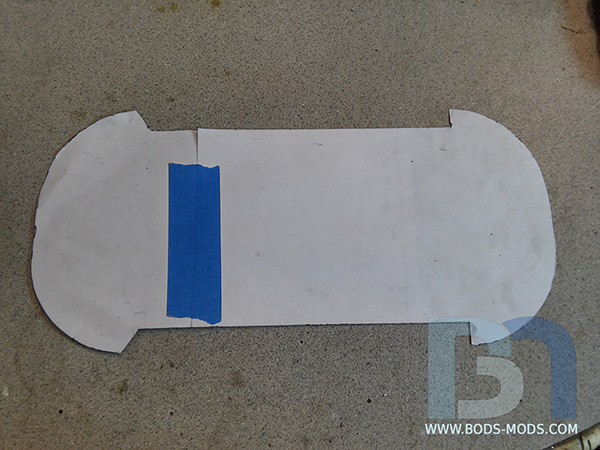 I didn't have any more large pieces of aluminum panel, but since the front bulkhead will serve as the radiator mount, most of the center will be cut out for airflow. So I could use smaller bits to piece it together.. 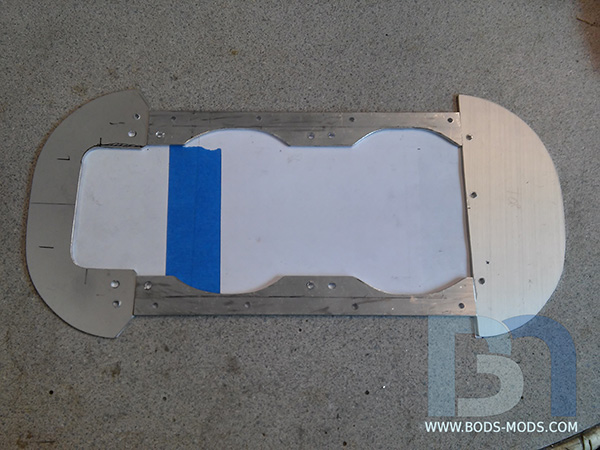 The box frame holds the Corsair 120mm RGB fans in place, and holds all the pieces together. I opted for a stronger steel C channel for this, rather than the white aluminum one like in the rear. 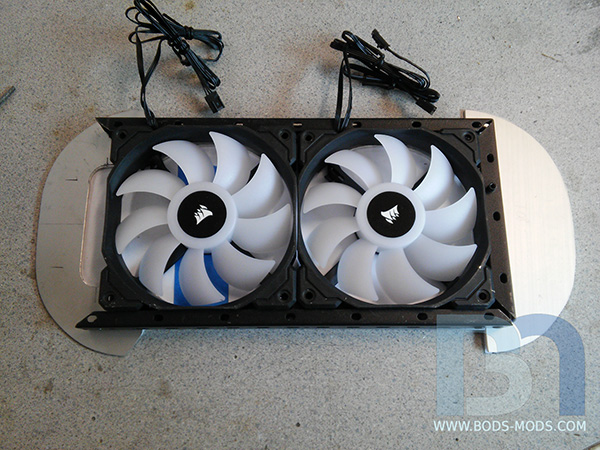 The 240mm radiator fits perfectly on the front side of the bulkhead. 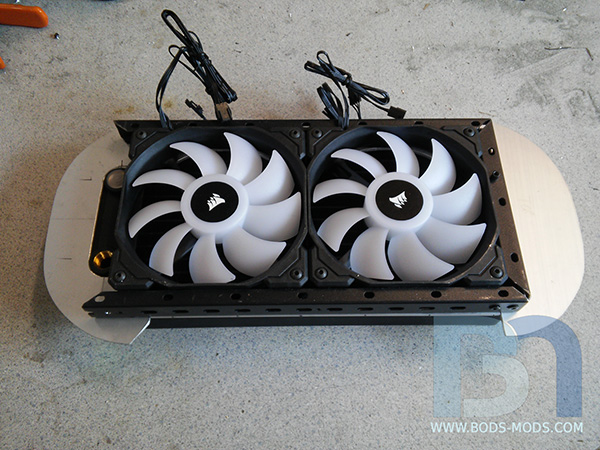 Once the fans are fastened to the rad, the bulkhead is sandwiched in between.. 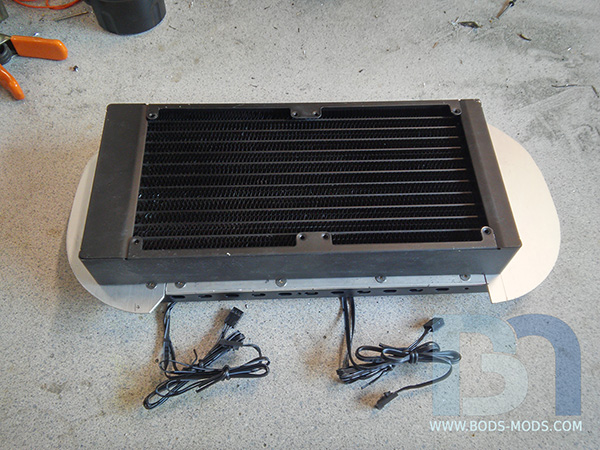 With the entire front assembly taped to the rest of the frame, you can see the Speeder shape coming together.  Here's a shot with a spare EVGA mITX motherboard placed to give you an idea of internal spacing. 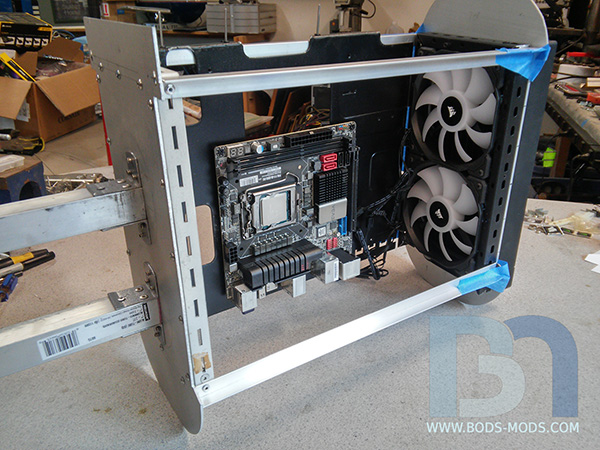 Once the framing is secured, I can start making brackets for mounting the PSU, SSD's, graphic card, and pump-res. Stay tuned! :)
|
Cool GTX
EVGA Forum Moderator
- Total Posts : 30968
- Reward points : 0
- Joined: 2010/12/12 14:22:25
- Location: Folding for the Greater Good
- Status: online
- Ribbons : 122
Re: Scratch Build: Rey's Speeder
2017/03/06 09:55:52
(permalink)
Interesting full custom build. Keep the updates coming 
|
rjohnson11
EVGA Forum Moderator
- Total Posts : 102231
- Reward points : 0
- Joined: 2004/10/05 12:44:35
- Location: Netherlands
- Status: online
- Ribbons : 84
Re: Scratch Build: Rey's Speeder
2017/03/06 10:13:35
(permalink)
Cool GTX
Interesting full custom build. Keep the updates coming
+1
|
Boddaker
iCX Member
- Total Posts : 316
- Reward points : 0
- Joined: 2007/02/09 17:13:09
- Location: Where the beer flows like wine
- Status: offline
- Ribbons : 18
Re: Scratch Build: Rey's Speeder
2017/03/09 10:11:00
(permalink)
Thanks guys! Here is some of the hardware that will be going into the Speeder Bike... The processor I will be using is an Intel i7 7700k. 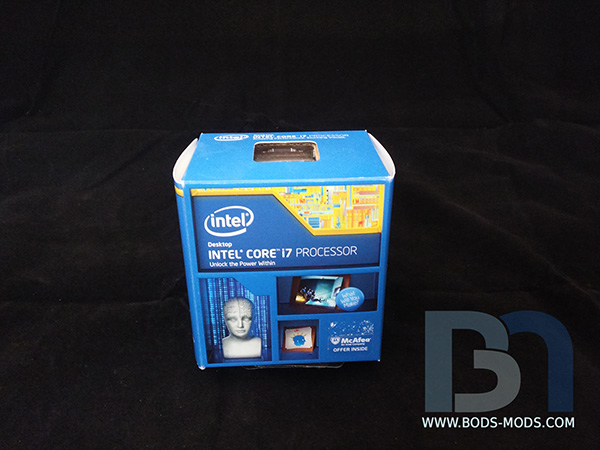 A big thank you to Corsair! :) They came through in a big way, providing a 600w SFX psu, RGB fan and lighting kit, and a keyboard and mouse to boot! 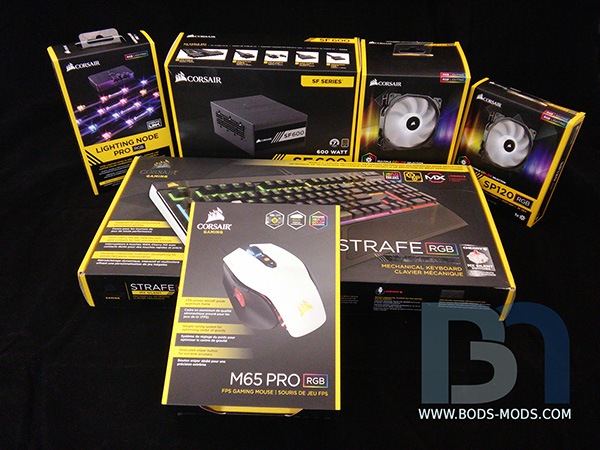 Crucial set me up with some awesome gear as well.. a 16gb DDR4 memory kit, and two MX300 SSD's! 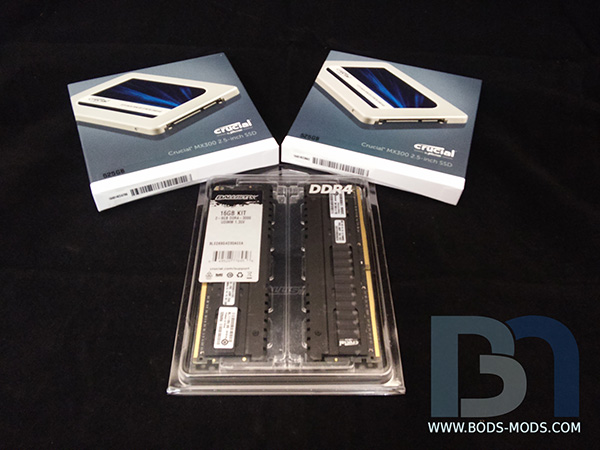 And for my qualifying products, I'll be using these fans from Cooler Master. :) 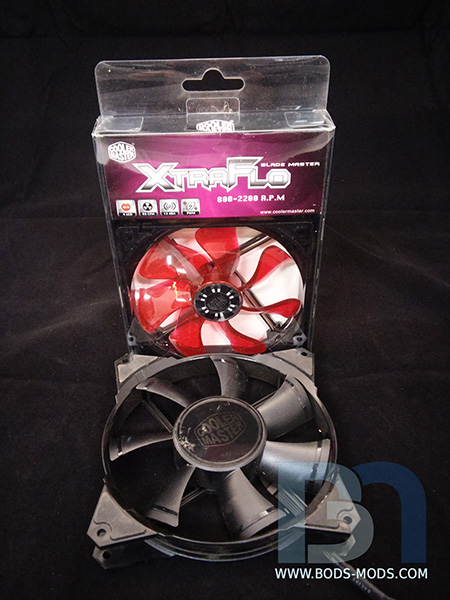 I'll post more hardware shots as I get them in. I'll be getting a Z270 Stinger mITX motherboard from EVGA when it becomes available, some really killer WC gear from Primochill, and maybe even a little something from NVIDIA...
|
rjohnson11
EVGA Forum Moderator
- Total Posts : 102231
- Reward points : 0
- Joined: 2004/10/05 12:44:35
- Location: Netherlands
- Status: online
- Ribbons : 84
Re: Scratch Build: Rey's Speeder
2017/03/11 04:45:44
(permalink)
A very nice selection of parts.
|
Boddaker
iCX Member
- Total Posts : 316
- Reward points : 0
- Joined: 2007/02/09 17:13:09
- Location: Where the beer flows like wine
- Status: offline
- Ribbons : 18
Re: Scratch Build: Rey's Speeder
2017/03/13 12:29:47
(permalink)
Time for the Monday Weekend Progress Report! Got some actual hardware mounted.. After some deliberation and pondering, I decided to go with panel mount extensions for the power, USB, ethernet, and displayport cables. This way, all connections will be at the rear, below the engines, rather than having cables dangling out the bottom. So to ensure there's enough space for all the cabling, I raised the power supply location up on the back bulkhead, and cut a notch in the side channel so it sits flush. 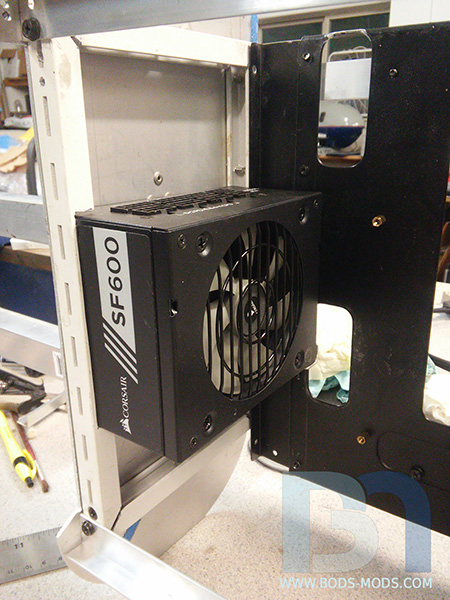 Then I made a corner bracket from 1/2" angle bar to secure the Corsair SFX PSU to the frame.. 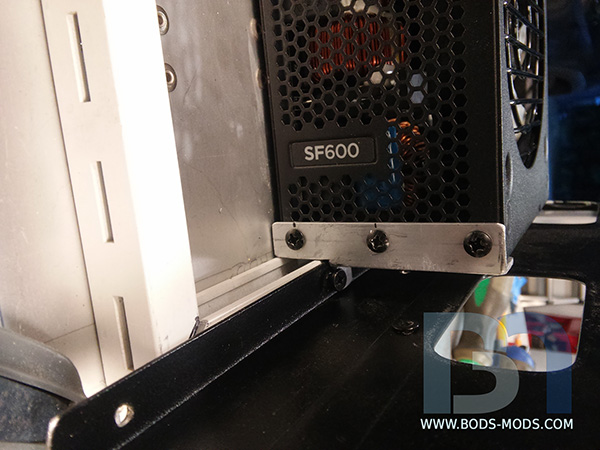 I also made a 3/8" C bracket to hold the other side of the PSU in place. 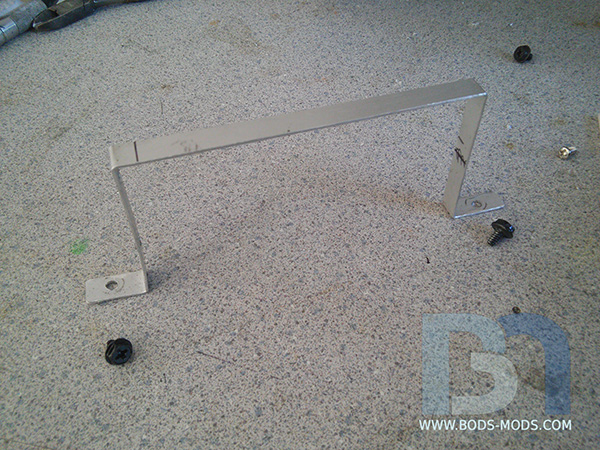 Measured and drilled holes to match those in the PSU.. 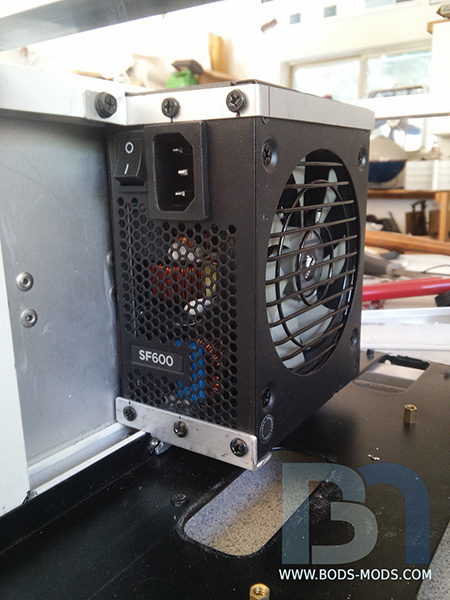 ..And drilled mounting holes in the frame. 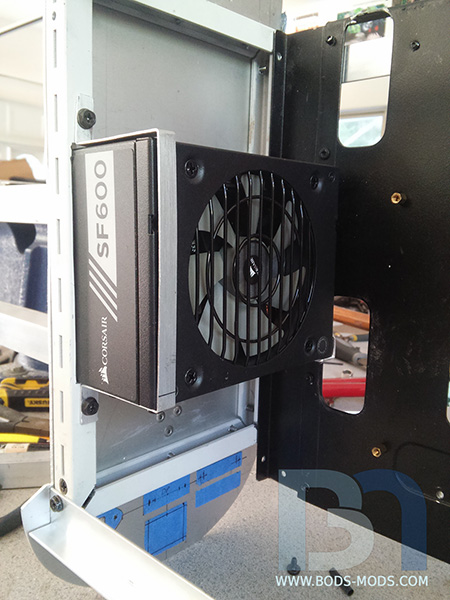 With the PSU done, I started on the SSD's. I took advantage of the center opening in the motherboard tray, positioning the drives so I can easily route the SATA and power cables. I used motherboard stand-offs to raise the drives up a bit. 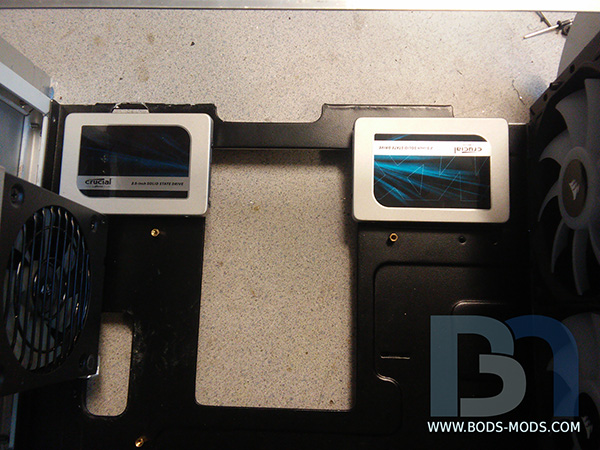 Here's an overall shot of the SSD's with cables connected, utilizing the access hole in the tray. Spare mobo in for effect.. 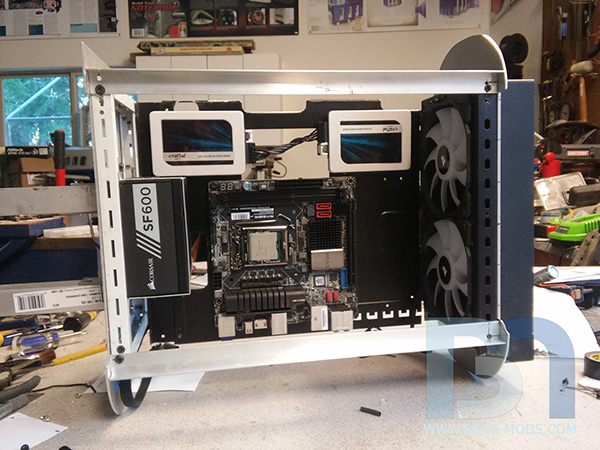 With the SSD's checked off the list, next up is the video card. I had originally had the video card placed horizontally in the concept rendering, facing the side panel.. But now with the power supply mounted up higher than planned, there isnt enough space.. So I will be mounting it vertically, which actually works out better for aligning to the rotated motherboard. I plugged the card directly into the mobo, but it blocks the airflow to the radiator, and you can't really see it. 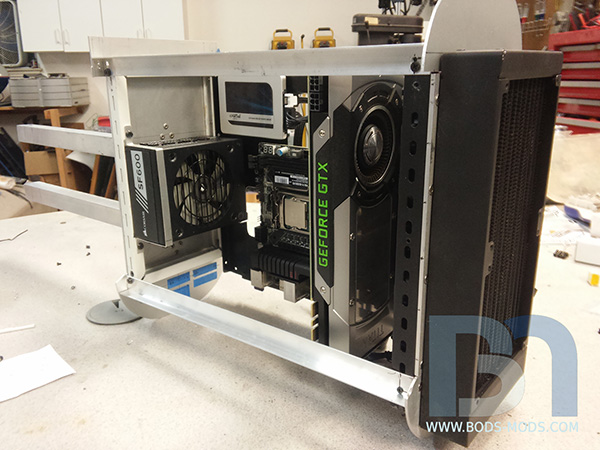 So with the help of a PCIe riser cable, I can mount the card away from the radiator, facing the side panel.. 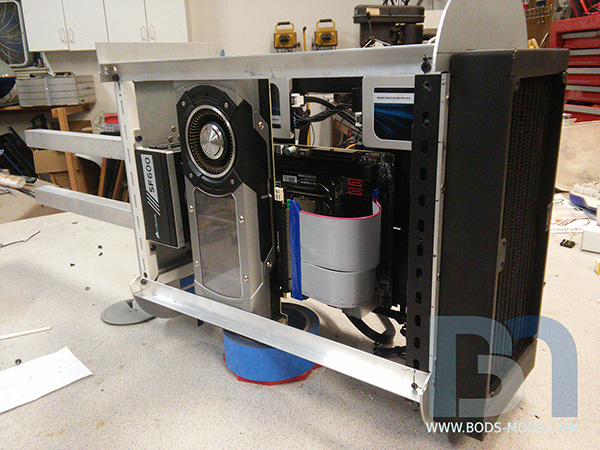 I should be able to fab up a mounting bracket for that in the next couple days. :) Thanks for watching!
|
loveha
Omnipotent Enthusiast

- Total Posts : 10497
- Reward points : 0
- Joined: 2009/09/26 01:51:22
- Location: Beulah Michigan
- Status: offline
- Ribbons : 65
Re: Scratch Build: Rey's Speeder
2017/03/13 12:45:50
(permalink)
Case - Phanteks Enthoo Evolv XMobo - EVGA X570 FTWCPU - AMD Ryzen 9 5900XRAM - 32GB Trident Z Royal 3600MHz 14-14-14-34GPU - EVGA RTX 3080 Ti FTW3 Ultra GamingPSU - Seasonic Prime TX-1000Heatkiller IV CPU Waterblock / Heatkiller V GPU WaterblockHeatkiller V EBC Active Backplate / Two Heatkiller Rad 360 L Six Noctua NF-A12x25 / Heatkiller D5 Pump
|
Boddaker
iCX Member
- Total Posts : 316
- Reward points : 0
- Joined: 2007/02/09 17:13:09
- Location: Where the beer flows like wine
- Status: offline
- Ribbons : 18
Re: Scratch Build: Rey's Speeder
2017/03/20 11:17:01
(permalink)
Well this last weekend was a productive one! My SeeMeCNC printer finally got a good long-overdue workout, with the printing of all the engine pieces. :) After gathering a healthy amount of Speeder reference pics, I drew up the engine pieces in Sketchup and scaled them to the correct size. And thanks to an STL export extension, I was able to save them directly out of Sketchup and load the files right into MatterControl, which is SeeMeCNC's printer software. You can see the interface in the background as the printer spits out the first engine nozzle.. 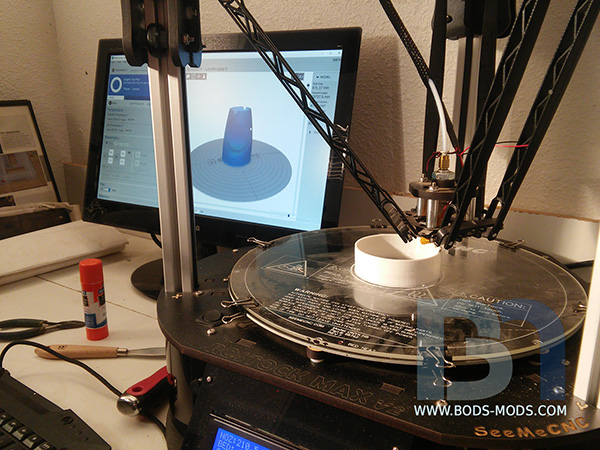 Not bad! I'm only printing in standard resolution (.2mm layer height).. the Rostock Max2 will do .1mm, but will also take twice as long to print. This nozzle took about 4hrs. 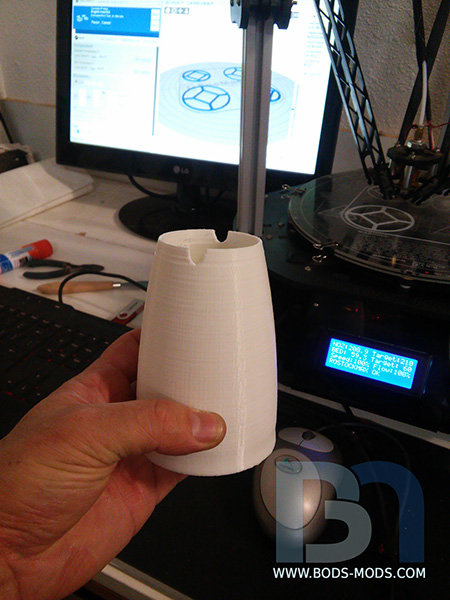 I devised a simple insert to mount all the engine pieces onto the box tubing, and printed them out. I printed them separately to avoid having a bunch of supports inside each piece. 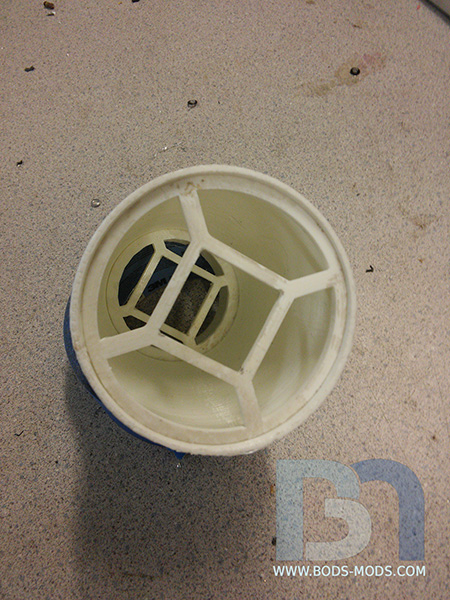 The inserts fit snugly onto the tubing, and keeps everything centered. 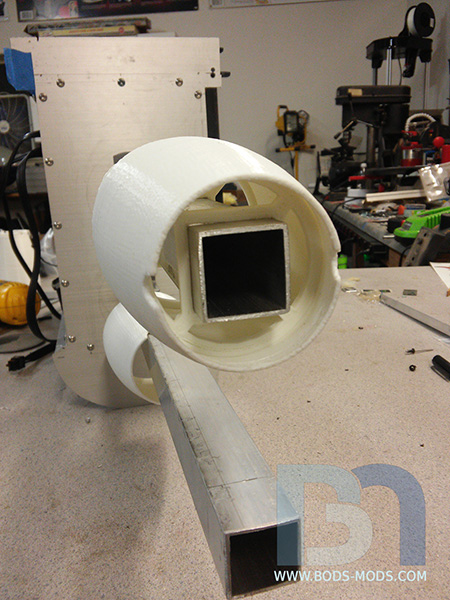 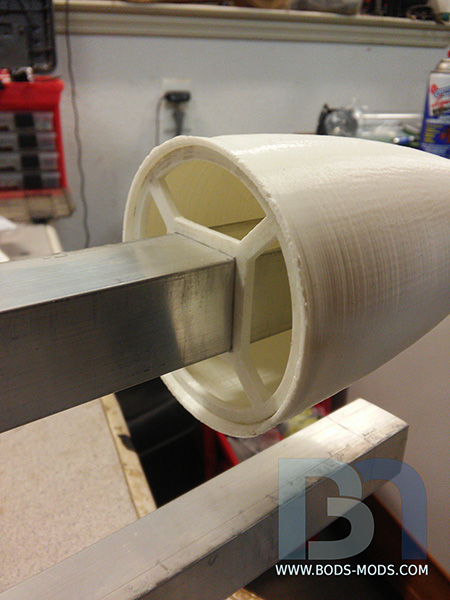 Both nozzles printed.. 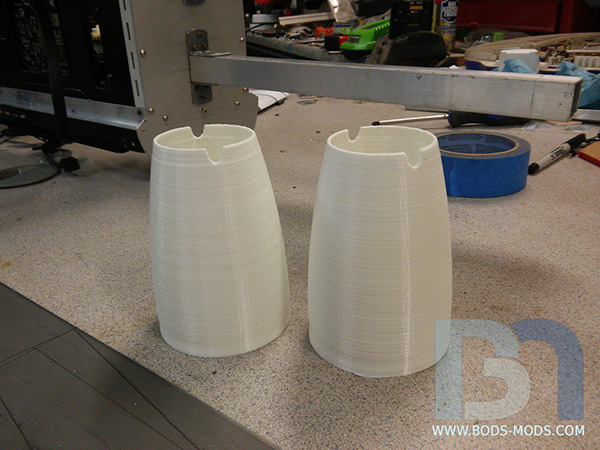 .. and both with inserts, mounted on the tubing.. 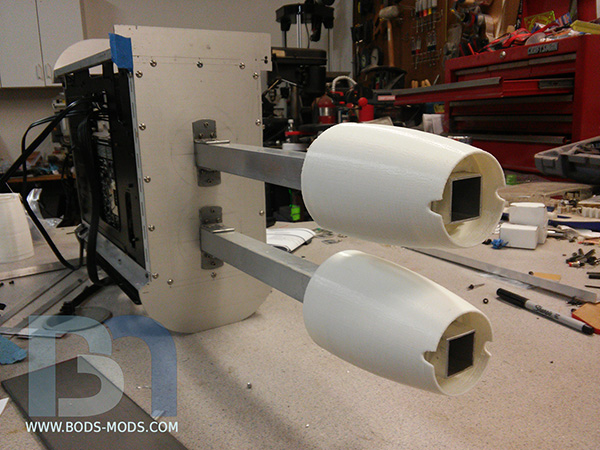 The center engine piece was next, and inserts printed for it as well. 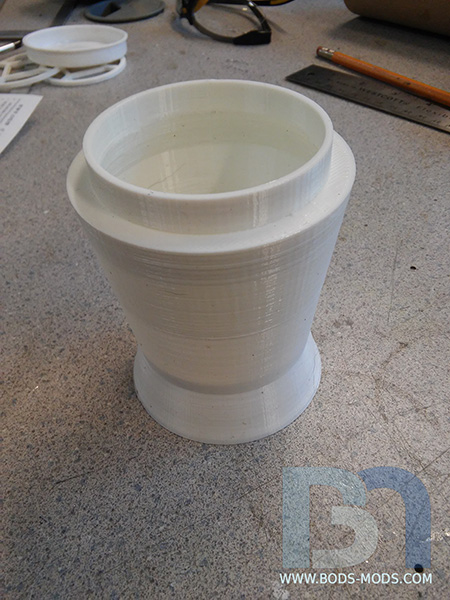 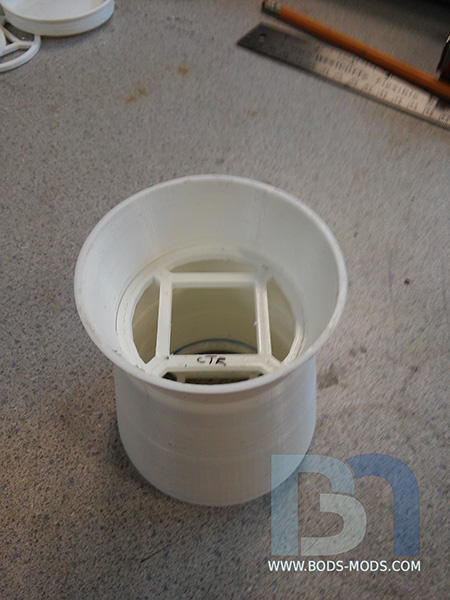 For the rest of the engine pieces, I opted to just use cardboard shipping tube, since they are just basic cylinders.. and I happen to have 3" dia. tube on hand. :) I just skinned them with sheet styrene. 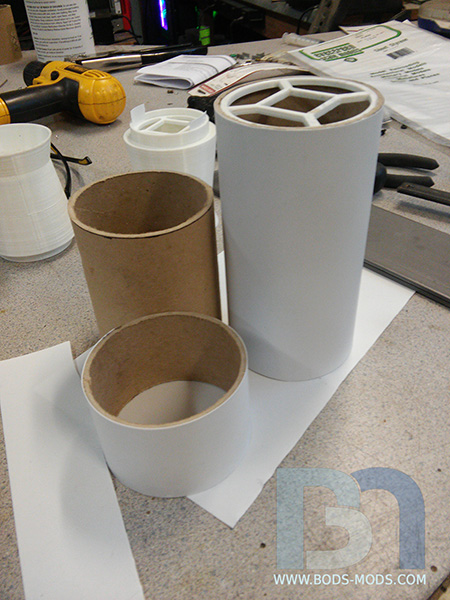 After adding inserts to the cardboard tube pieces, I assembled both engines onto the box tubing.. 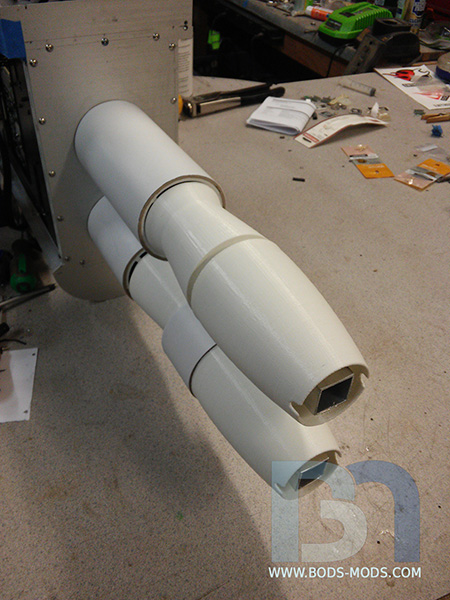 The center pieces are the same on both engines, just reversed. 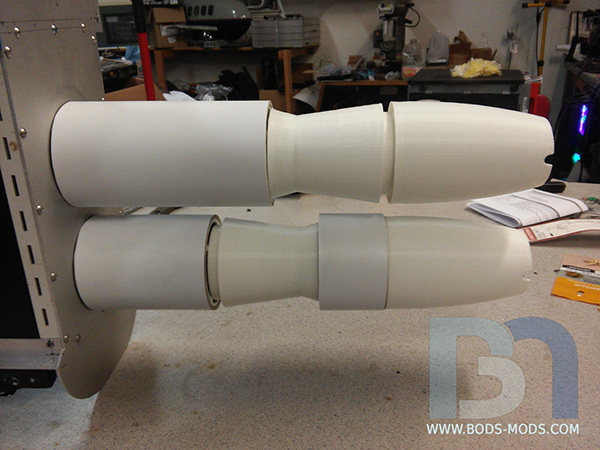 And an overall shot of the Speeder bike with engines. 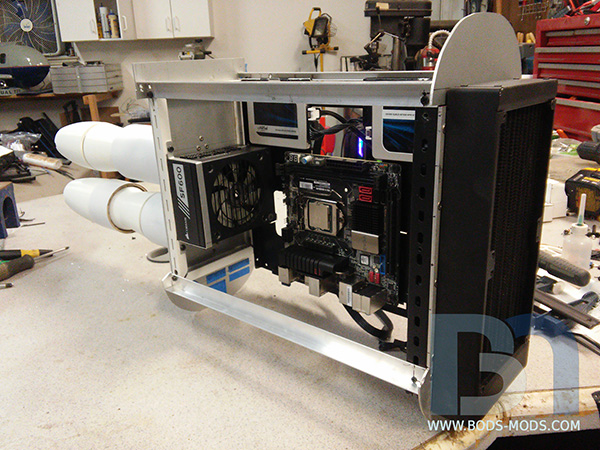 I still need to make a couple end caps for the cylinder pieces to close them up, which I can just cut from styrene and glue them on. More printing on the way, so stay tuned! :)
|
Cool GTX
EVGA Forum Moderator
- Total Posts : 30968
- Reward points : 0
- Joined: 2010/12/12 14:22:25
- Location: Folding for the Greater Good
- Status: online
- Ribbons : 122
Re: Scratch Build: Rey's Speeder
2017/03/20 11:37:56
(permalink)
Your SeeMeCNC printer is a neat Toy
|
Boddaker
iCX Member
- Total Posts : 316
- Reward points : 0
- Joined: 2007/02/09 17:13:09
- Location: Where the beer flows like wine
- Status: offline
- Ribbons : 18
Re: Scratch Build: Rey's Speeder
2017/03/22 09:05:21
(permalink)
Cool GTX
Your SeeMeCNC printer is a neat Toy
Thanks, I'm loving it! Sometimes I just sit and watch it print for a while. It's so mesmerizing! :P Here's more printing goodness! After the engines, I started on the back panel that will cover the rear bulkhead area around the engines. This was a pretty big piece, so I had to separate it into two prints. This is the bottom half.. 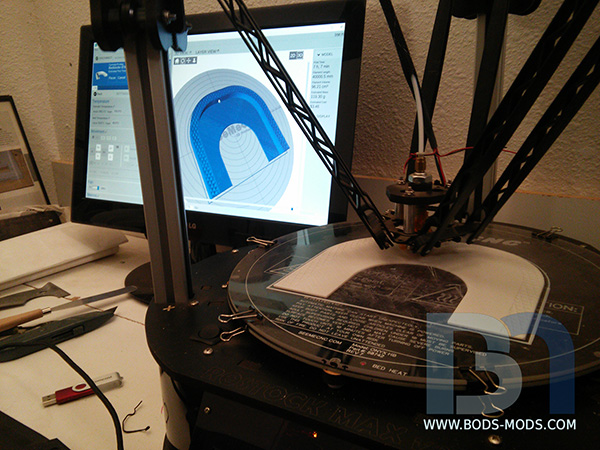 Woke up the next morning to a perfect print! 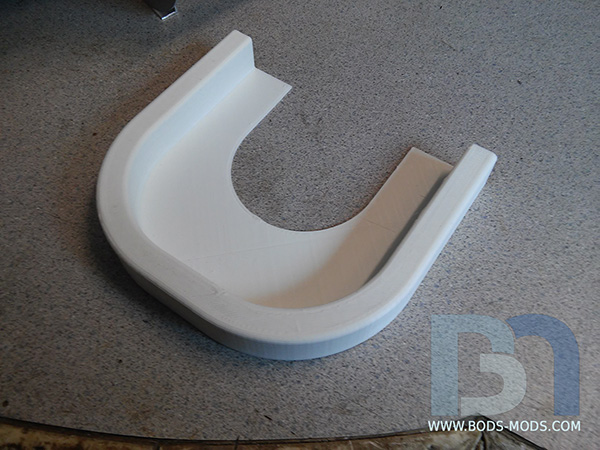 Here's how it fits on the rear bulkhead, around the engine tube.. 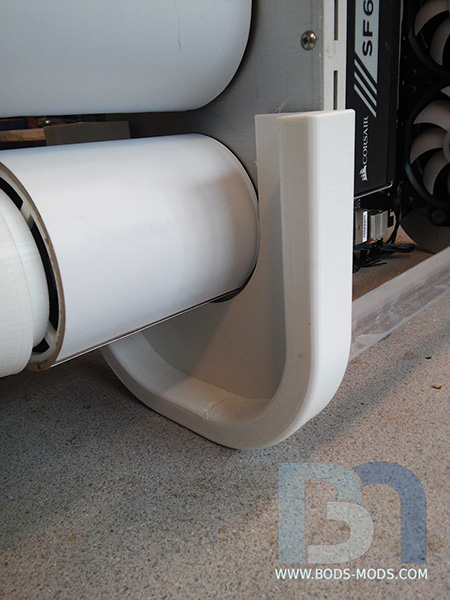 Next is the top half, just finished.. 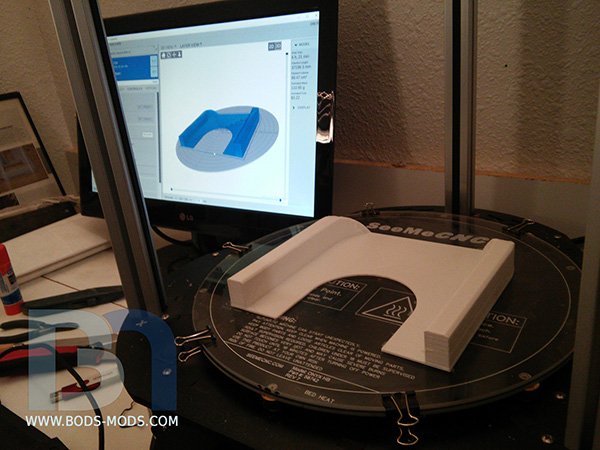 Both halves together.. 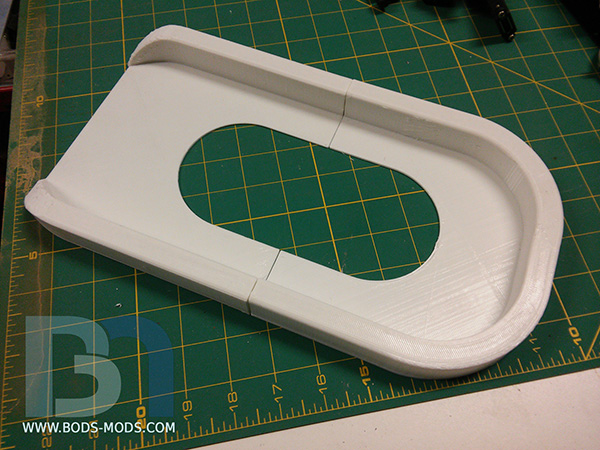 ..and placed around the engines. The tips are a little rough on the top, but can be smoothed out. 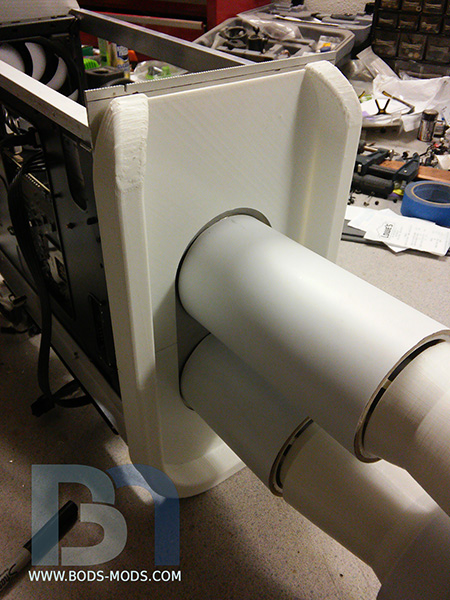 an overall shot of the Speeder.. 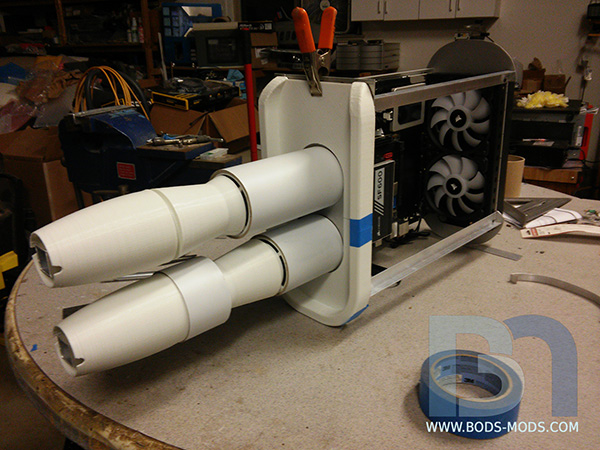 Next I'll be working on the front grill pieces and front nose. That should be interesting!
|
Cool GTX
EVGA Forum Moderator
- Total Posts : 30968
- Reward points : 0
- Joined: 2010/12/12 14:22:25
- Location: Folding for the Greater Good
- Status: online
- Ribbons : 122
Re: Scratch Build: Rey's Speeder
2017/03/22 12:14:47
(permalink)
Very NICE 
|
notfordman
Omnipotent Enthusiast
- Total Posts : 10344
- Reward points : 0
- Joined: 2007/08/09 23:52:23
- Location: In a van, down by the
- Status: offline
- Ribbons : 28
|
Boddaker
iCX Member
- Total Posts : 316
- Reward points : 0
- Joined: 2007/02/09 17:13:09
- Location: Where the beer flows like wine
- Status: offline
- Ribbons : 18
Re: Scratch Build: Rey's Speeder
2017/03/24 20:13:23
(permalink)
notfordman
Guess I didn't look hard enough for this project, bummer. Subbed! What a cool project to start with. I really enjoy the mods you make Mr. Bod. You are very creative, I really enjoy it. Is the 3D printer a semi recent addition? Such a great tool, I want one! And I know what you mean about sitting back, and watching the printer do it's voodoo. That would be me too. Coming along really well. One thing I really like, is that the build is scraps, like you said. Are you water cooling the CPU or are you doing the GPU as well? Carry on please! 
Thanks for the kind words notfordman! I got the 3D printer a while ago, but am just now making good use of it. I printed the rose for my daughter's case last year, but that's about it aside from this project. For this build, I'll be watercooling just the CPU (utilizing Primochill's new block :D). I'm hoping to procure an EVGA 1080ti with ICX cooling and incorporate that into the side of the case. :)
|
Boddaker
iCX Member
- Total Posts : 316
- Reward points : 0
- Joined: 2007/02/09 17:13:09
- Location: Where the beer flows like wine
- Status: offline
- Ribbons : 18
Re: Scratch Build: Rey's Speeder
2017/03/27 10:58:50
(permalink)
Here's your Monday Mod Update for March 27th.. Got the Primochill pump and res mounted! About the only place I could mount the pump was in between the motherboard and fans. It was a tight squeeze, but it will fit! Using the rubber gasket, I marked the holes to drill for the mounting brackets. 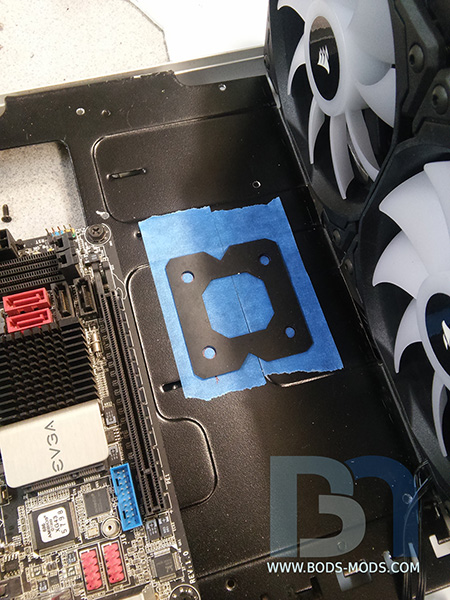 After positioning the pump directly on the mobo tray, I noticed the top input port was just a little off-center, case-wise.. 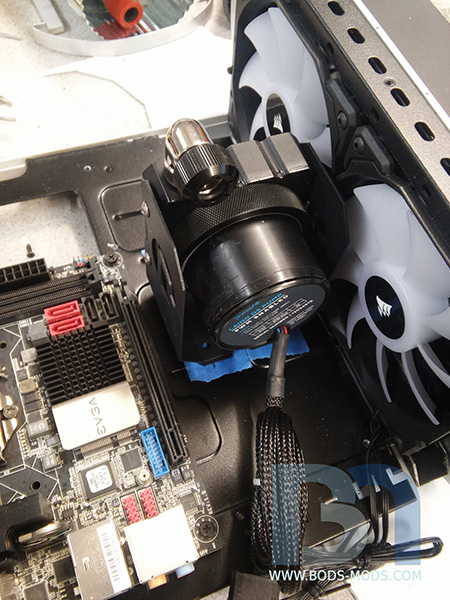 ...so I added a 1/4" shim to bring it out. 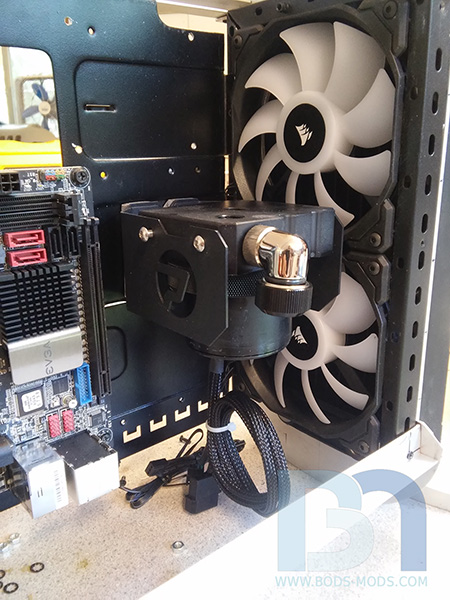 Now it lines up perfectly with the reservoir. 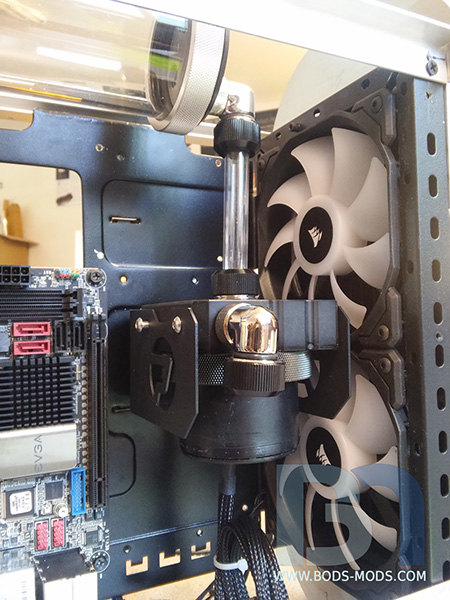 I wanted to put the Primochill CTR tube res across the top, so I positioned it in the center using a piece of tape to support it while I took measurements. 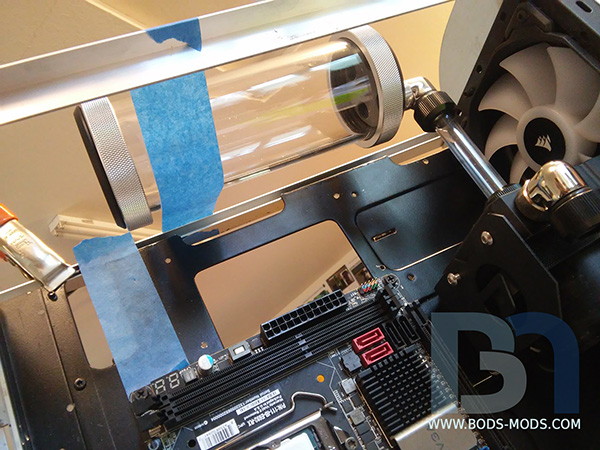 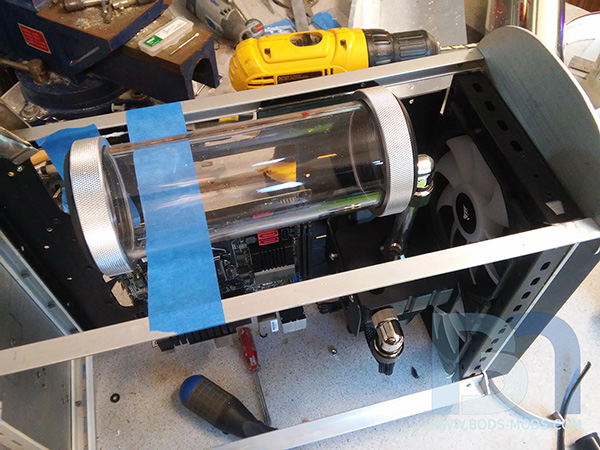 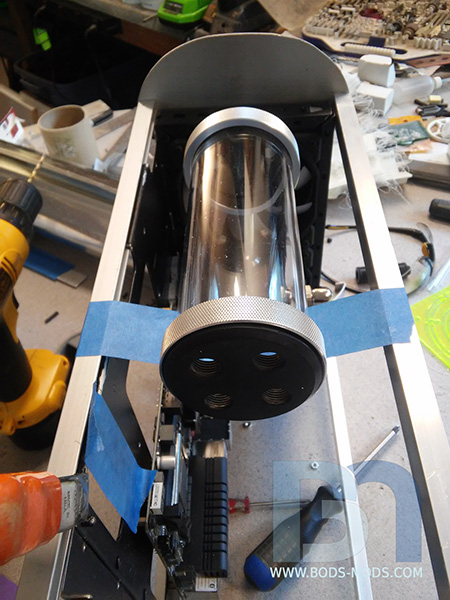 Once I took down all the measurements, I jumped into Sketchup and whipped up a special two-piece mounting bracket to cradle the res, with mounting tabs on each end. 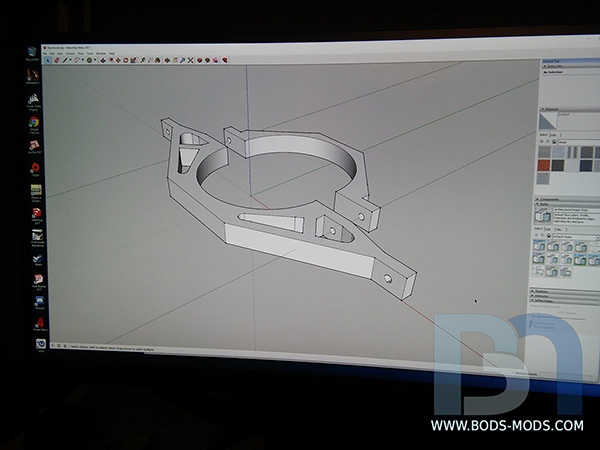 Exported the STL and printed out two sets in ABS. 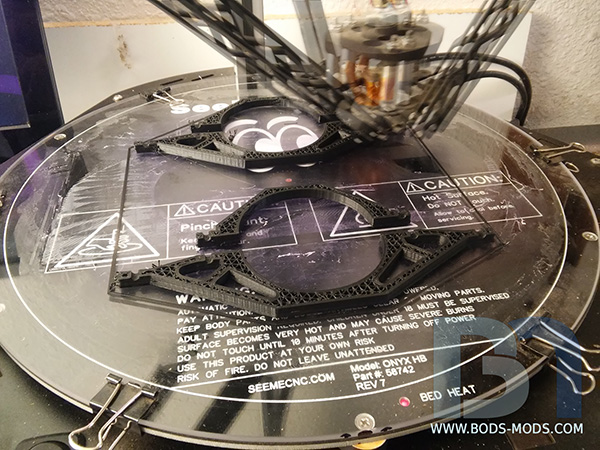 These took just about 1 1/2 hours to print. 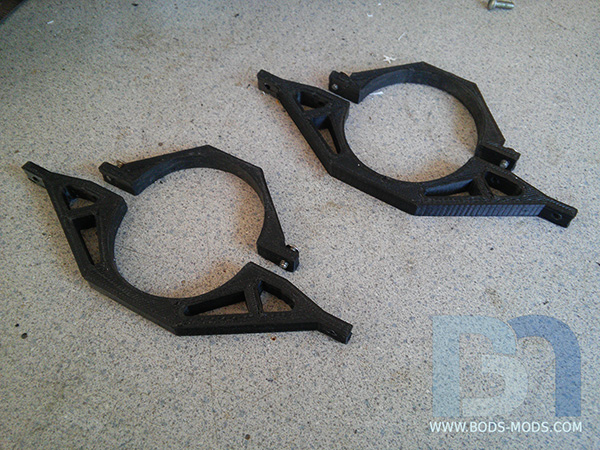 Brackets installed, and res supported! 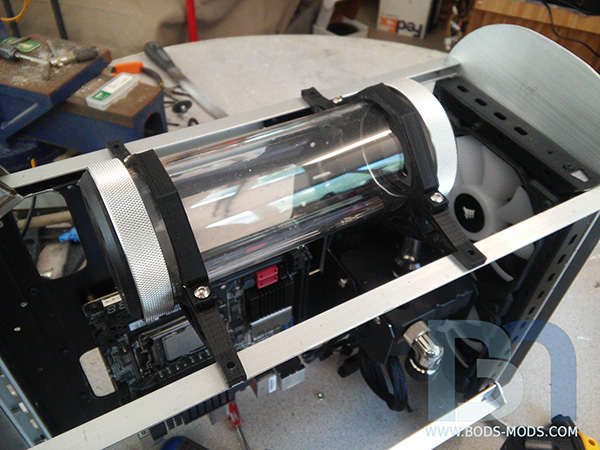 But... just when I think I'm done and can move onto the next thing, I find out there's a problem.. With the res in the center of the case, I won't have room for the video card! Back to the drawing board... Going back into Sketchup, I revise my bracket design to move the reservoir over 3/4", but still using the same top pieces. The old centered bracket is on the bottom, with the revised offset bracket on top.. 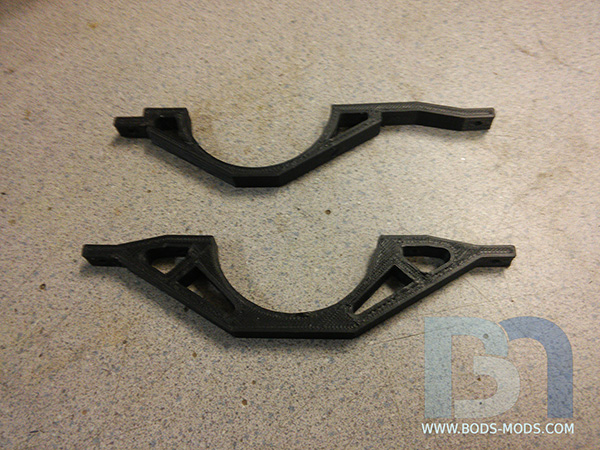 With the new bottoms printed, I now have room for the video card. 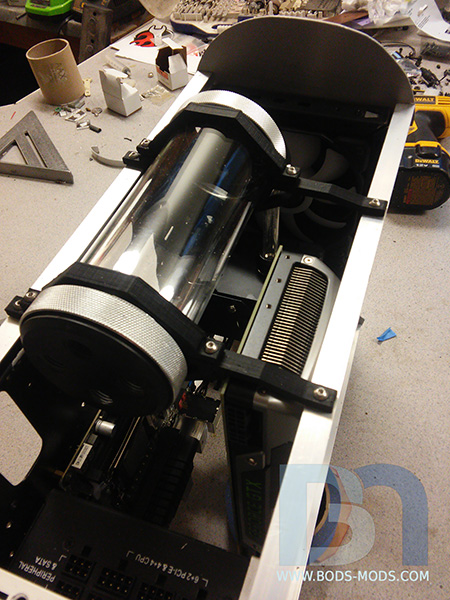 Great, but now what about the tubing lining up with the pump input port? 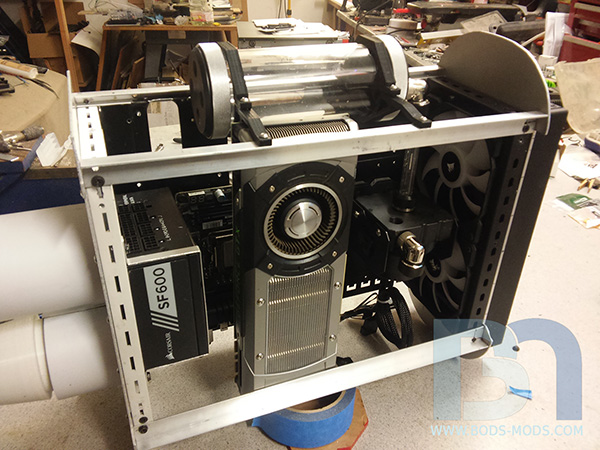 Not a problem with the CTR res and it's 4-port top cap! I can just choose the next hole over. But I was lazy and simply rotated the cap 90º until the tube lined up again. :D 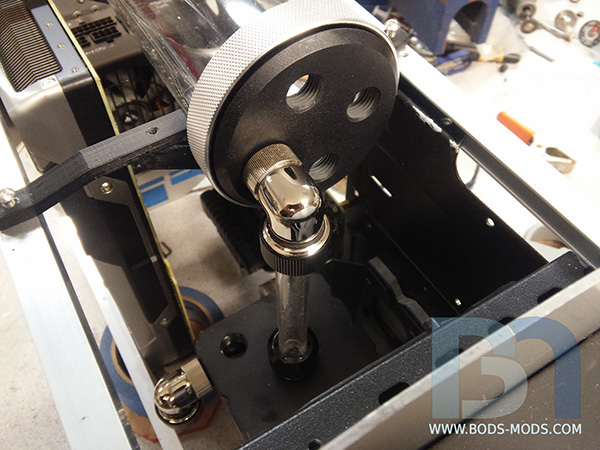 Only thing left to mount now is the video card, and I should be able to take care of that tonight or tomorrow. With the res bracket now holding the top securely in place, I just have to come up with a bottom bracket for the IO plate to sit on.
|
Boddaker
iCX Member
- Total Posts : 316
- Reward points : 0
- Joined: 2007/02/09 17:13:09
- Location: Where the beer flows like wine
- Status: offline
- Ribbons : 18
Re: Scratch Build: Rey's Speeder
2017/03/29 10:06:30
(permalink)
Another item I managed to check off the list over the weekend was the rear stabilizers. Pretty simple construction, just a couple pieces of 1/8" styrene, metal brackets and some hardware.. The stabilizers are the slightly curved vanes that are mounted vertically on each side of the engine pods. A nice basic shape that didn't take very long to cut out of 1/8" styrene sheet and round the corners. I used my heat gun to add a slight bend to them. 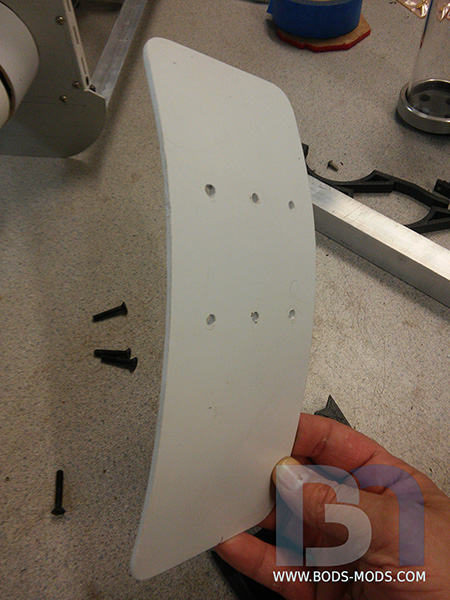 Next was to fab up a bracket to hold the stabilizers in place. I bent two pieces of 1/2" flat bar to fit around the 1" box tubing. 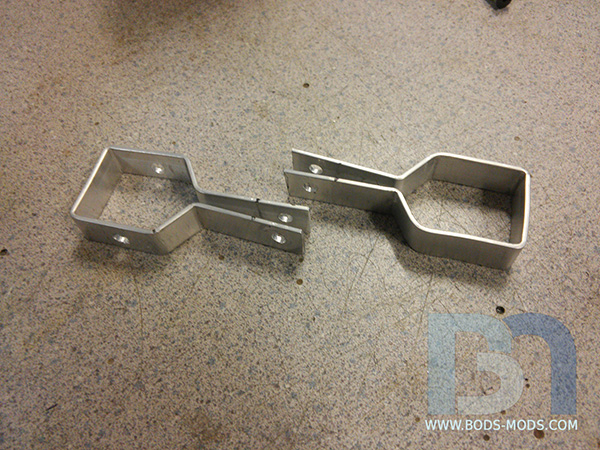 They just slide onto the tubing like so, and then I drilled some holes for a couple 1/4" threaded rods. The bottom one also serves to join the two brackets together in the middle. 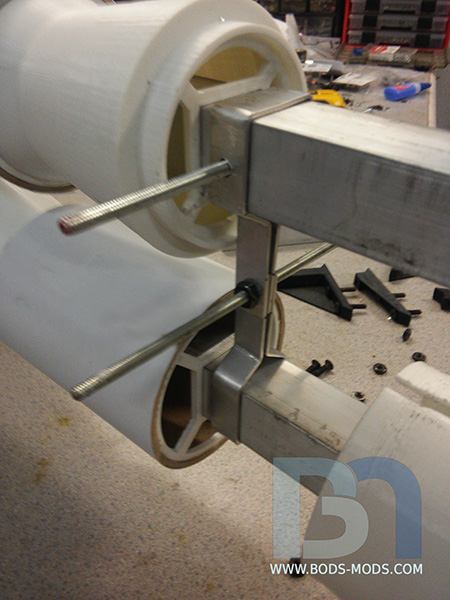 I cut a slot in each engine nozzle so they would fit over the brackets. 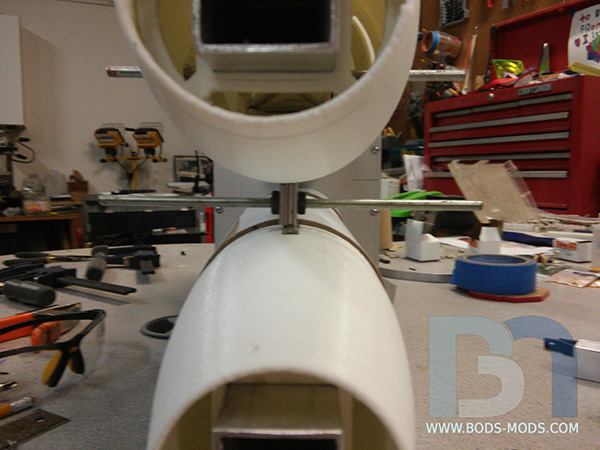 The top nozzle was drilled out on each side so the threaded rod goes completely through. 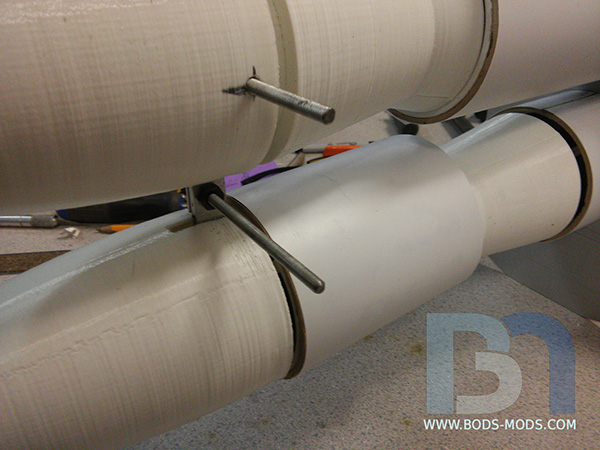 Taking advantage of the 3D printer once again, I whipped up some more custom brackets that bolt onto the back of the stabilizers.. 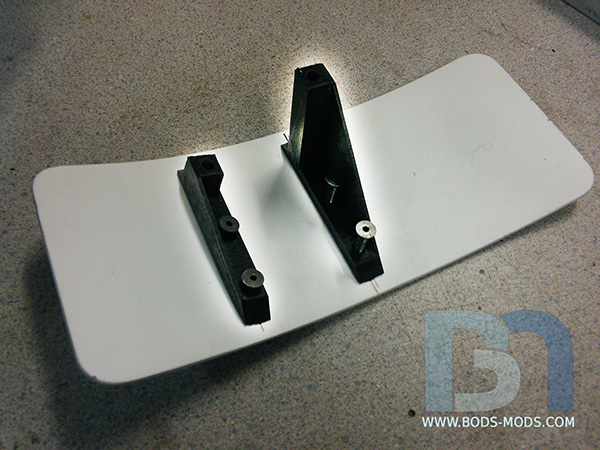 ..and they just slide onto the rods. 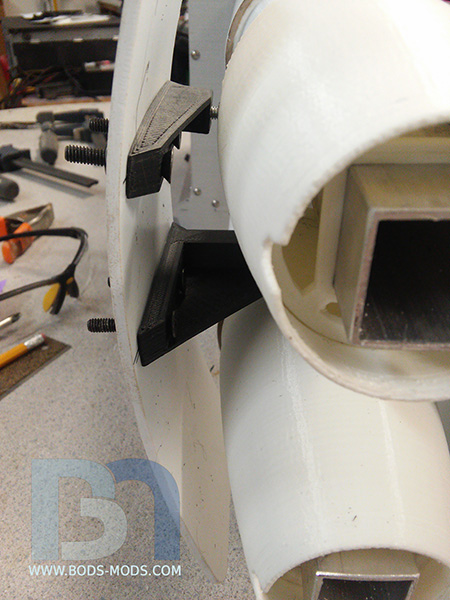 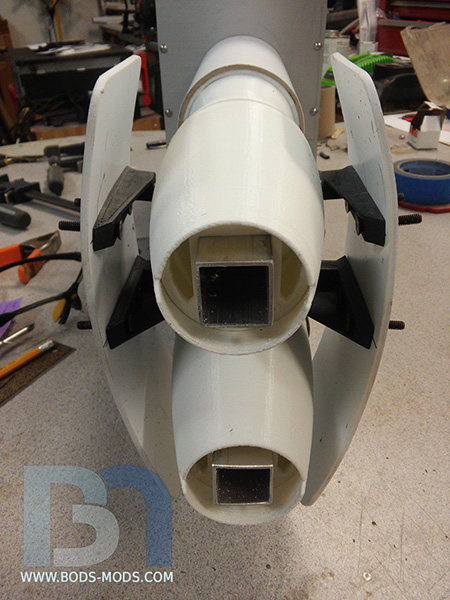 And there you go.. I still need to cut down the fasteners so they are flush to match the threaded rod. I'm also looking into some different nuts to use.. maybe some acorn nuts or something that resembles rivet heads. 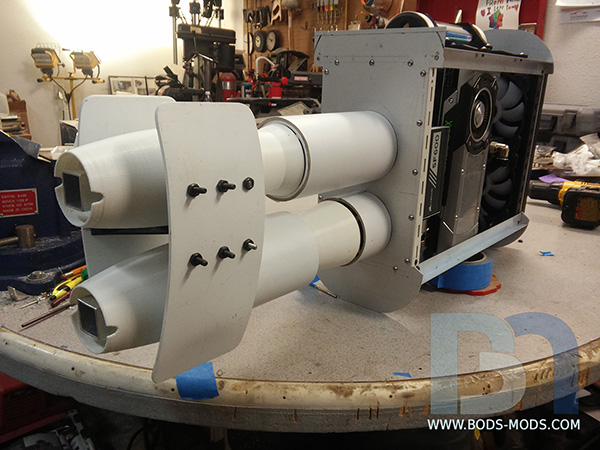
|
Sleinous
EVGA Forum Moderator
- Total Posts : 7663
- Reward points : 0
- Joined: 2010/06/12 12:22:01
- Location: France
- Status: offline
- Ribbons : 32
Re: Scratch Build: Rey's Speeder
2017/03/29 10:50:02
(permalink)
This just looks awesome, simply put!!
My Affiliate Code: GL1IAAFWJF
|
bdary
Omnipotent Enthusiast
- Total Posts : 10323
- Reward points : 0
- Joined: 2008/04/25 14:08:16
- Location: Florida
- Status: offline
- Ribbons : 116
Re: Scratch Build: Rey's Speeder
2017/03/29 11:04:20
(permalink)
Great skills and ingenuity for a build like this...
|
rjohnson11
EVGA Forum Moderator
- Total Posts : 102231
- Reward points : 0
- Joined: 2004/10/05 12:44:35
- Location: Netherlands
- Status: online
- Ribbons : 84
Re: Scratch Build: Rey's Speeder
2017/04/01 00:30:04
(permalink)
This is evolving nicely. Looking forward to final pics.
|
Boddaker
iCX Member
- Total Posts : 316
- Reward points : 0
- Joined: 2007/02/09 17:13:09
- Location: Where the beer flows like wine
- Status: offline
- Ribbons : 18
Re: Scratch Build: Rey's Speeder
2017/04/03 11:20:52
(permalink)
Lots of printing done over the weekend! Got the whole front nose assembled too. :) I started with the grill pieces.. These were printed a few weeks ago, but I wanted to wait until I had the entire front completed before posting pics. I was able to print the main grill as one piece.. 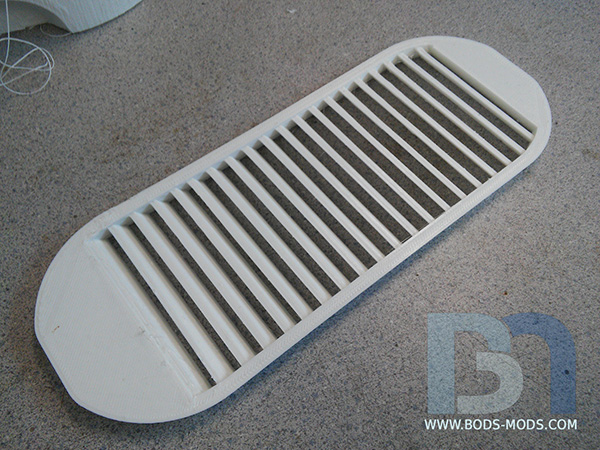 But for the trim, I had to cut it in half to fit it onto the bed. So I'll have to fill in the seam later. 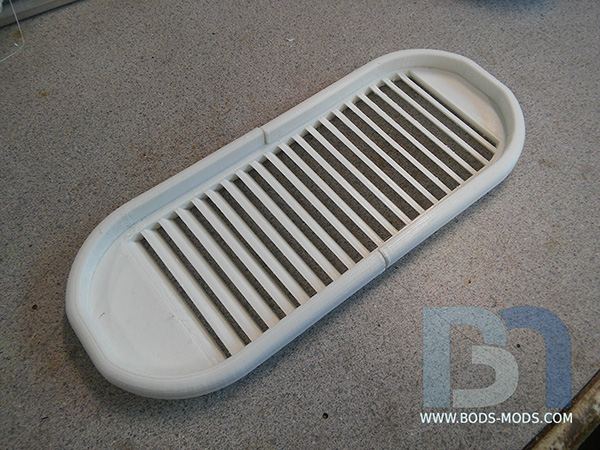 I also had to print the nose piece in two parts because it was so long. Had a bit of a mishap on the first attempt, as one of the legs tipped over mid-print due to it losing adhesion to the bed. But I was actually impressed with how it was able to correct itself and continue on. 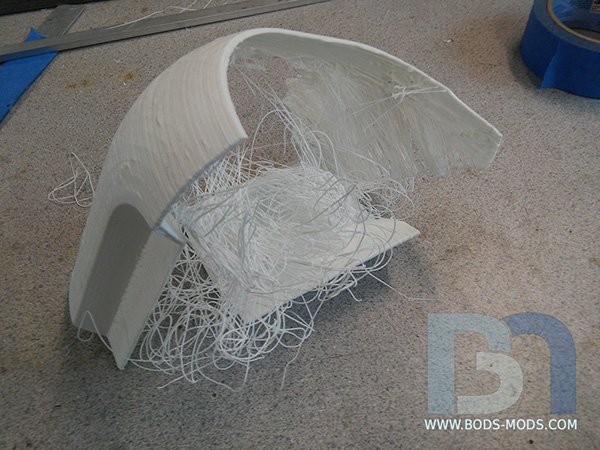 With a few modifications to the design and adding a raft, I was able to successfully print the bottom half of the nose. 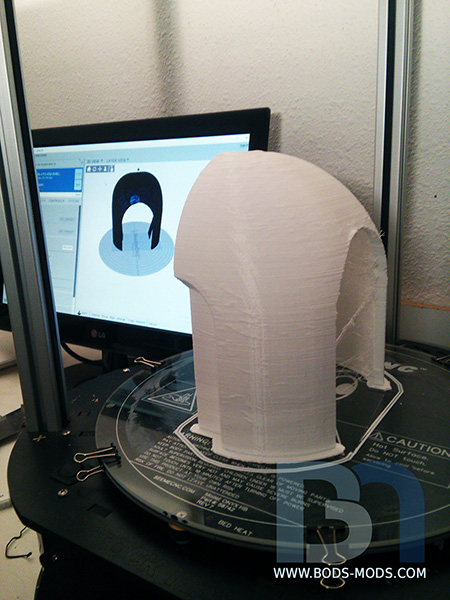 Then while printing the top half, the power went out and I had to restart the print, again. But I didnt want to start completely over this time, so I shortened the model to just print the rest of it. Here are all the pieces taped together. 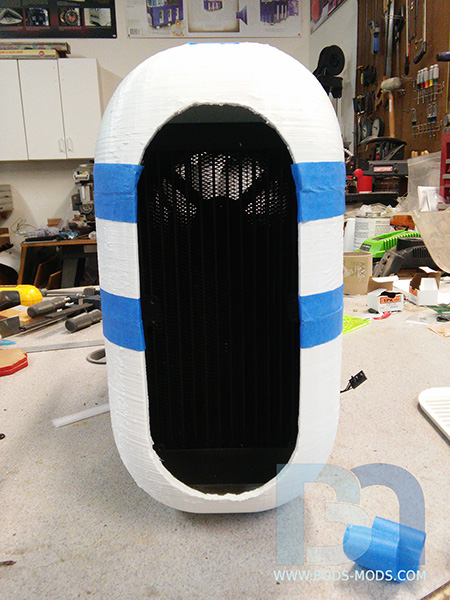 And with the center grill assembly.. 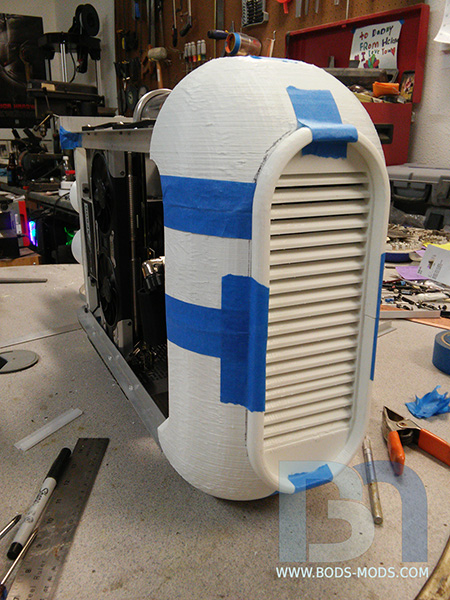 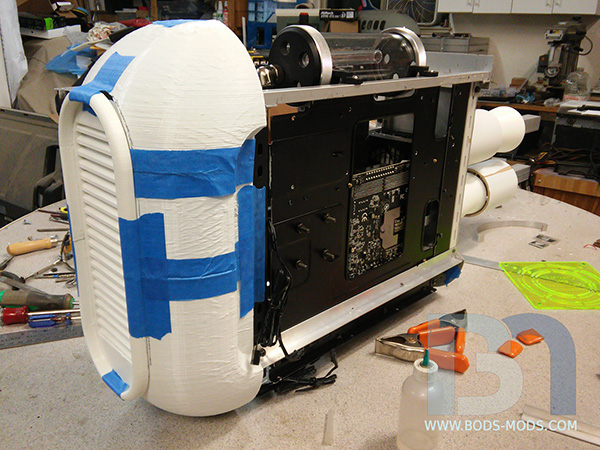 I used Weld-On #4 to tack the pieces together, and will come back over the seams with filler to strengthen those areas. But for now, it's good enough to hold its shape and not have to use any tape. 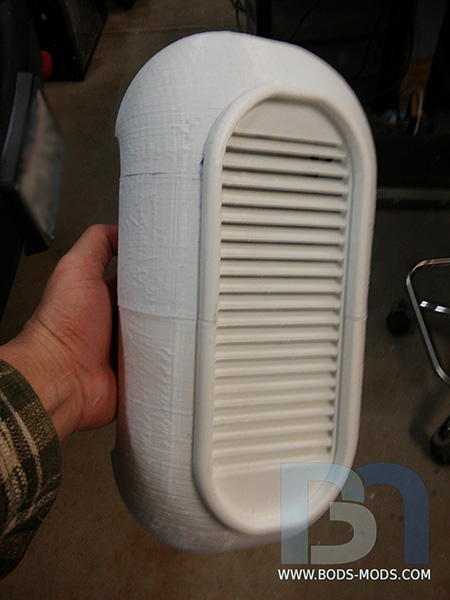 Next up is the bottom bracket, which I pretty much completed over the weekend as well. Oh, and then there's this too... 
|
rjohnson11
EVGA Forum Moderator
- Total Posts : 102231
- Reward points : 0
- Joined: 2004/10/05 12:44:35
- Location: Netherlands
- Status: online
- Ribbons : 84
Re: Scratch Build: Rey's Speeder
2017/04/03 12:16:28
(permalink)
Keeps looking greater with every update
|
Boddaker
iCX Member
- Total Posts : 316
- Reward points : 0
- Joined: 2007/02/09 17:13:09
- Location: Where the beer flows like wine
- Status: offline
- Ribbons : 18
Re: Scratch Build: Rey's Speeder
2017/04/05 09:27:27
(permalink)
Here is the bottom IO panel progress.. I cut a piece out of an old Thermaltake panel to use for the bottom panel, utilizing the built-in mesh grill for ventilation. I've already cut out the IO opening for the motherboard. 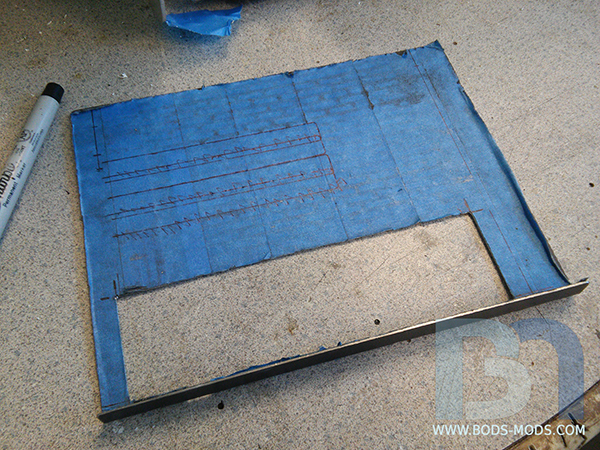 Got it in place, and marking the area for the graphics card. 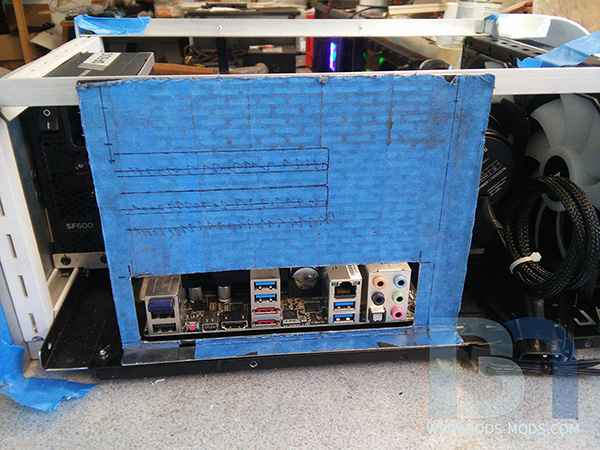 Speaking of graphics cards, EVGA sent me this little gem! 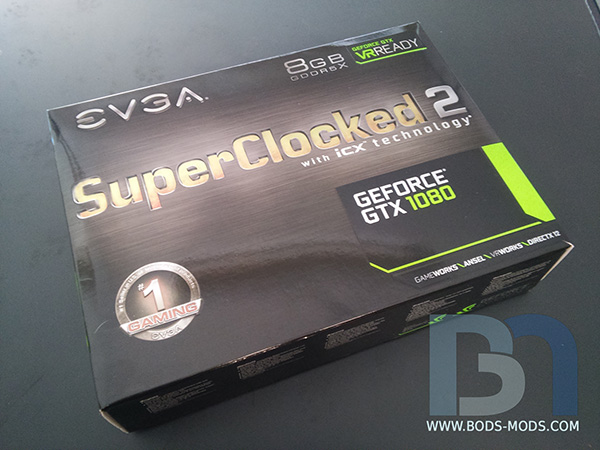 Now I can use it for mocking up instead of that crummy old Titan. ...KIDDING! :P 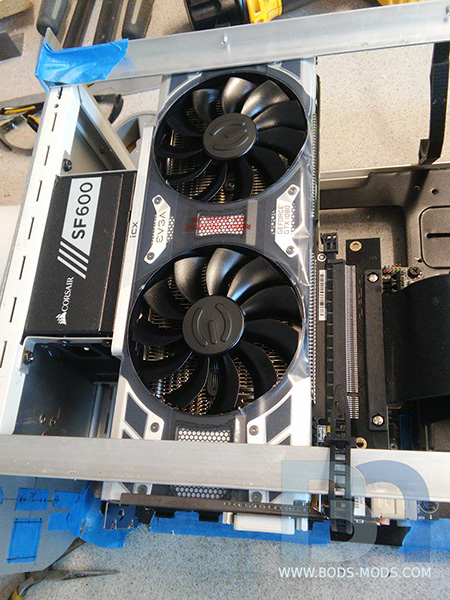 I also got the actual PCIe riser cable I'll be using in the build, from Li Heat.  Both card and cable installed and in place to finish up the bottom plate. 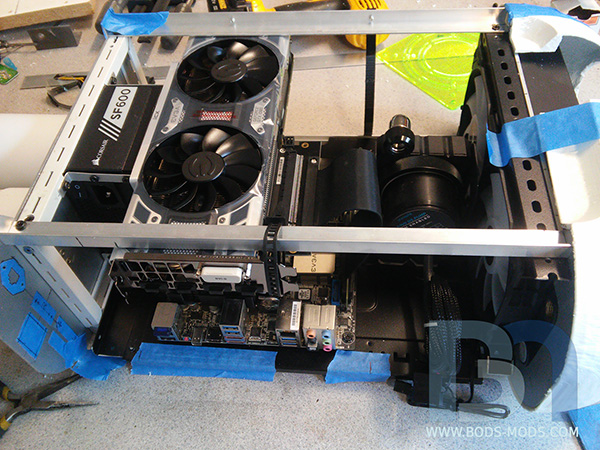 ..and done. The plate really serves to stiffen up the frame structure as well. 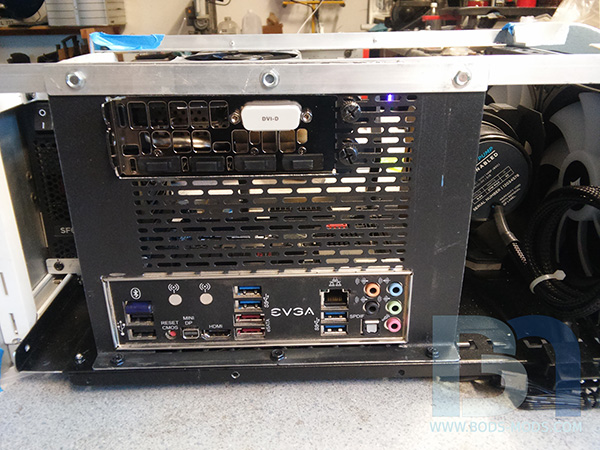 One final shot of graphics card pr0n.. 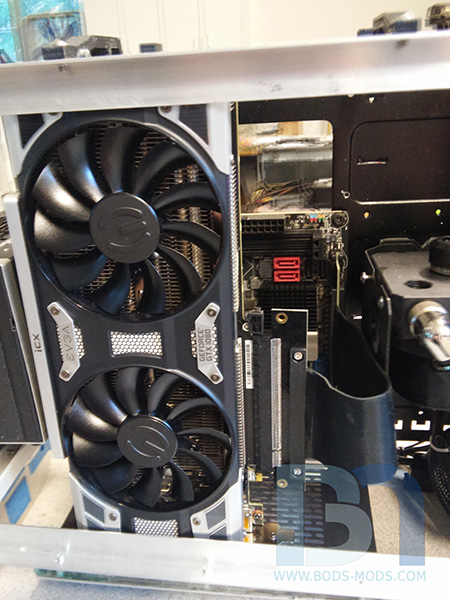
post edited by Boddaker - 2017/04/05 12:27:42
|
notfordman
Omnipotent Enthusiast
- Total Posts : 10344
- Reward points : 0
- Joined: 2007/08/09 23:52:23
- Location: In a van, down by the
- Status: offline
- Ribbons : 28
|