Boddaker
iCX Member

- Total Posts : 316
- Reward points : 0
- Joined: 2007/02/09 17:13:09
- Location: Where the beer flows like wine
- Status: offline
- Ribbons : 18


Re: Achromodic
2018/03/12 10:11:27
(permalink)
Thanks everyone.. it's getting real close now, alomst time for final assembly! Had a great productive weekend! Made an extra webbing insert for the back light panel so it matches the double layers of the top panel. With the lights on, it creates some really cool shadow effects. :) 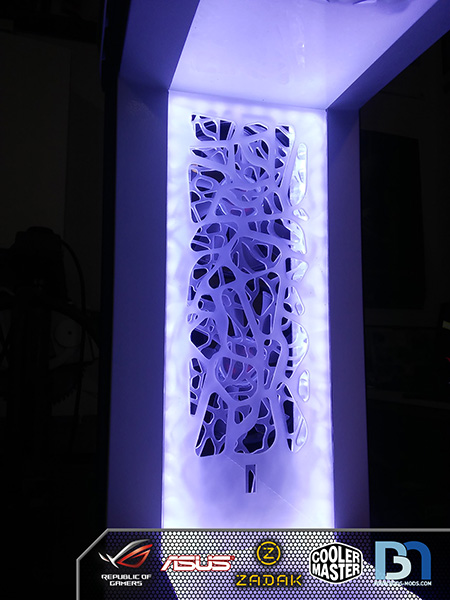 Got started on the front light panel as well.. With the reservoir mounted directly in front of it, I needed to make some pass-thru holes for the in/out ports. Fortunately, the frosted 1/8" panel is transparent enough for me to see exactly where the fittings are. 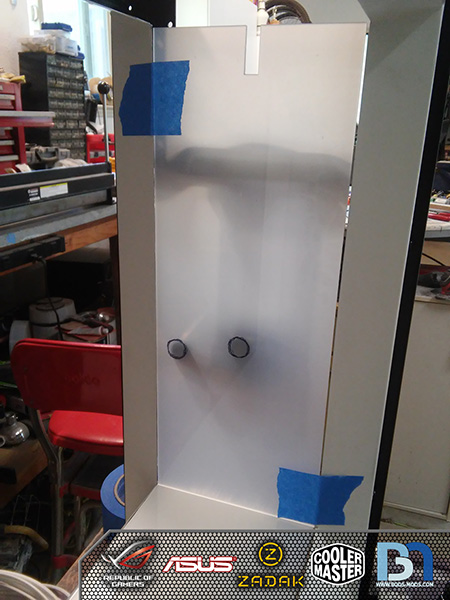 The view from the res side, and my markings seem to line up nicely. 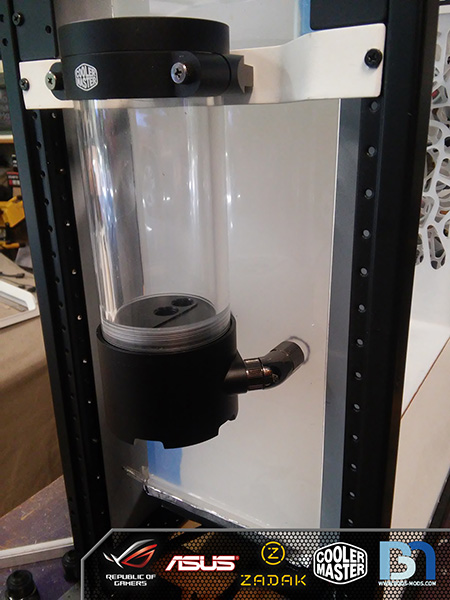 I used a 3/4" spade bit to start the hole, then finished it off with the dremel. 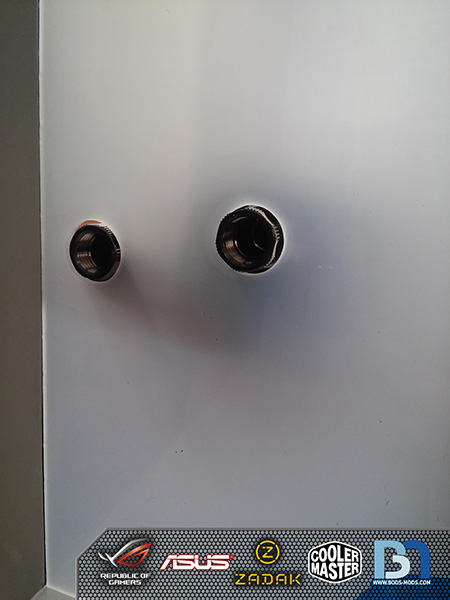 With the Primochill flex compression fittings.. 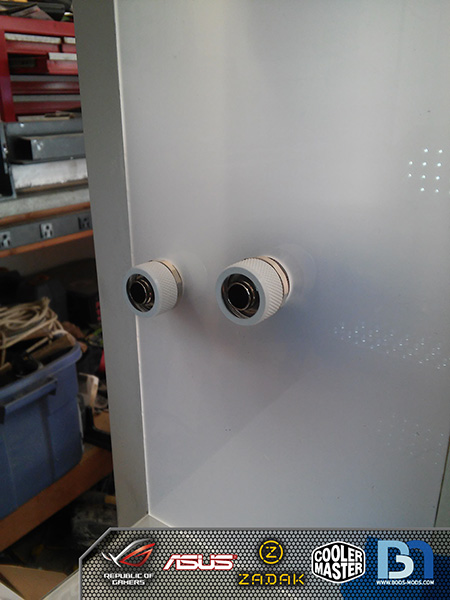 ..and a view from the other side.. 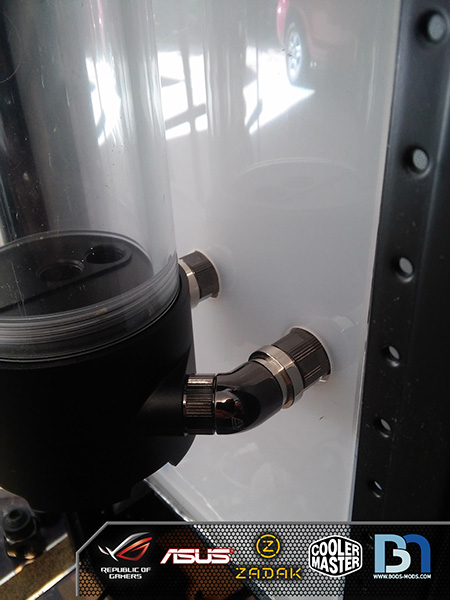 Once that was done, I figured I'd make the pass-thru holes on the top panel as well. After marking the holes and seeing how close they were to the webbing, I decided to work them into the design, rather than having just perfectly round holes like the front panel. So I free-handed some random shaped holes to blend it in to the overall web pattern. 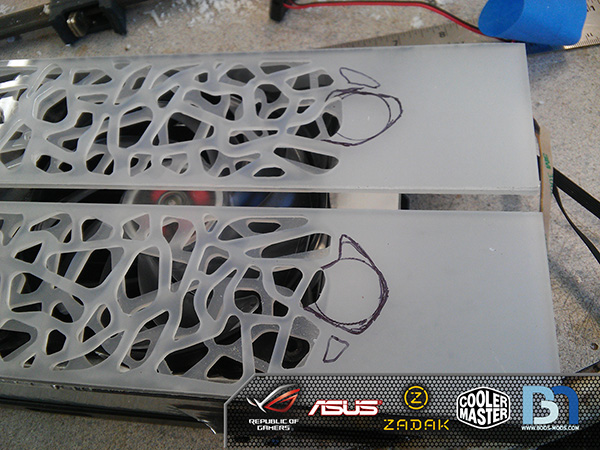 ..and cut! I also added a couple smaller holes next to the main ones, but didn't go all the way through, just to enhance the effect. 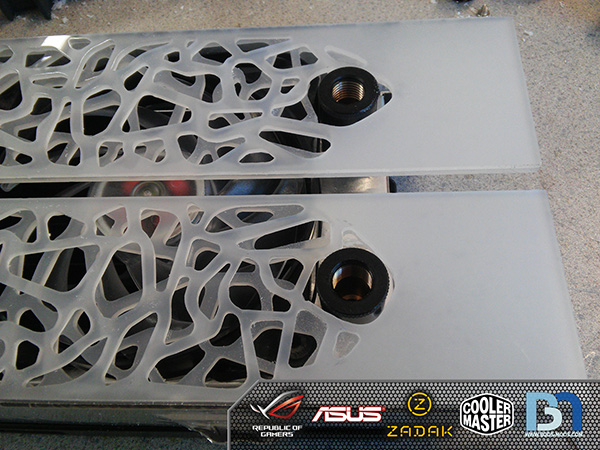 ..and with the white fittings.. 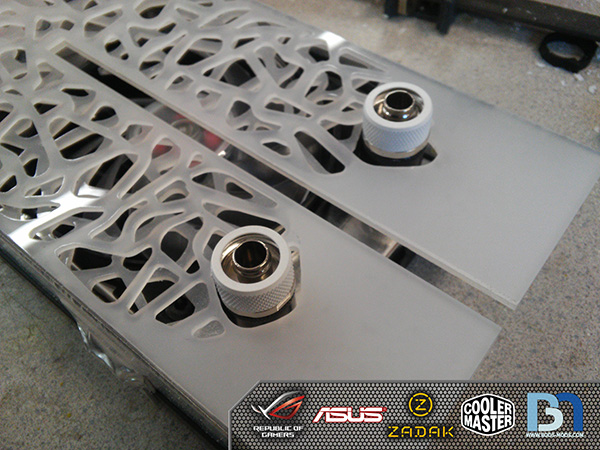 Lastly, I of course just had to see what it looked like with some black LRT flex tubing! 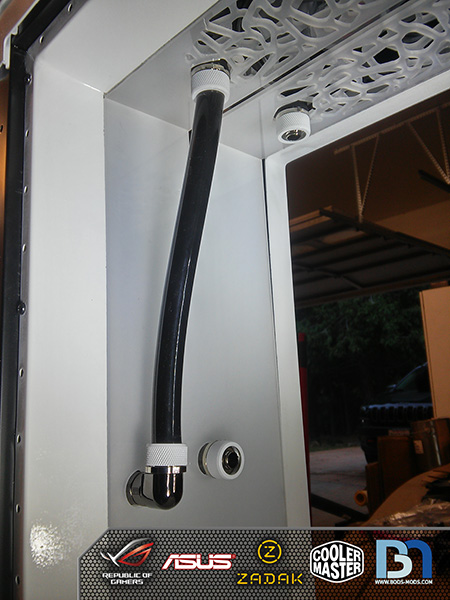 Only thing left is to add the led strip to the front panel, and then all the light panels will be done!
|
rjohnson11
EVGA Forum Moderator

- Total Posts : 102262
- Reward points : 0
- Joined: 2004/10/05 12:44:35
- Location: Netherlands
- Status: online
- Ribbons : 84
Re: Achromodic
2018/03/14 11:11:18
(permalink)
Looking forward to the final pics. This is another one of your great mods. I enjoy watching the evolution of your creations.
|
Boddaker
iCX Member
- Total Posts : 316
- Reward points : 0
- Joined: 2007/02/09 17:13:09
- Location: Where the beer flows like wine
- Status: offline
- Ribbons : 18
Re: Achromodic
2018/03/26 17:49:10
(permalink)
The guys at EVGA sent over one of there new Z10 keyboards to mod, along with an X5 mouse and killer Torq mouse pad. :) I will of course be adding some webbing to the Z10 and painting it white so it matches the theme. 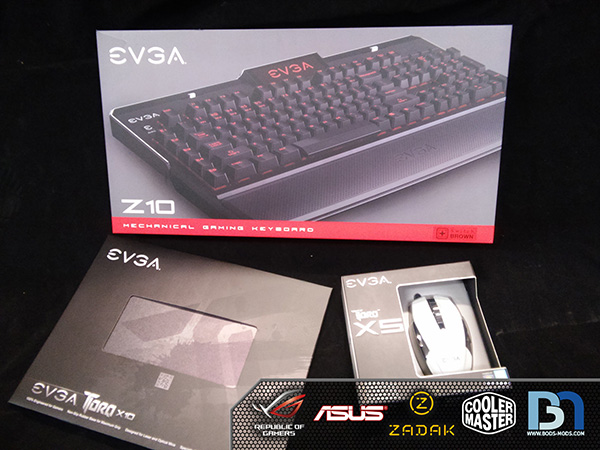 And I finally got my chromed parts in! Unfortunately, some of the parts didn't get my seal of approval and will have to be sent back to be re-done. But here are the pieces that were acceptable.. the CPU block from CM's Maker 240 kit: 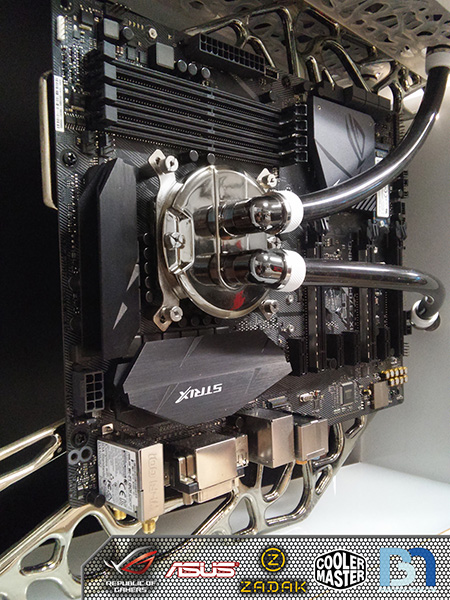 The GPU bezel came out awesome: 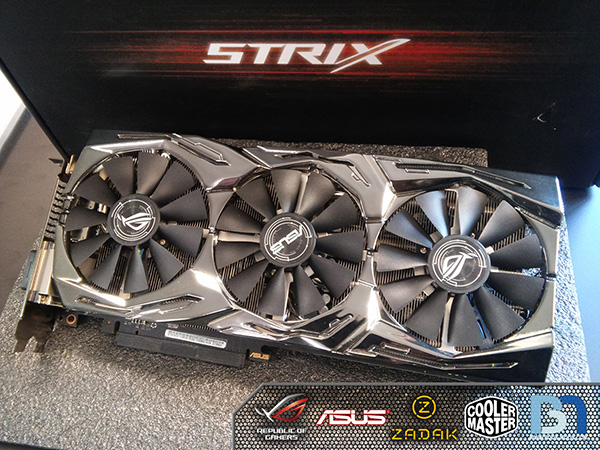 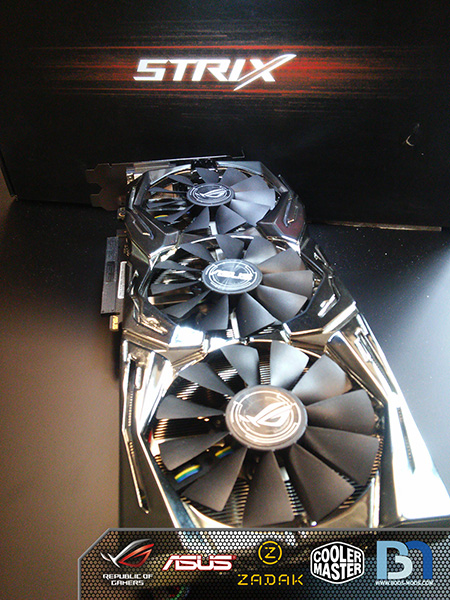 And both Zadak memory caps and SSD trim piece were acceptable.. 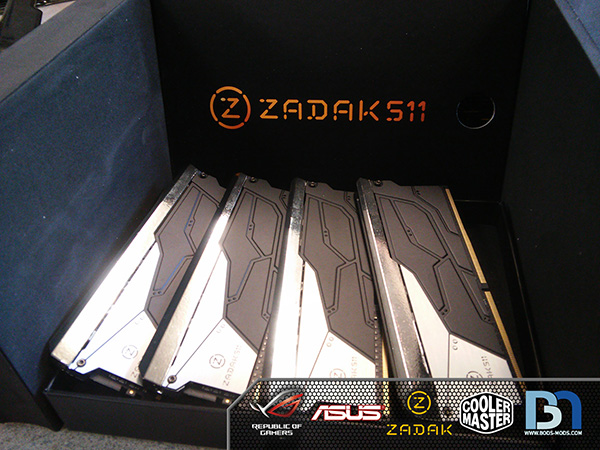 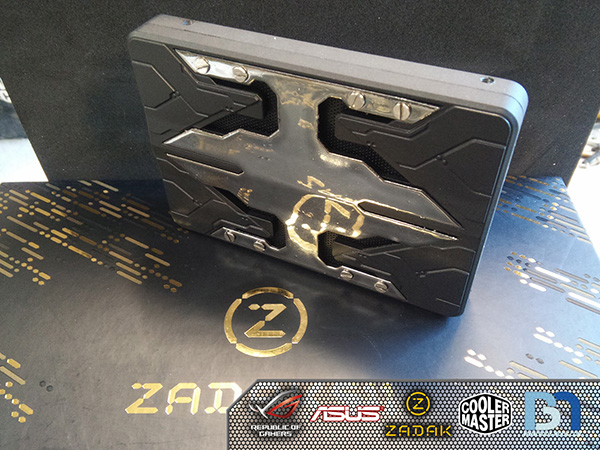 The motherboard tray was ok, but has issues too. luckily most of them will be hidden by the motherboard itself. But I was able to set it in place and see how it looked with all the light panels on: (sorry the camera in my phone sucks for lighting so everything is blown out) 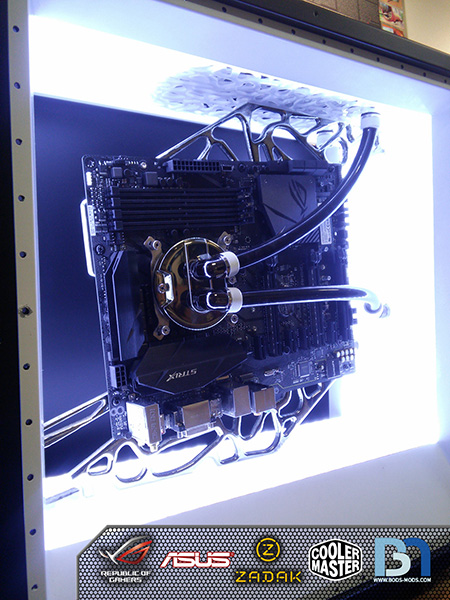 Shot of the finished front panel: 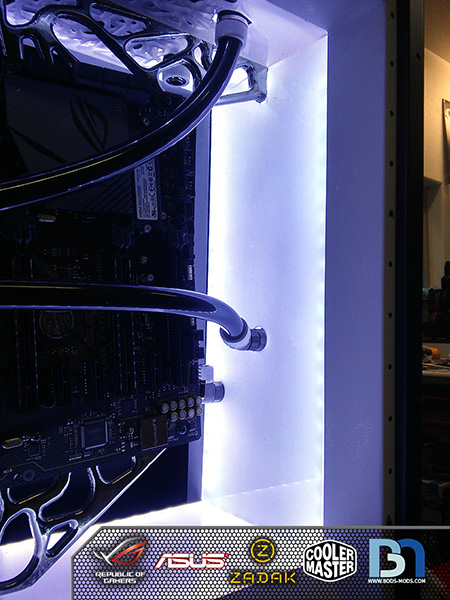 And some better pics after extensive photoshopping lol: 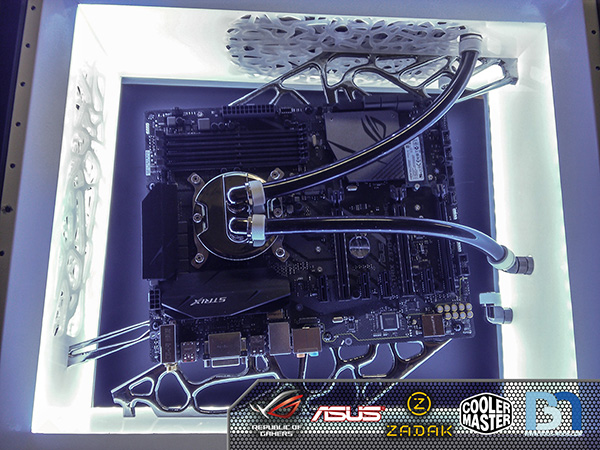 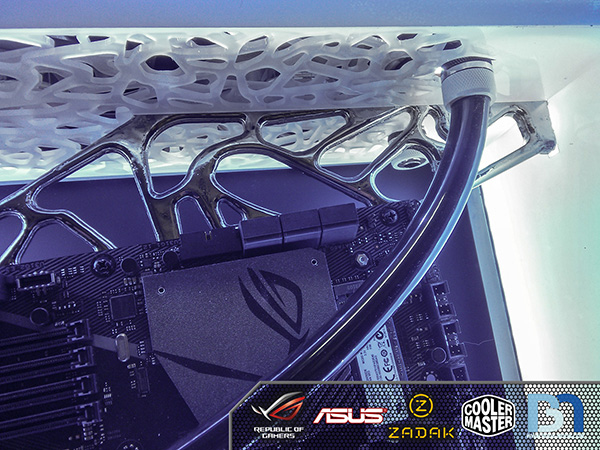 Still need some adjustment here and there, and I can now mark the bottom panel for cabling holes and such.
|
PietroBR
FTW Member

- Total Posts : 1202
- Reward points : 0
- Joined: 2013/09/14 06:40:52
- Location: Brazil
- Status: offline
- Ribbons : 7
Re: Achromodic
2018/03/27 04:13:26
(permalink)
Boddaker
The guys at EVGA sent over one of there new Z10 keyboards to mod, along with an X5 mouse and killer Torq mouse pad. :) I will of course be adding some webbing to the Z10 and painting it white so it matches the theme.
Well. Look at that. I think you're the first oficial owner outside EVGA to have a Z10 keyboard. Congrats 
|
Boddaker
iCX Member
- Total Posts : 316
- Reward points : 0
- Joined: 2007/02/09 17:13:09
- Location: Where the beer flows like wine
- Status: offline
- Ribbons : 18
Re: Achromodic
2018/03/27 08:46:29
(permalink)
PietroBR
Boddaker
The guys at EVGA sent over one of there new Z10 keyboards to mod...
Well.
Look at that.
I think you're the first oficial owner outside EVGA to have a Z10 keyboard.
Congrats
Oh wow, I knew it was new, but I didn't know that it was NEW new! lol :P I was checking it out the other night, and I'm really impressed with the build quality. I also love the way the wrist bar connects to the keyboard. It has two magnetic prongs that snap into place, and it has three 'detents' if you will, that allows the wrist bar to be extended out, or closer in depending on your preference. Very user friendly!
|
rjohnson11
EVGA Forum Moderator
- Total Posts : 102262
- Reward points : 0
- Joined: 2004/10/05 12:44:35
- Location: Netherlands
- Status: online
- Ribbons : 84
Re: Achromodic
2018/03/27 11:38:26
(permalink)
Yep that is a very brand new item from EVGA.
|
PietroBR
FTW Member
- Total Posts : 1202
- Reward points : 0
- Joined: 2013/09/14 06:40:52
- Location: Brazil
- Status: offline
- Ribbons : 7
Re: Achromodic
2018/03/28 04:18:49
(permalink)
Boddaker
PietroBR
Boddaker
The guys at EVGA sent over one of there new Z10 keyboards to mod...
Well.
Look at that.
I think you're the first oficial owner outside EVGA to have a Z10 keyboard.
Congrats
Oh wow, I knew it was new, but I didn't know that it was NEW new! lol :P
I was checking it out the other night, and I'm really impressed with the build quality. I also love the way the wrist bar connects to the keyboard. It has two magnetic prongs that snap into place, and it has three 'detents' if you will, that allows the wrist bar to be extended out, or closer in depending on your preference. Very user friendly!
Nice! Please, if you can, post more detailed photos on it as well Boddaker. Everybody is eager to know more about it before it hit the reviewers. Edit: We already have a dedicated thread for the Z10 Keyboard. Feel free to post there, that way you can focus this thread on your build alone https://forums.evga.com/EVGA-Z10-Keyboard-m2749643.aspx
|
Boddaker
iCX Member
- Total Posts : 316
- Reward points : 0
- Joined: 2007/02/09 17:13:09
- Location: Where the beer flows like wine
- Status: offline
- Ribbons : 18
Re: Achromodic
2018/04/11 14:53:47
(permalink)
Well, I finally have some progress to show. I've been working on an idea for the back panel, but had to scrap several failed attempts, mainly due to 3D printing woes. But now that I revised my plan, redesigned the model, and fixed my printer, I finally have a workable piece! The idea was to fill the center of the back panel with a bunch of random, extruded, clear organic shapes that will be backlit by the 140mm fans. Simple enough! ...well not really. :P First, I had to come up with a 3D model, so I created a cluster of organic shapes derived from the webbed motherboard tray and fan grills. It's basically a reverse of that, in where the holes are now the solids. I then designed the cluster to be stackable end to end, making a seamless pattern so I could stack four of them to fill in the back panel. Here is the 3D printed quarter section: 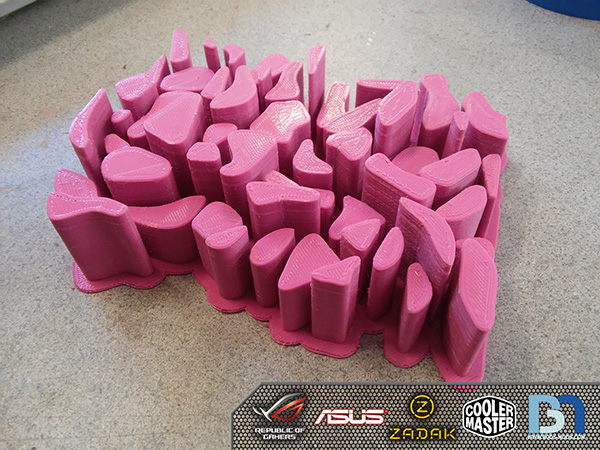 It fits nicely in the frame of the back panel. 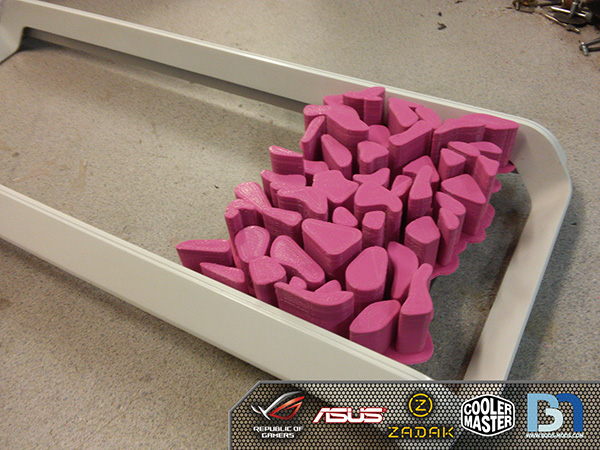 In order to make duplicates of this in clear resin, I need to make a silicone mold of it. So first I coat it with XTC to smooth out the print.  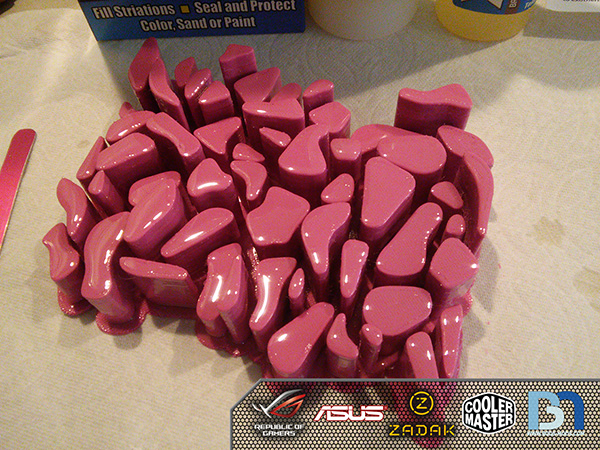 While that cures, I whip up a quick box for the mold. 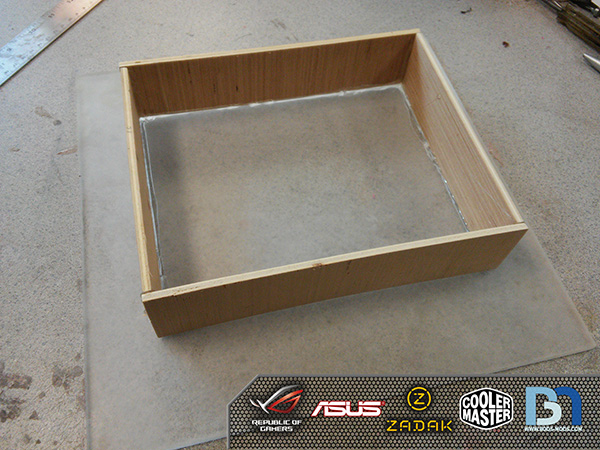 Doing some volumetric calculations, I realize my box is too big for the small amount of silicone I bought, so I used some dense foam pieces to fill in around the print. Now I should be able to cover the entire piece without running out. 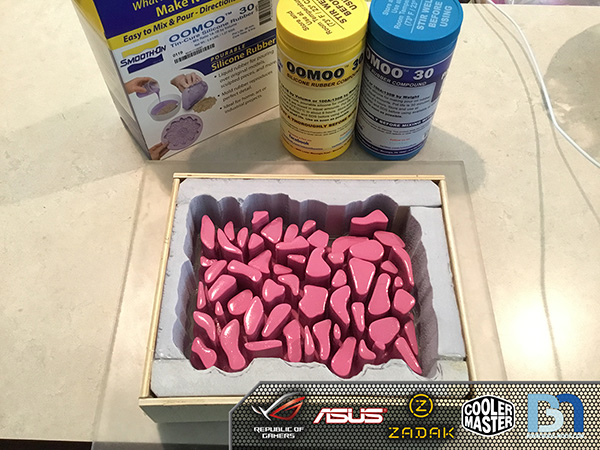 I'm using a product from Smooth-On called OOMOO 30, which is a 2-part silicone rubber. Very easy to work with, just mix both parts 1:1 ratio. Working time is 30 minutes, cures in about 6hrs. .. but why do I feel the need to play Portal 2 now? :P 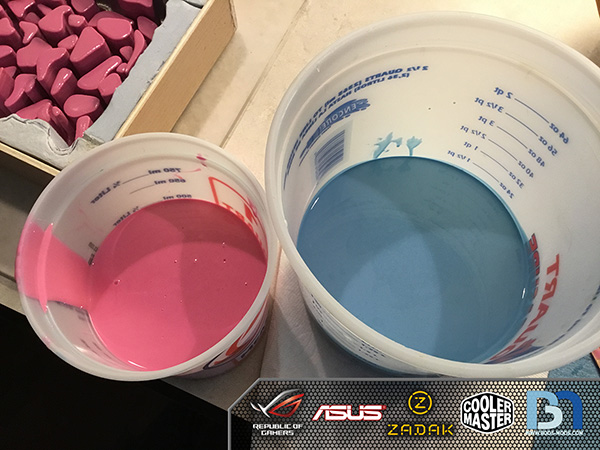 Once mixed thoroughly, it turns to a uniform purple color. Some products require the use of a vacuum chamber to degas the mixture (remove all the bubbles), but this OOMOO stuff is formulated for beginners and doesn't really need it, due to it's low viscosity. 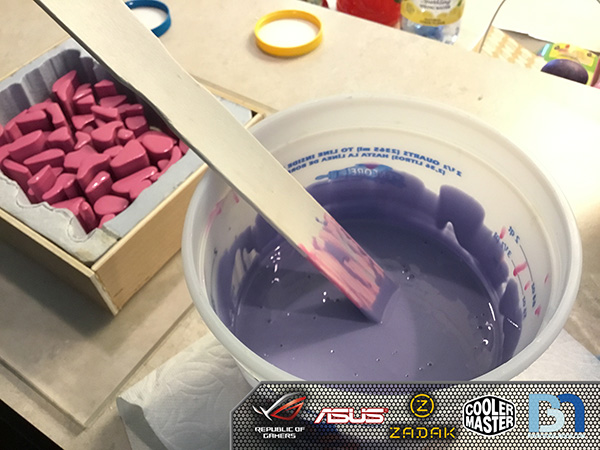 After spraying on some mold release, we're ready to pour! Going around the edges with a long slow pour and letting the silicone flow into the piece by itself helps prevent any bubbles from forming. 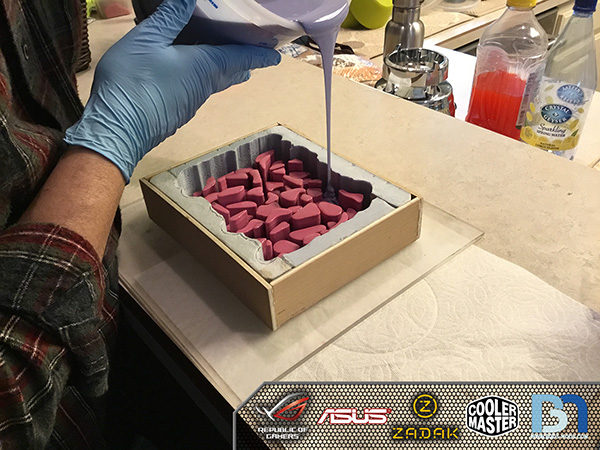 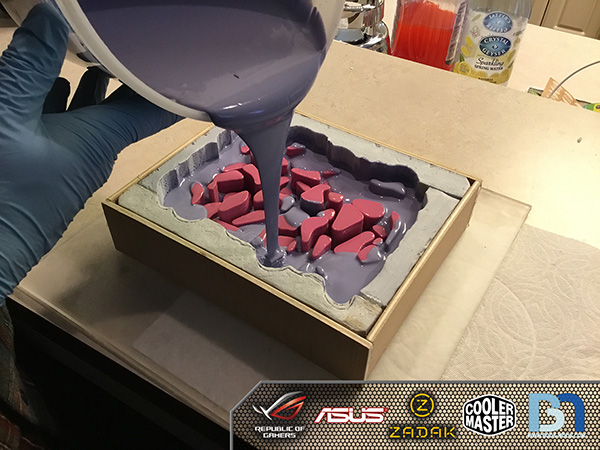 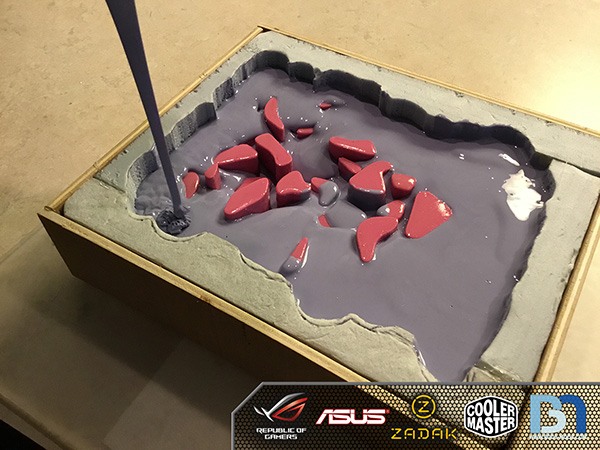 Now we wait while it cures. 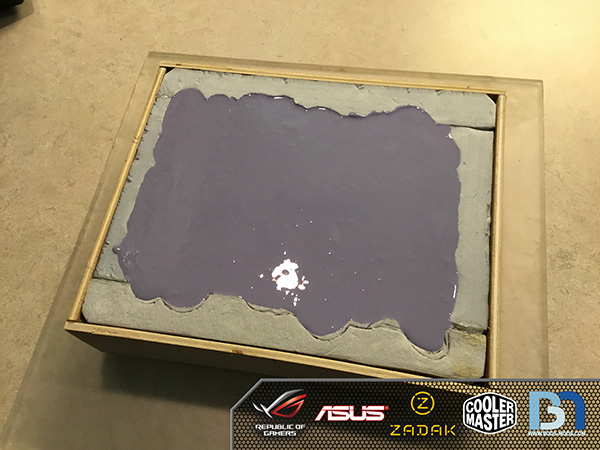 The next day I came back and started the demold process. I quickly found out that it was going to be impossible to get the print out in one piece. I could work it loose all around the edges, but the center was locked and I was starting to tear in places in between the towers. So I had to cut around each one and remove them one at a time. 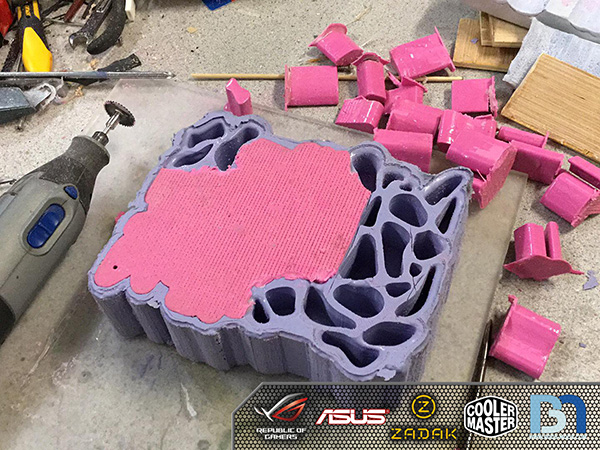 All out! Didn't take too long, but now I have to rethink my plan of making a resin copy all at once, because I won't be able to get it out of the mold in one piece. I will have to divide it up into smaller parts, or even do each shape individually. 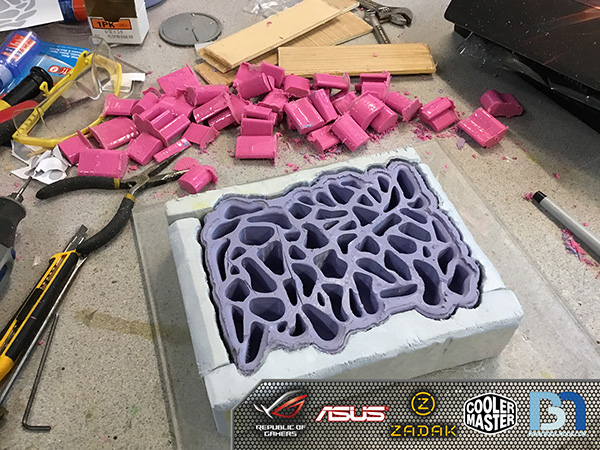 Next update will hopefully show some successful resin replicas of the original print. Fingers crossed!
|
rjohnson11
EVGA Forum Moderator
- Total Posts : 102262
- Reward points : 0
- Joined: 2004/10/05 12:44:35
- Location: Netherlands
- Status: online
- Ribbons : 84
Re: Achromodic
2018/04/14 00:50:48
(permalink)
Good luck on the replicas.
|
notfordman
Omnipotent Enthusiast

- Total Posts : 10345
- Reward points : 0
- Joined: 2007/08/09 23:52:23
- Location: In a van, down by the
- Status: offline
- Ribbons : 28
Re: Achromodic
2018/04/15 15:34:38
(permalink)
I'm enjoying watching you figure things out.... You're lucky I'm not a neighbor, you would never get rid of me! Probably a good thing then.  You have all kinds of different skills, that work to make some of the coolest stuff. Edit: probably a dumb idea, could you possibly glue the pieces back together, if they were cut carefully?
|
fergusonll
FTW Member
- Total Posts : 1686
- Reward points : 0
- Joined: 2013/02/21 09:49:10
- Status: offline
- Ribbons : 3
Re: Achromodic
2018/04/16 21:05:33
(permalink)
I have to agree with others, you have some mad skills and loving this build. Top notch mods my friend.
|
Boddaker
iCX Member
- Total Posts : 316
- Reward points : 0
- Joined: 2007/02/09 17:13:09
- Location: Where the beer flows like wine
- Status: offline
- Ribbons : 18
Re: Achromodic
2018/04/18 10:29:31
(permalink)
Thanks a lot guys.. I love trying new stuff, and I try to do something different on every build I do.. keeps me on my toes! :) notfordmanI'm enjoying watching you figure things out.... You're lucky I'm not a neighbor, you would never get rid of me! Probably a good thing then. You have all kinds of different skills, that work to make some of the coolest stuff.
Edit: probably a dumb idea, could you possibly glue the pieces back together, if they were cut carefully? Possibly, but it would be really difficult to cut between all the pieces accurately enough. What I'll probably end up doing is pouring the resin into each cavity so they are all individual pieces, then either glue them onto a piece of acrylic sheet in their original orientation, or set them all up and pour the base using more resin.
|
Boddaker
iCX Member
- Total Posts : 316
- Reward points : 0
- Joined: 2007/02/09 17:13:09
- Location: Where the beer flows like wine
- Status: offline
- Ribbons : 18
Re: Achromodic
2018/04/18 10:37:13
(permalink)
Well I didn't get the resin poured over the weekend (turns out I need a scale to accurately measure out the two-part mixture), so instead I worked on the cabling layout, access holes, and SSD placement. Mocking things up, I ran the motherboard cabling down to the floor and marked where they would pass thru to the psu. 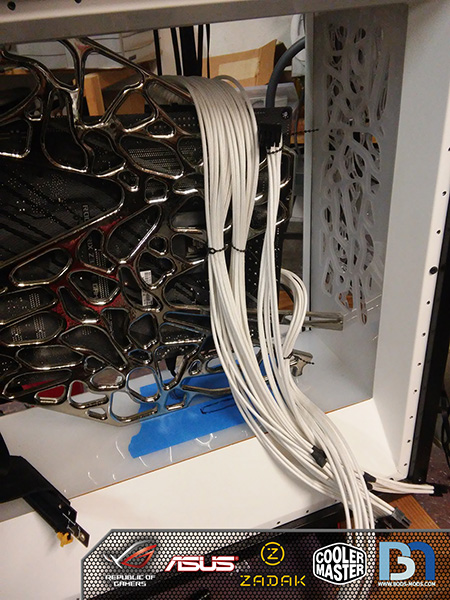 On the other side under the mobo, I'll be needing an access hole for two USB3.0 cables & ethernet from the IO, as well as an SSD data cable and the HDMI cable from the video card. 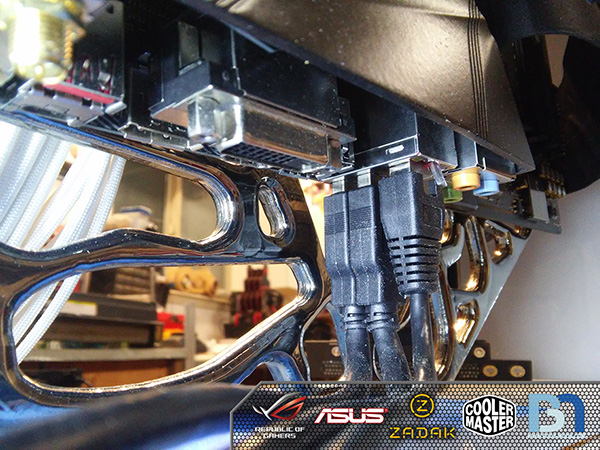 Luckily both USB and ethernet are located in the same place, so I just need to make one hole. 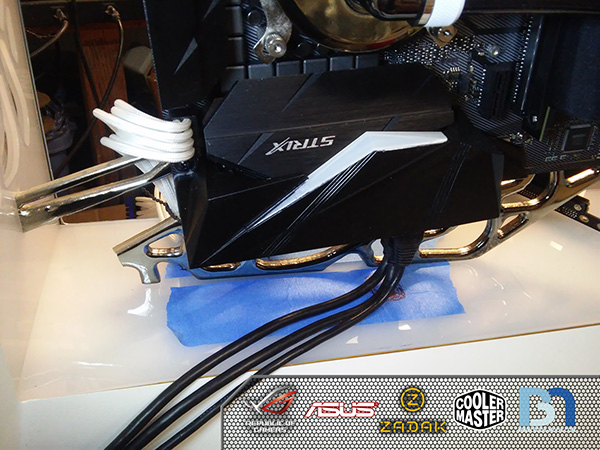 Here's the video card hanging temporarily in place to see how much space is needed between it and the webbing. It also gives me an idea of what shape the mounting bracket will need to be. 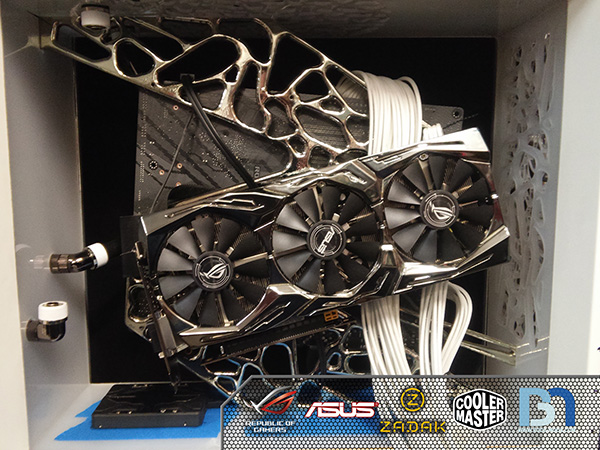 With everything marked, I could tear it all down again, and start drilling holes in the bottom light panel. 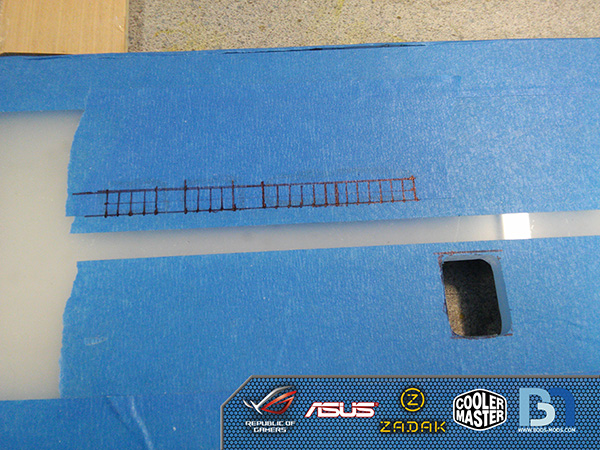 I wanted to get the look of individual holes for the sleeved cables, but still have one main hole for each group of cables. 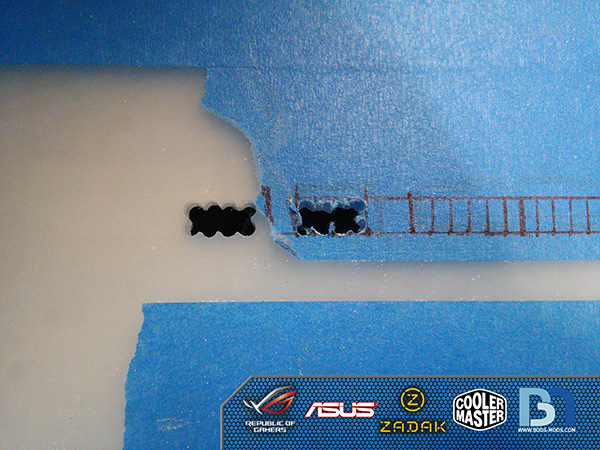 For the Zadak SSD, I couldn't find any good place to mount it on the webbing, so I tried placing it right on the floor... but it sticks out too much because it's so thick. So I decided to flush mount it into the floor. 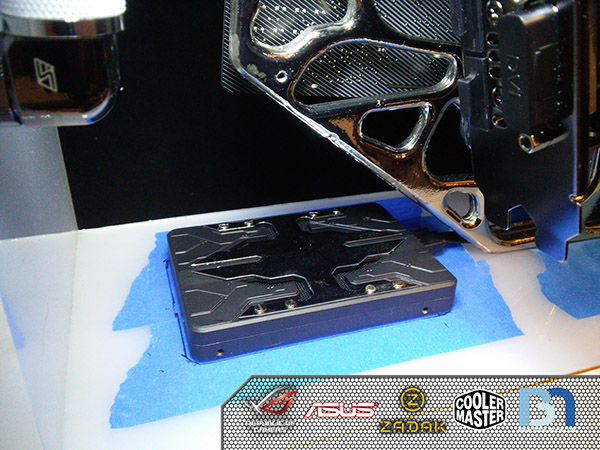 Using the scroll saw, I cut a gigantic hole in the bottom light panel. 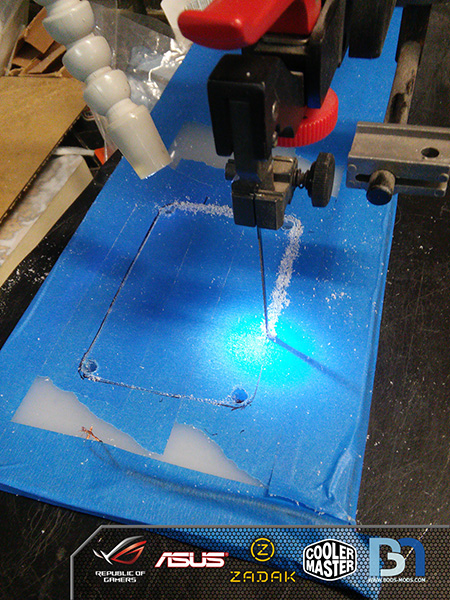 Next, I needed to rout out some extra material at one end to make room for the cables. 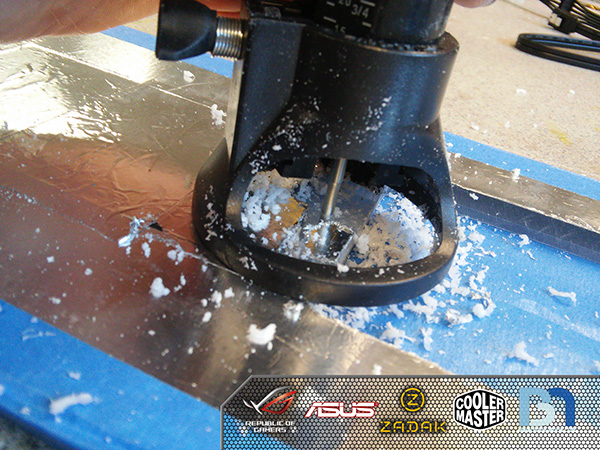 After some filing, the SSD fits nice and snug. 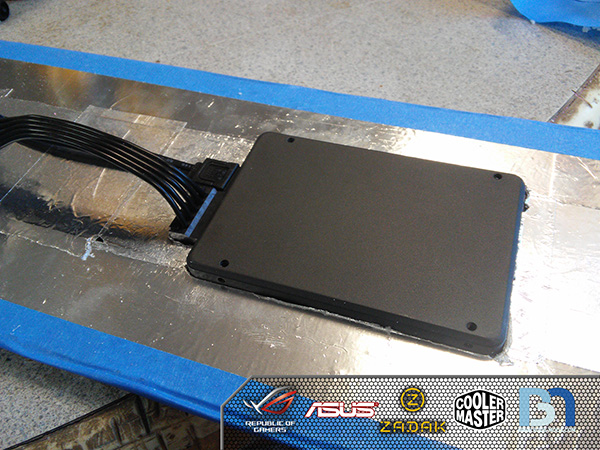 Digging thru my closet o' spare parts, I came across an adata SSD mounting bracket. So I used that to support the SSD underneath. 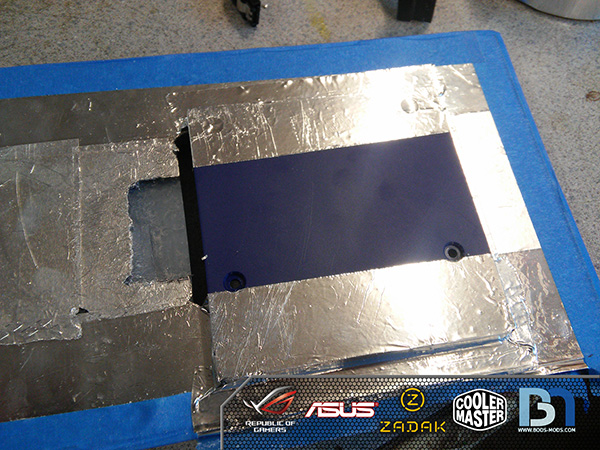 Here it is from the top.  Now the SSD sits flush with the top of the light panel, and the cabling is hidden below. :) 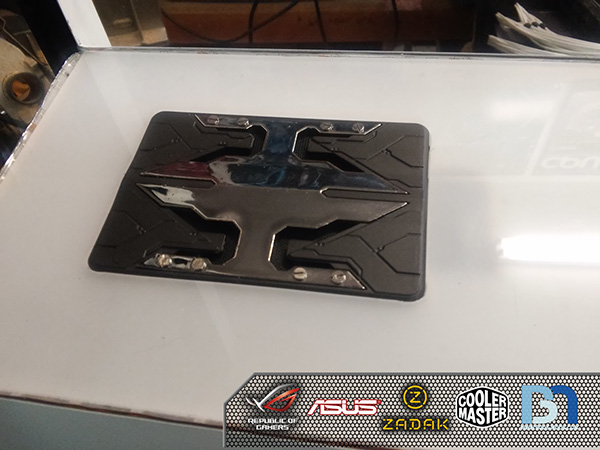 An overall shot of the bottom light panel with all the access holes drilled, ready for the sleeved cables! 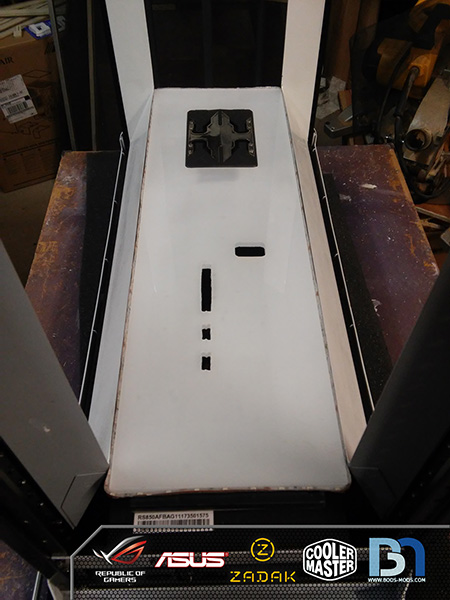
|
PietroBR
FTW Member
- Total Posts : 1202
- Reward points : 0
- Joined: 2013/09/14 06:40:52
- Location: Brazil
- Status: offline
- Ribbons : 7
Re: Achromodic
2018/04/19 04:56:03
(permalink)
That's some perfectionist job you're doing there. Looking at this photo: IMO, the EVGA GTX 1080TI SC or FTW3 would be perfect to match the web on the background.   EDIT: I did a quick montage to see how it would looks like on your build:  It's not proper scaled, but if the shroud would be chromed, then I think it would look very nice in your build  Well, maybe a next time.
post edited by PietroBR - 2018/04/19 05:01:34
|
Boddaker
iCX Member
- Total Posts : 316
- Reward points : 0
- Joined: 2007/02/09 17:13:09
- Location: Where the beer flows like wine
- Status: offline
- Ribbons : 18
Re: Achromodic
2018/04/19 09:15:12
(permalink)
PietroBR
That's some perfectionist job you're doing there.
Looking at this photo:
IMO, the EVGA GTX 1080TI SC or FTW3 would be perfect to match the web on the background.
EDIT:
I did a quick montage to see how it would looks like on your build:
It's not proper scaled, but if the shroud would be chromed, then I think it would look very nice in your build LOL I appreciate you mocking that up! Yes, I've lamented over this many times, as I totally agree that card would be perfect for my theme. However I must use what was provided to me by ASUS, as they are sponsoring this build along with Cooler Master and Zadak. :)
|
rjohnson11
EVGA Forum Moderator
- Total Posts : 102262
- Reward points : 0
- Joined: 2004/10/05 12:44:35
- Location: Netherlands
- Status: online
- Ribbons : 84
Re: Achromodic
2018/04/19 09:24:04
(permalink)
It's really nice to have sponsors.
Kudos also to PietroBR for making that montage.
|
notfordman
Omnipotent Enthusiast
- Total Posts : 10345
- Reward points : 0
- Joined: 2007/08/09 23:52:23
- Location: In a van, down by the
- Status: offline
- Ribbons : 28
Re: Achromodic
2018/04/19 16:07:52
(permalink)
Something I was wondering about the webbing, before the GPU was mounted. Weaving the sleeved cables through the webbing. Wouldn't work well here because GPU takes [hides] a lot of it. Maybe another build idea. The webbing turned out fantastic, I think. SSD looks better too. 
|
PietroBR
FTW Member
- Total Posts : 1202
- Reward points : 0
- Joined: 2013/09/14 06:40:52
- Location: Brazil
- Status: offline
- Ribbons : 7
Re: Achromodic
2018/04/19 17:51:08
(permalink)
Boddaker
LOL I appreciate you mocking that up! Yes, I've lamented over this many times, as I totally agree that card would be perfect for my theme. However I must use what was provided to me by ASUS, as they are sponsoring this build along with Cooler Master and Zadak. :)
I understand haha Still, The result of the build is coming along very nicely. Can't wait to see the final photos. rjohnson11
It's really nice to have sponsors.
Kudos also to PietroBR for making that montage.
Thanks RJ
|
Boddaker
iCX Member
- Total Posts : 316
- Reward points : 0
- Joined: 2007/02/09 17:13:09
- Location: Where the beer flows like wine
- Status: offline
- Ribbons : 18
Re: Achromodic
2018/05/08 12:00:19
(permalink)
Hey guys, getting back to the resin casting for the back panel finally.. I wanted to wait until I could show a decent amount of progress, and it took a while to cast multiple sets as the cure time was well over 24hrs. So after prepping the mold with a release to make sure the resin didnt stick, I started pouring. The EpoxaCast 690 from Smooth-On has really low viscosity so most of the bubbles came to the top pretty easily after mixing. But I also poured really slowly from a high distance from the mold to stretch out and break any remaining bubbles (a trick I learned from watching their youtube vids). As you can see, it's pretty clear in the mold. 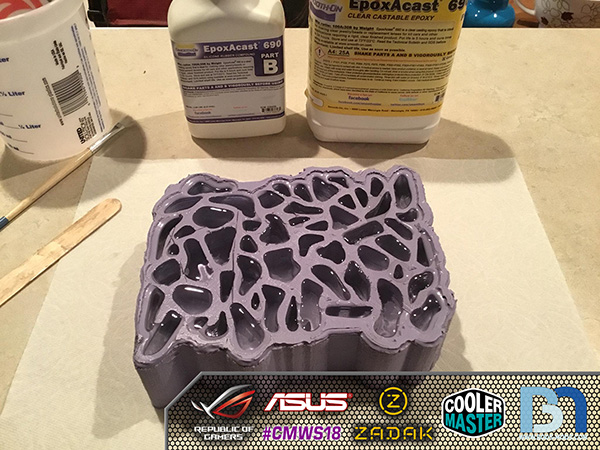 After a day and a half of curing, I started pulling out the pieces. They popped out no problem. Looks like an ice cube lol.. 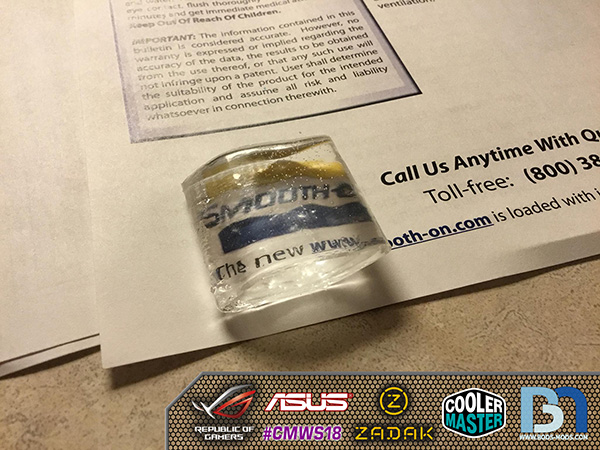 And here's all the pieces out. I printed up a placeholder to keep them all organized. 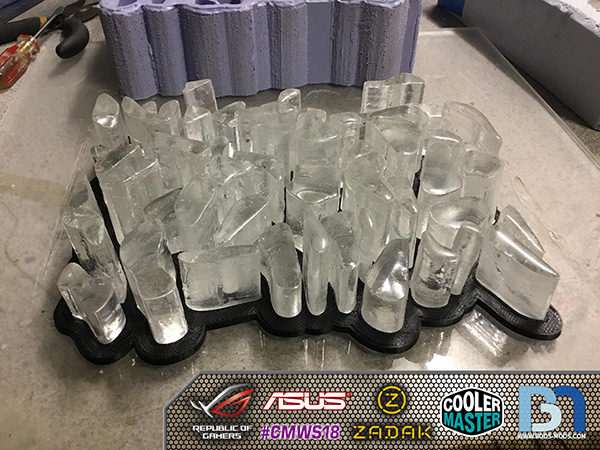 2nd set made.. some pieces aren't as clear as others mostly because I couldn't apply the XTC over 100% of the original print (particularly the middle area), so the rough surfaces transferred over to the clear resin pieces. I'll just have to add more glazing to those pieces and then it will all look uniform. 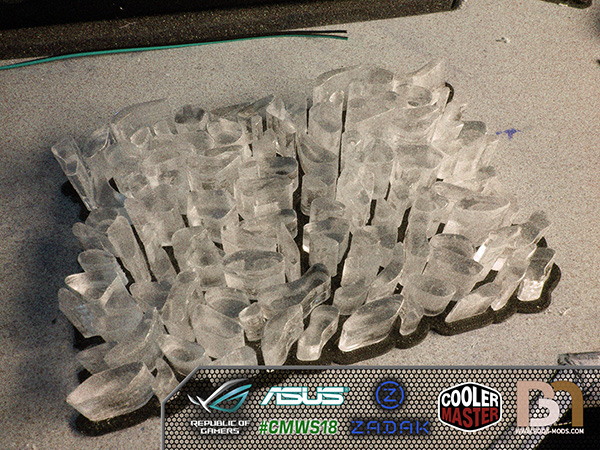 3rd set.. 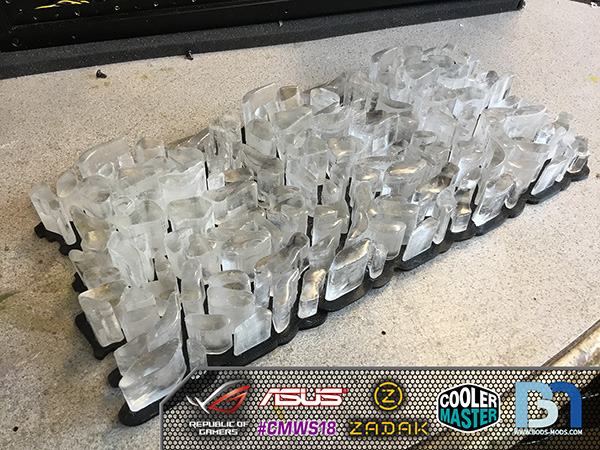 ..and finally 4th set! 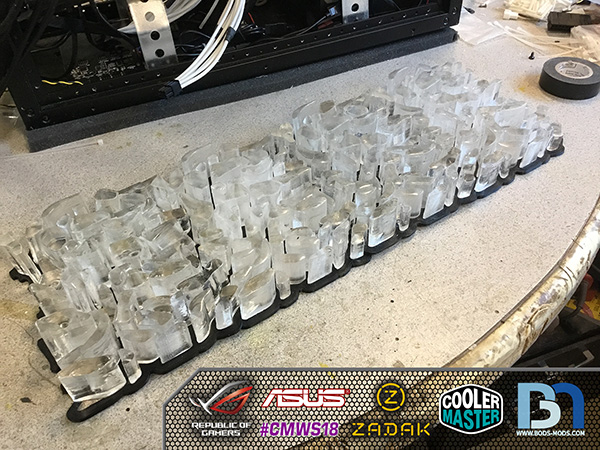 I added the back bezel to give you an idea of how it's going to look when finished. 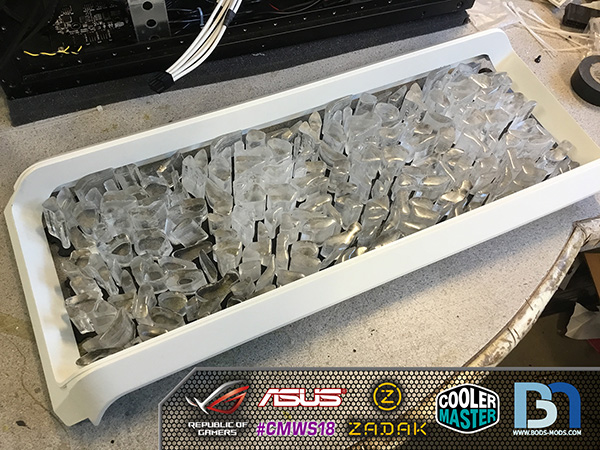 ..and of course I had to see what it would look like lit up.. 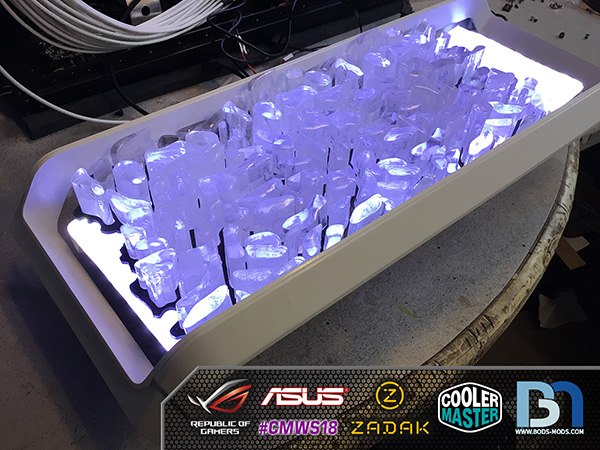 Can't wait to wrap this thing up! :)
|
PietroBR
FTW Member
- Total Posts : 1202
- Reward points : 0
- Joined: 2013/09/14 06:40:52
- Location: Brazil
- Status: offline
- Ribbons : 7
Re: Achromodic
2018/05/09 04:41:28
(permalink)
Wooooah.
Amazing work,
And also, amazing patience for taking time and make those "ice cubes".
Trully it's going to be an amazing build in the end.
|
Sleinous
EVGA Forum Moderator
- Total Posts : 7663
- Reward points : 0
- Joined: 2010/06/12 12:22:01
- Location: France
- Status: offline
- Ribbons : 32
Re: Achromodic
2018/05/09 15:05:03
(permalink)
Same here, blown away with this one
My Affiliate Code: GL1IAAFWJF
|
rjohnson11
EVGA Forum Moderator
- Total Posts : 102262
- Reward points : 0
- Joined: 2004/10/05 12:44:35
- Location: Netherlands
- Status: online
- Ribbons : 84
Re: Achromodic
2018/05/10 07:21:08
(permalink)
|
EVGATech_GabrielT
EVGA Tech Support
- Total Posts : 1104
- Reward points : 0
- Joined: 2012/02/22 09:59:37
- Status: offline
- Ribbons : 1
Re: Achromodic
2018/05/15 00:28:32
(permalink)
Cant wait to see the final photos.
|
Boddaker
iCX Member
- Total Posts : 316
- Reward points : 0
- Joined: 2007/02/09 17:13:09
- Location: Where the beer flows like wine
- Status: offline
- Ribbons : 18
Re: Achromodic
2018/05/22 15:21:19
(permalink)
Thanks for the comments! I'm getting excited to finish this up as well. :) Time for an update! I started working on the GPU mounting bracket last night. If you remember about a month ago, I showed the placement of the video card on the back side of the motherboard tray.. Using some thin cardboard, I worked up a bracket design that will support the video card, and provide enough clearance behind the card for the PCI riser card and sleeved cables. 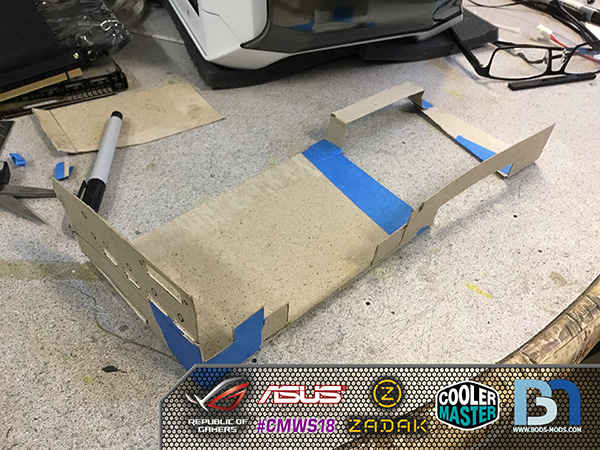 I also incprporated the IO panel so I can do away with the stock one, and serve as the means to fasten the card to the bracket. 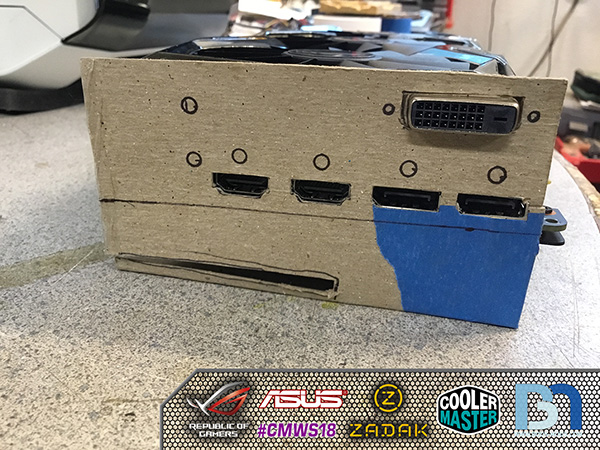 Before I could finish the bracket tho, I needed to organize the cables so I knew where they would sit, so I 3D printed some cable combs of my own design. ;-)  Taped up the mockup to see how it will look.. 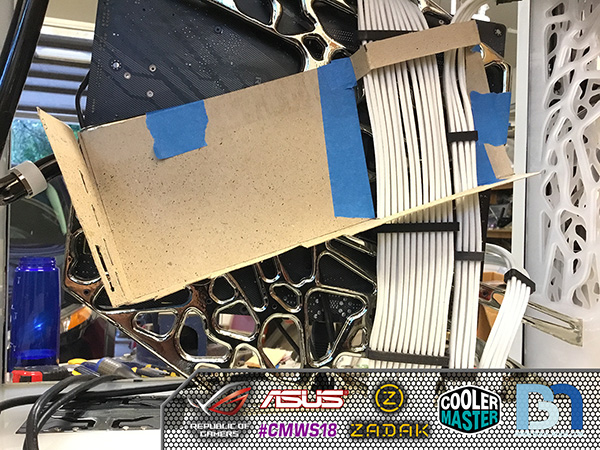 A few more tweaks and I'll flatten out the cardboard shape and transfer it over to a piece of aluminum. Then cut and bend!
|
puzion
New Member

- Total Posts : 14
- Reward points : 0
- Joined: 2018/04/08 20:00:39
- Status: offline
- Ribbons : 0
Re: Achromodic
2018/05/23 08:24:07
(permalink)
Big fan! Would love to see in person.
|
EVGATech_GabrielT
EVGA Tech Support
- Total Posts : 1104
- Reward points : 0
- Joined: 2012/02/22 09:59:37
- Status: offline
- Ribbons : 1
Re: Achromodic
2018/05/24 00:26:42
(permalink)
|
rjohnson11
EVGA Forum Moderator
- Total Posts : 102262
- Reward points : 0
- Joined: 2004/10/05 12:44:35
- Location: Netherlands
- Status: online
- Ribbons : 84
Re: Achromodic
2018/05/24 10:31:38
(permalink)
|
turbomadman
iCX Member
- Total Posts : 458
- Reward points : 0
- Joined: 2007/12/01 01:48:35
- Status: offline
- Ribbons : 2
Re: Achromodic
2018/05/25 18:17:54
(permalink)
Great custom work so far! Howzit coming along?
|
Boddaker
iCX Member
- Total Posts : 316
- Reward points : 0
- Joined: 2007/02/09 17:13:09
- Location: Where the beer flows like wine
- Status: offline
- Ribbons : 18
Re: Achromodic
2018/05/30 11:54:38
(permalink)
Thanks guys! Finished up the GPU bracket over the holiday weekend, among other things.. :) I opted to simplify the bracket by shortening it down a bit.. no real need to extend it beyond where the cabling was. So after taping up my scrap piece of brushed aluminum, I transferred the shape from the template. 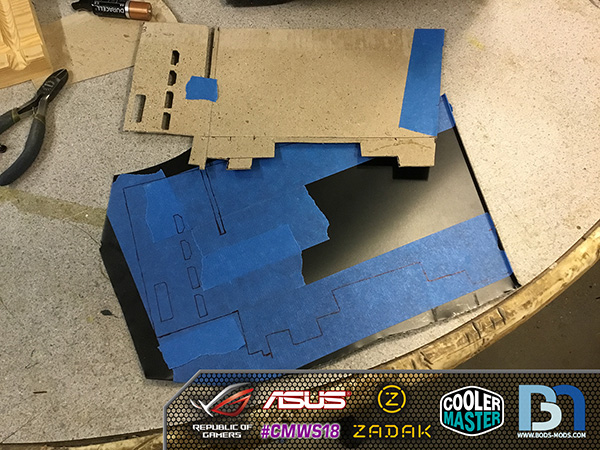 Cutting was easy on the scroll saw, thanks to the alu's thickness and the spiral blade, which cuts in every direction. No need to rotate the piece! 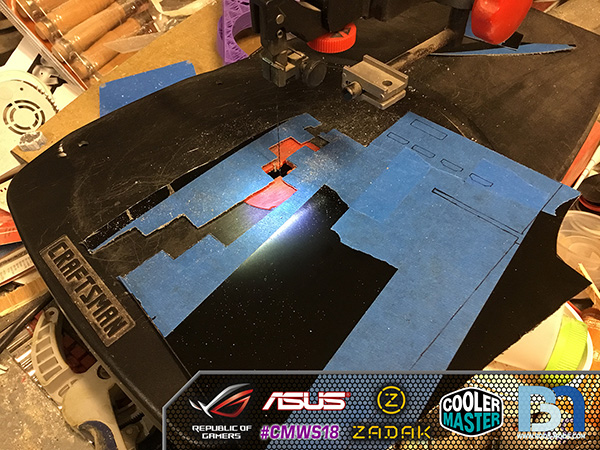 The result.. Time to file! 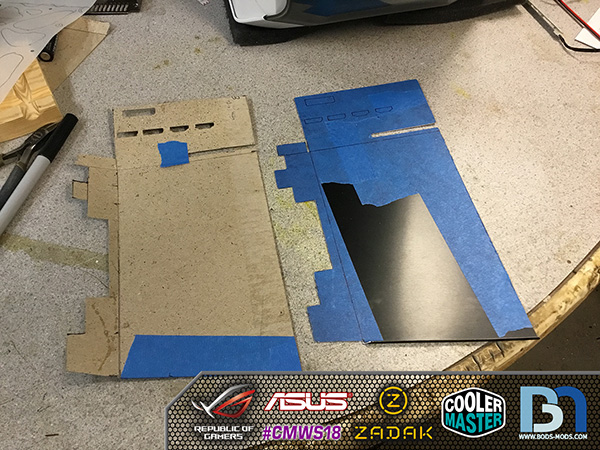 Before I bend it, I need to cut out all the IO ports. 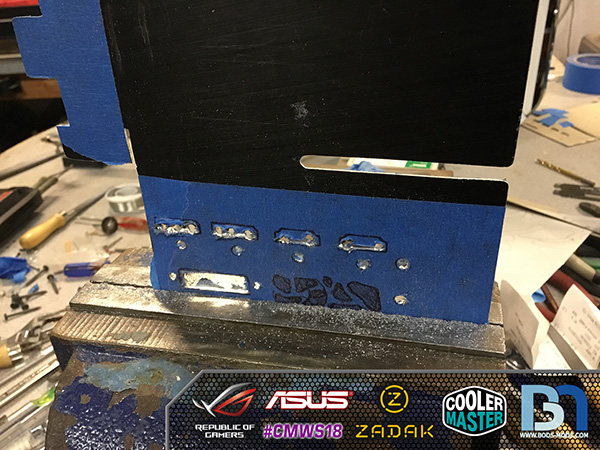 Two bends and a couple pop rivets later, and we have a bracket!  I used the original GPU bracket for comparison. Pretty close.. Also I try to take every opportunity to incorporate the theme into every piece I make. ;-) 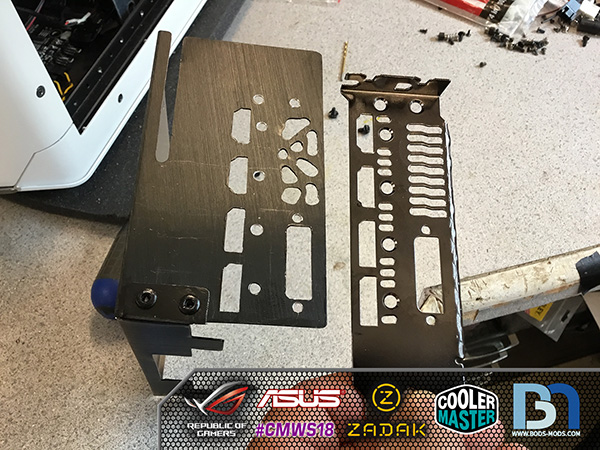 The ports line up nicely.. The slot is for the PCIe riser cable.  The bracket fits tightly around the bottom of the PCB, and allows enough clearance for the riser cable to plug in. 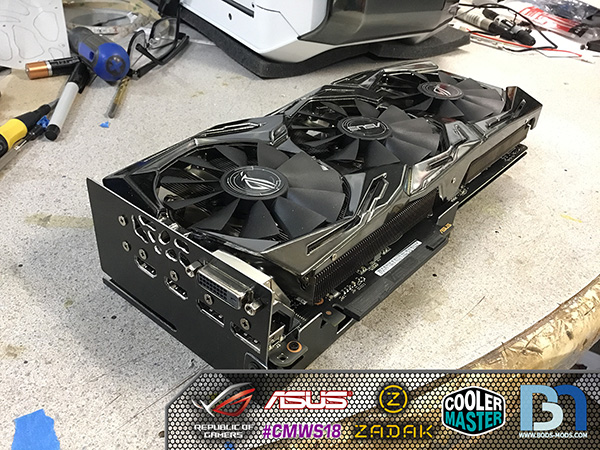 To mount the bracket onto the motherboard tray, I had to find spots in between the holes where there was enough solid material to drill into. Once those were located, I used some tracing paper to mark the bracket, drilled that first, then used the bracket to mark the exact spots on the mobo tray. 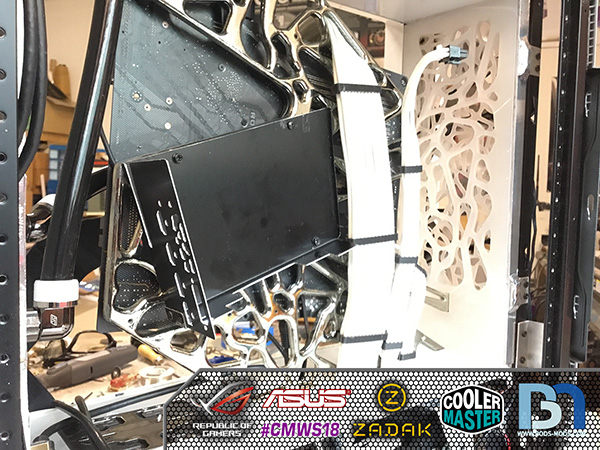 Fitting the Li Heat PCIe riser cable around the mobo tray and into the bracket with some creative origami lol. The E-tape is just there to hold it in place for the picture. 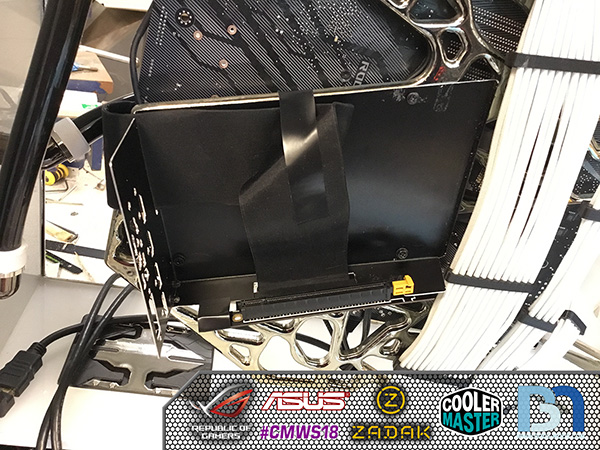 ..and the card is mounted! 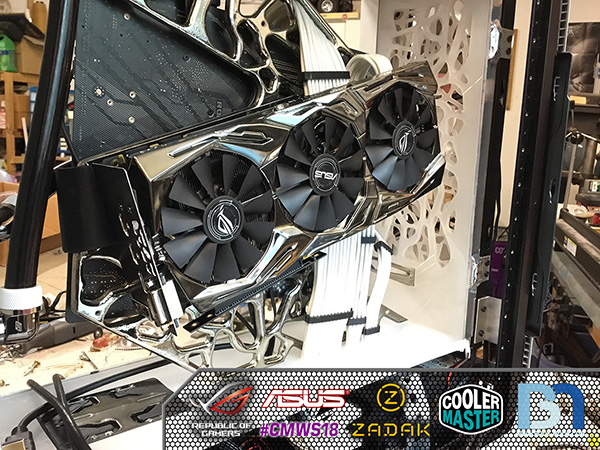 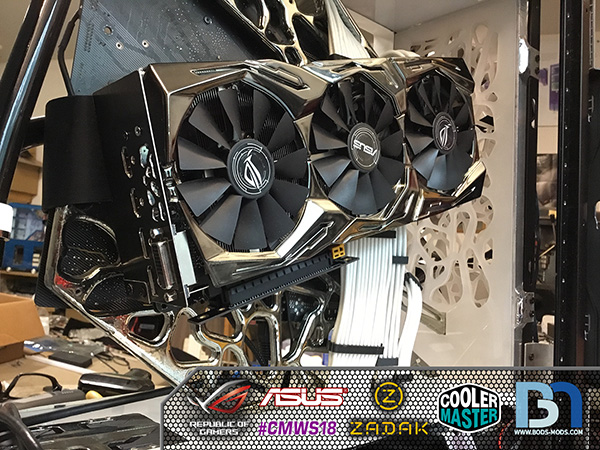 Top view.. The bracket raises the video card up 1 1/4" to give ample clearance for both riser cable and sleeved cables. 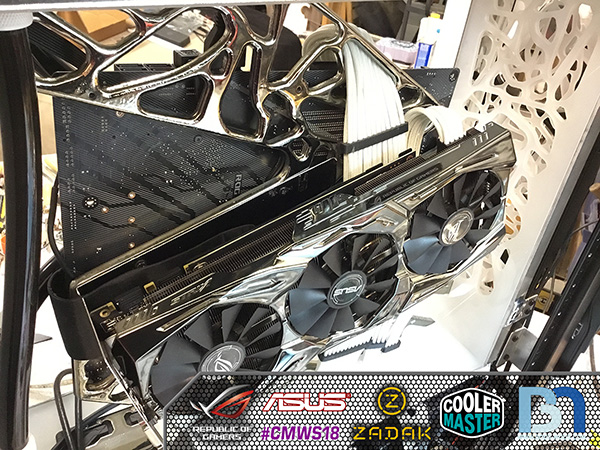 Getting down to just a few final items for the case, then it's on to the peripherals!
|
rjohnson11
EVGA Forum Moderator
- Total Posts : 102262
- Reward points : 0
- Joined: 2004/10/05 12:44:35
- Location: Netherlands
- Status: online
- Ribbons : 84
Re: Achromodic
2018/05/30 12:08:28
(permalink)
Love this mod, so many possibilities.
|