EVGA

Nikko's BLACK Build: Updated with rebuilt water cooling loop! 19-Sep-2015

Author
nikkocortez
CLASSIFIED Member
  • Total Posts : 2884
  • Reward points : 0
  • Joined: 2010/02/01 10:04:03
  • Status: offline
  • Ribbons : 14
2014/09/21 21:01:19 (permalink)
1 Year Later!  Water cooling loop update in post #5!
 
 
So I have been deployed (still am) for a while and took some R&R.  After about 6 months of picking parts for my next rig following my X79 POW MIA I finalized my list and slowly collected parts.  I was also awaiting news of the tech specs of X99 and once they were leaked/released I decided it was best to stick to X79 as good second hand parts were in good price ranges to keep this build sort of on a budget allowing me to put exactly the hardware I wanted into the system with out breaking the bank.
 
The Guts:

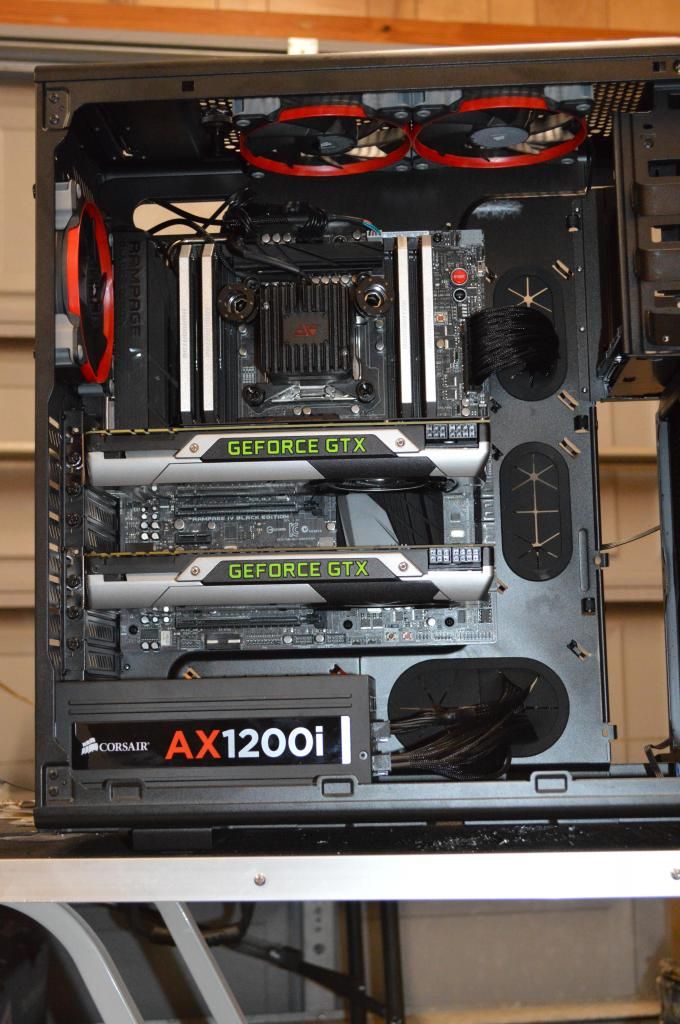
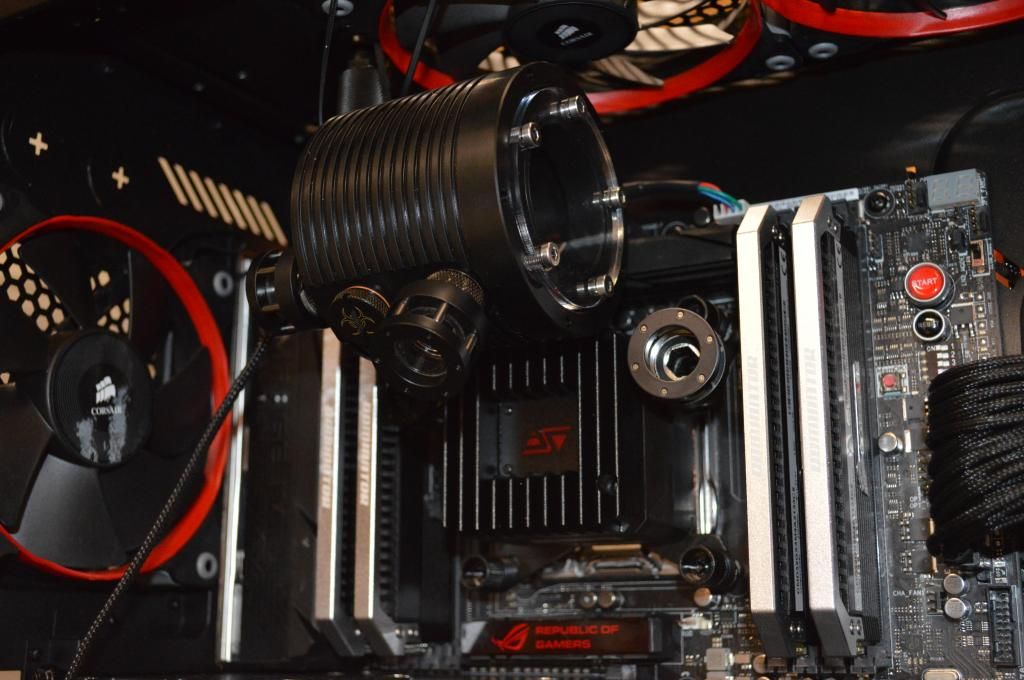
I started by picking up a second hand i7-3960 and a refurbed ASUS X79 RIVE Black Edition.  Only disappointment in the Refurb was it was missing the OC Key but I made up for it by picking up the ASUS ROG Front Panel which so far with out much tweaking is a nice feature.  I bought the 32gb 2133mhz DDR3 Dominator Kit new and used a coupon code saving $43 off the price on Newegg which was nice.  And collected two Second hand GTX Titan SC's.  I wasn't so much concerned getting the Ti's, or Blacks or running the chance of choking on 4GB of Vram and considering the two second hand Titans cost me the price of a single Titan Black Hydro Copper I would say I did well in maximizing GPU performance with the cost.

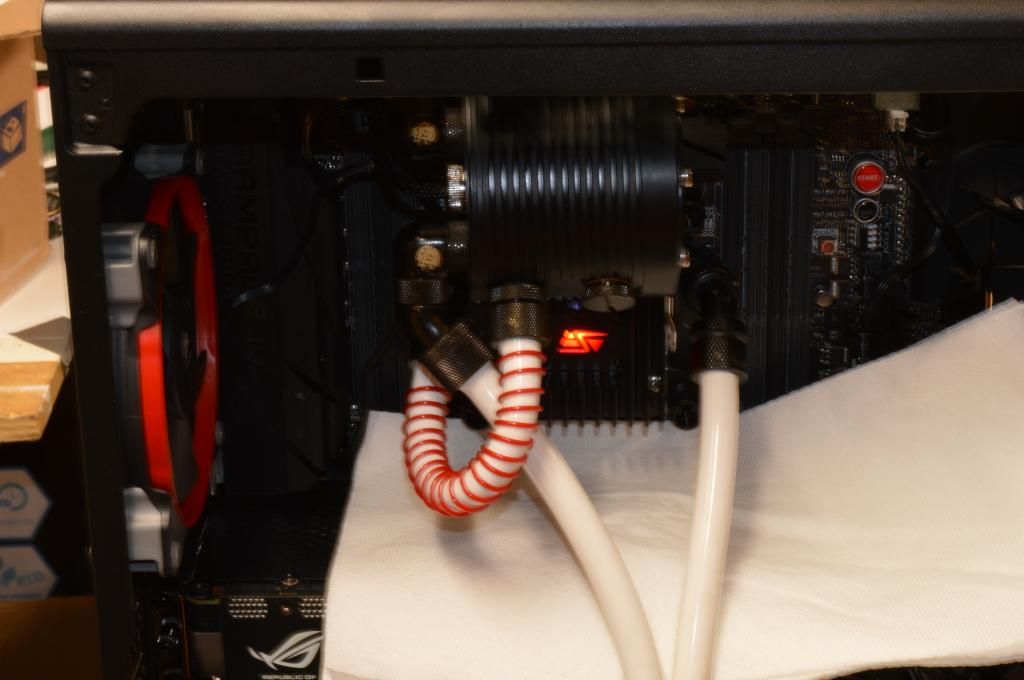
Water cooling was a must and I am looking forward to possibly watercooling my two Titans in the future but for now I stuck with a 240mm rad and the Swiftech Pump/CPU Block to simplify the loop.  I had planned on running rigid tubing but after hassles and lack of experience the rigid tubing was taking to much of my R&R time to do so I simply ran some tubing with some fittings I had to spare.
 
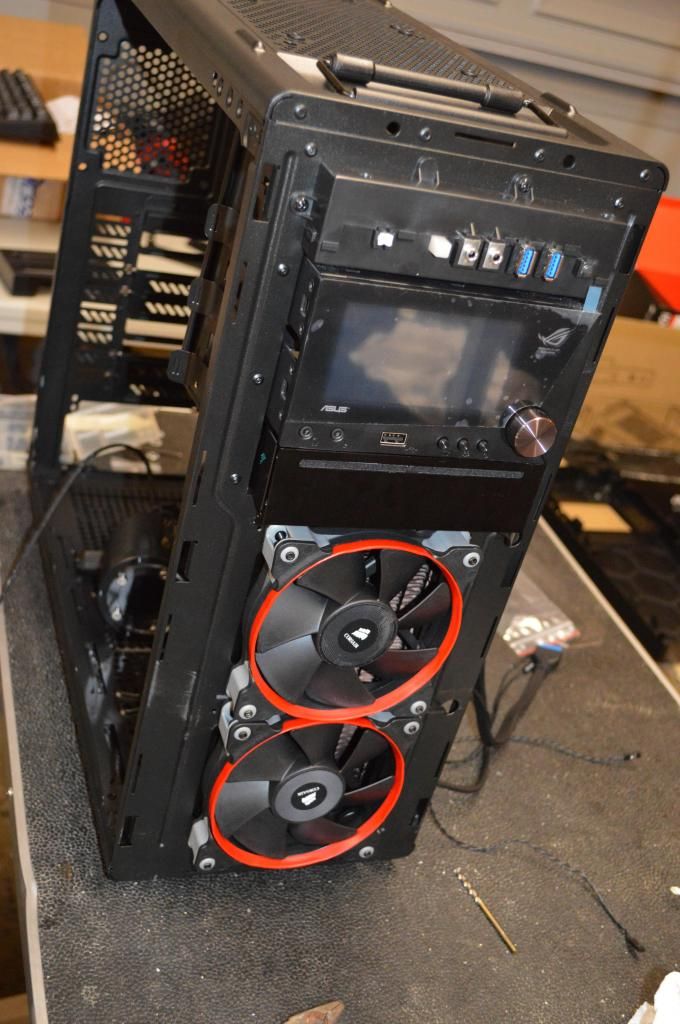
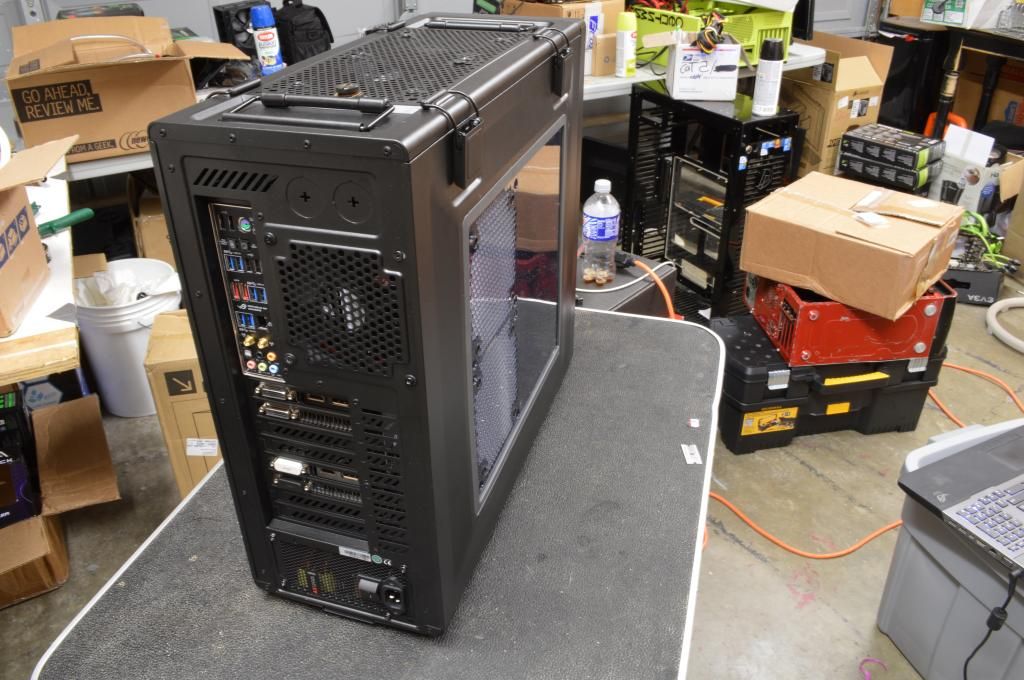
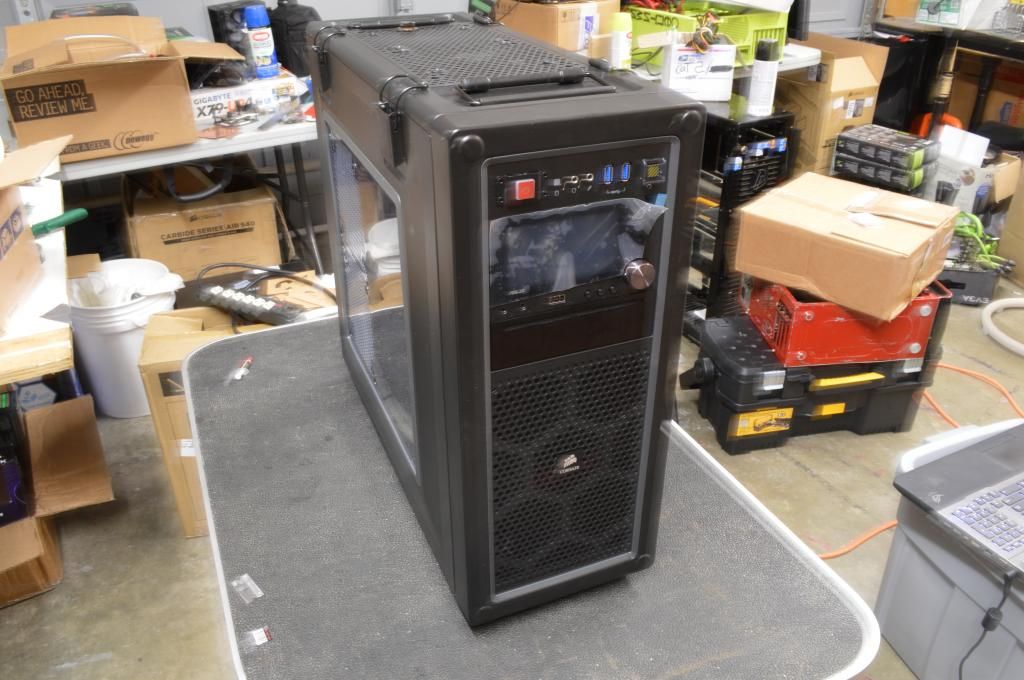
As far as the case was concerned I looked long and hard at my choices.  There are some good ones out there but there were some key things I was looking for.  Rugged, Simple, Portable, and Black.  The Corsair C70 fit the bill nicely.  It did take some rough cutting and work to accommodate the massive 240mm rad in the front but it worked out.  The case was furnished with a complement of Corsair fans as well.
 
Largely the build is in a mid state of construction.  Future plans for blacking out the Titans and Dominator RAM, as well as some more modifications to the case are still in the works but put on hold as I had to return to my deployment.  My future goal is a blacked out interior with some custom cut plexi or sheet metal panels to simplify the interior and help with cable management, and of course run the rigid tubing for the loop.  But as it stands from the end of my deployment here is my new workstation/gaming build BLACK.
 
 
Test fitting components and getting a feel for running the loop.

 
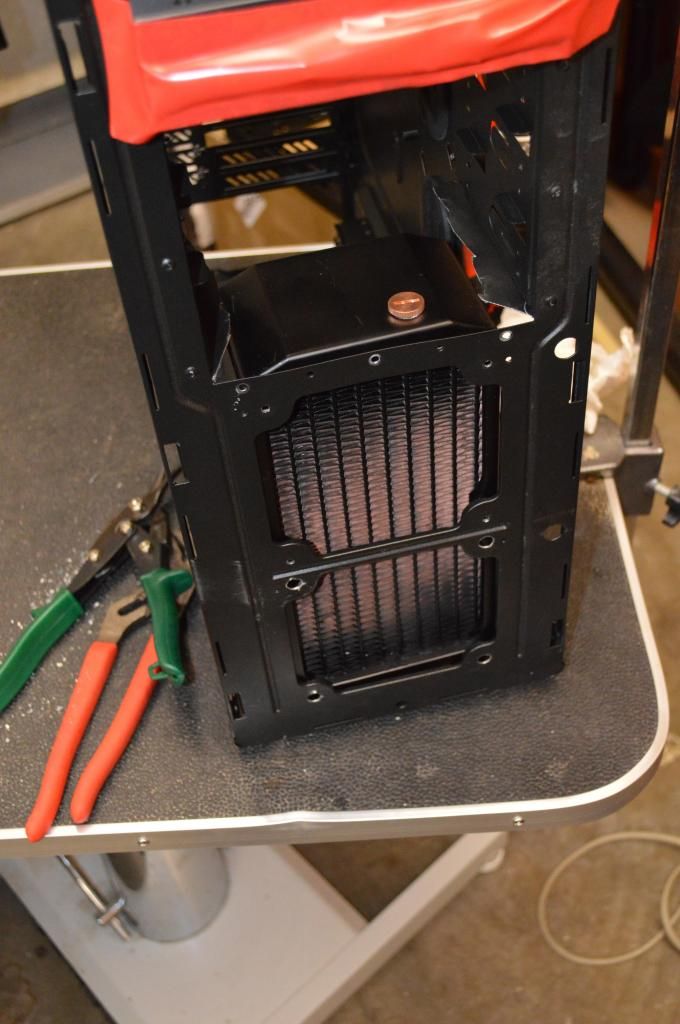
The rough chop shop work to accommodate the Alphacool 80mm thick 240mm rad.  The C70's front fan holes did not match up to the fan spacing on my rad so they were bored out to help.

 
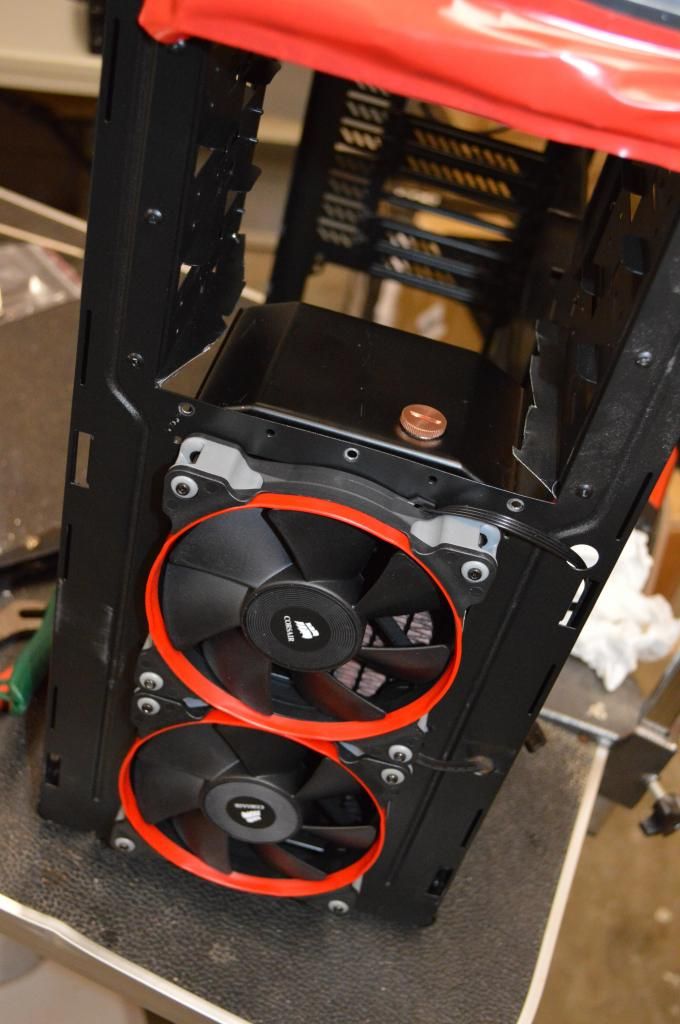
Fans installed.  Really liking the Corsar fans.

 
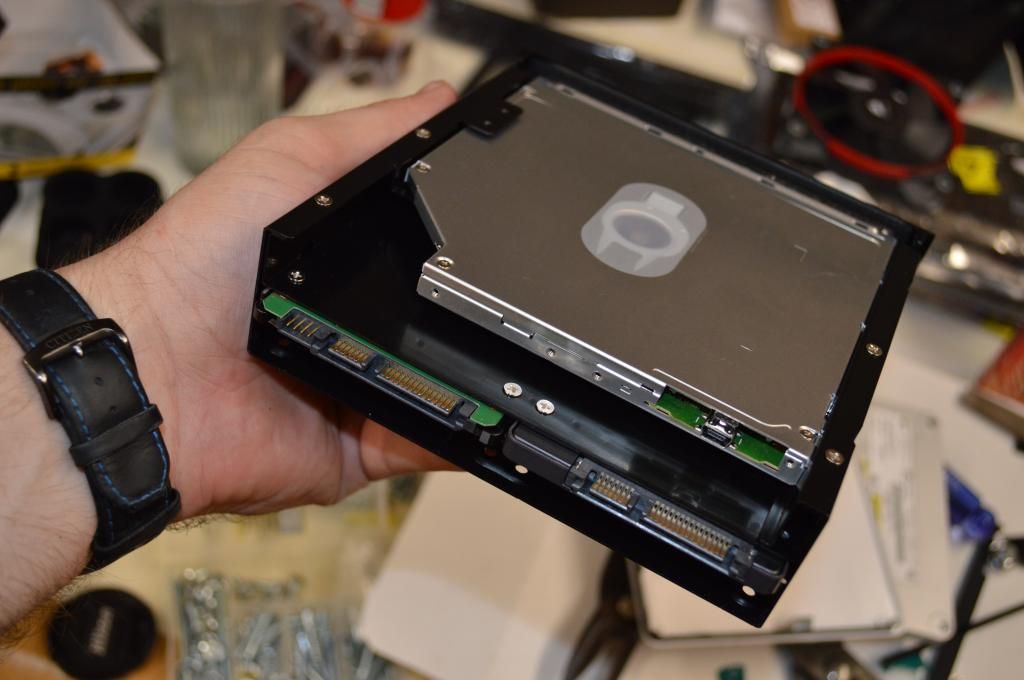
To drastically minimize space I went with a Samsung 840 SSD and a simple 1TB Laptop hdd and a slot load DVD drive.  Using the nice drive bracket I was able to fit all three drives into a single 5.25" slot.

 
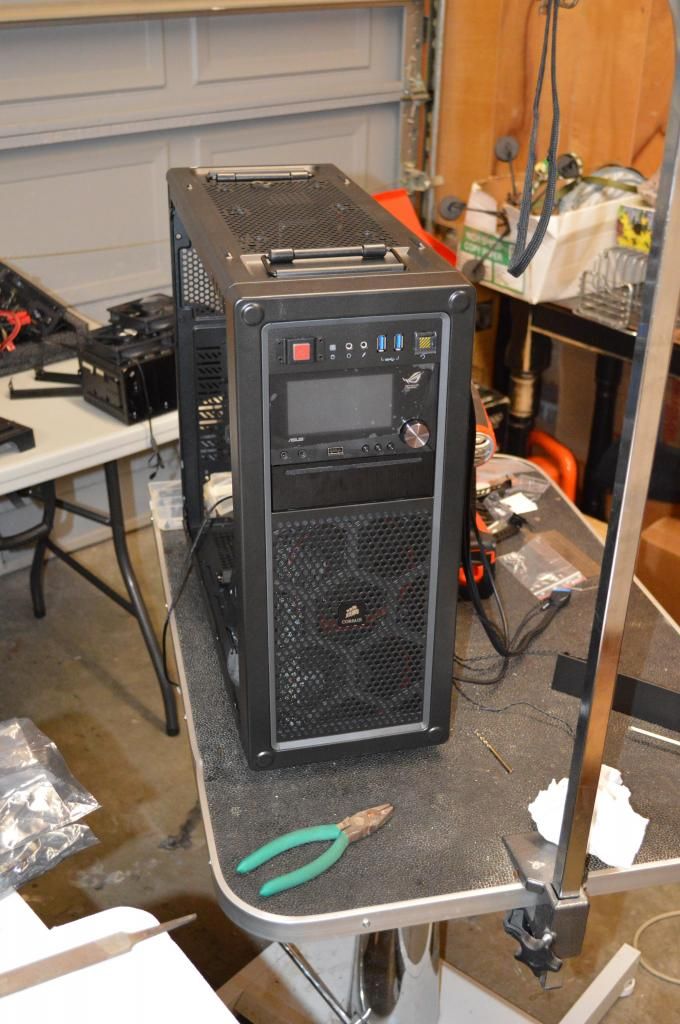
The ROG Front Base Panel and the Drive bay installed before the front cover is installed.

 
Not looking to bad although the Drive bay stands out a bit more than I would like with the off color tone.

 
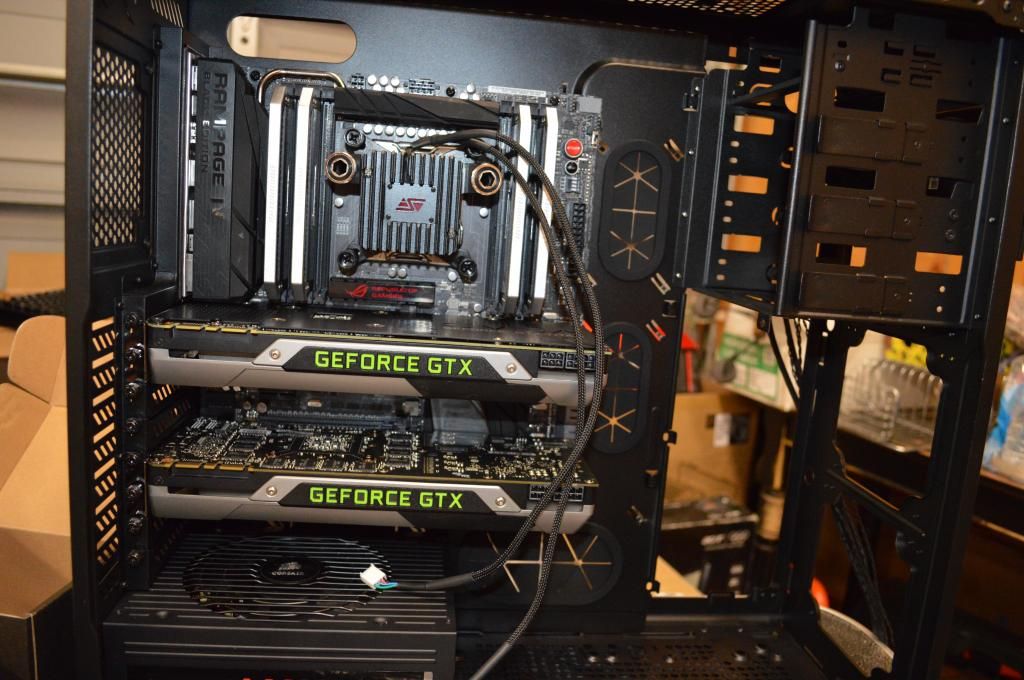
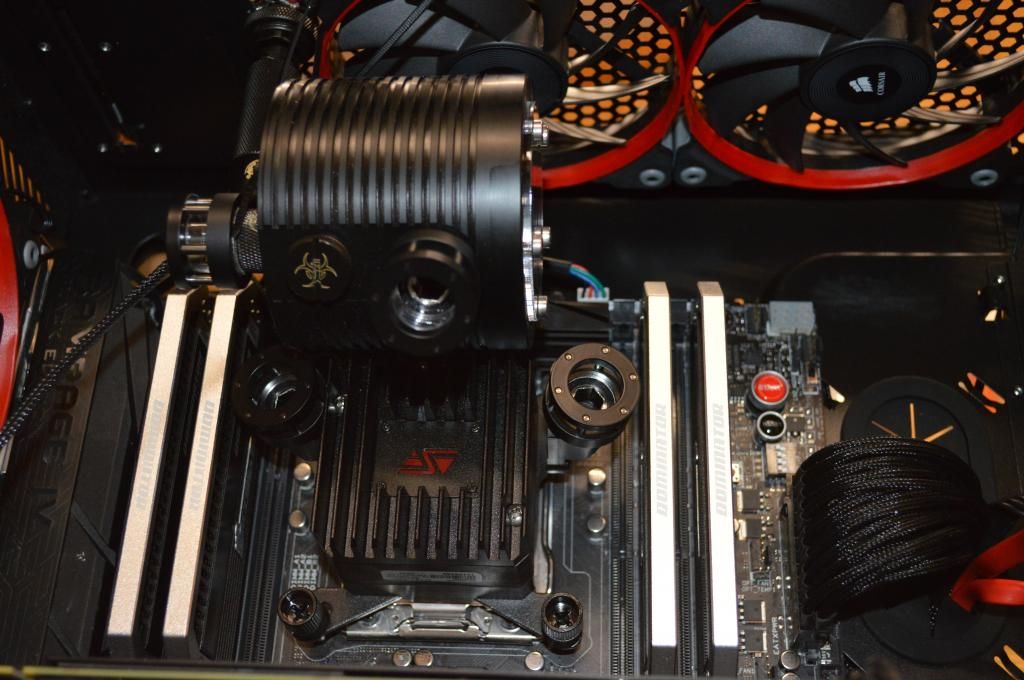
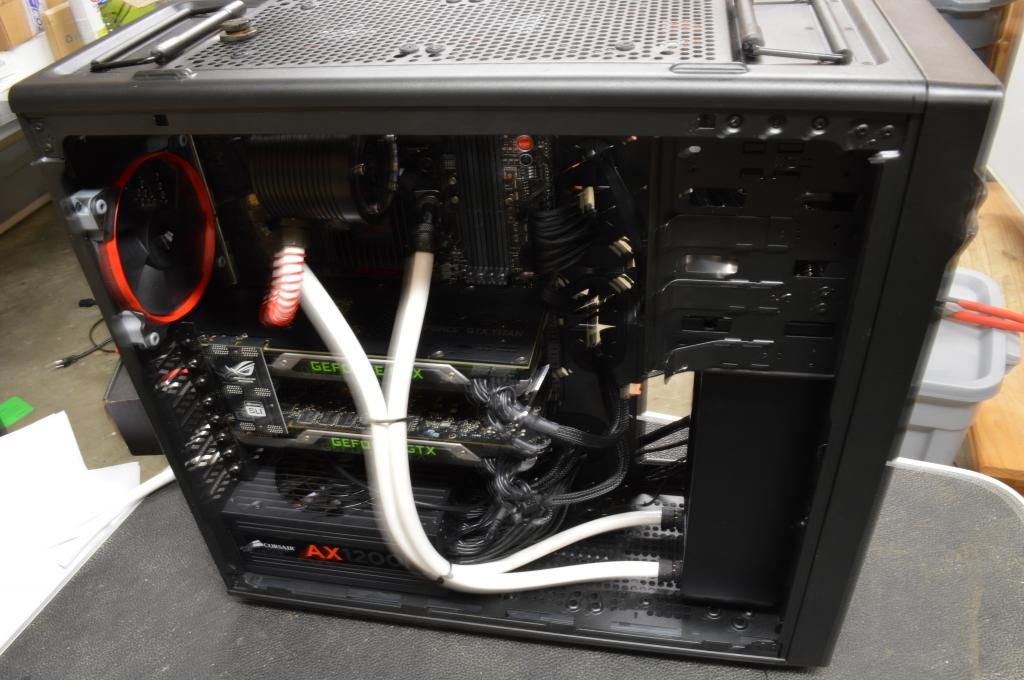
The main components are reinstalled as I start really planning and building the loop.

 
I'll admit its a bit of an odd positioning for the reservoir but it works.


I am going to skip my poor attempts on trying to get the hardline tubing that I must have spent 30+ hours on with no avail and jump to what took 15 minutes to assemble with the flexible tubing.  Not going to give up on hardline, just ran out of time.

 
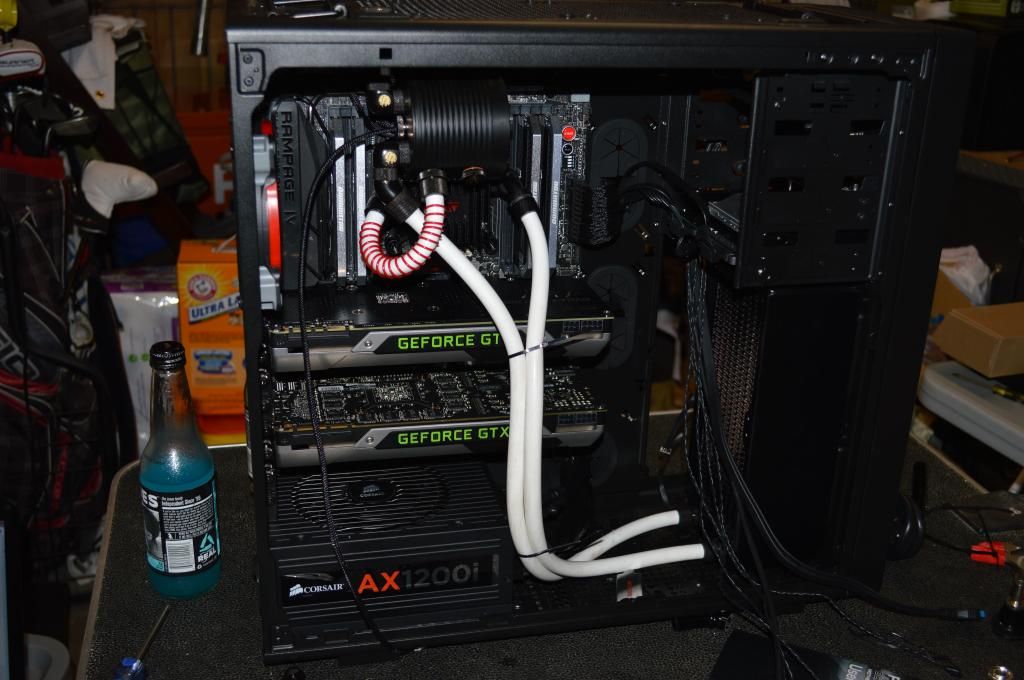
Leak testing done for a good 16 hours.  It passed.


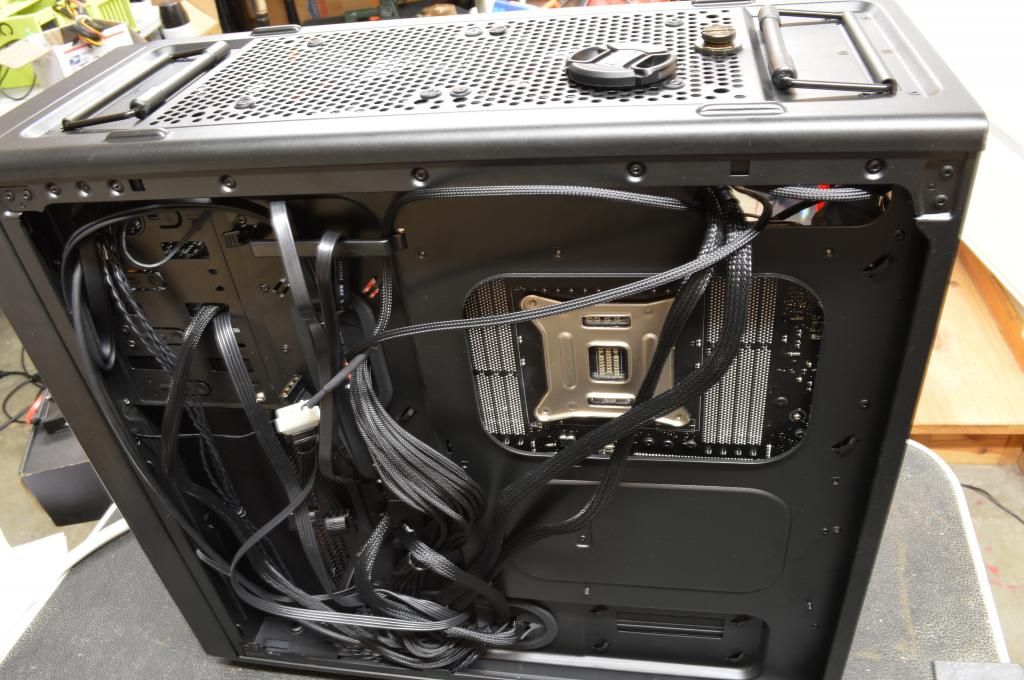
My horrific cable management. 

 
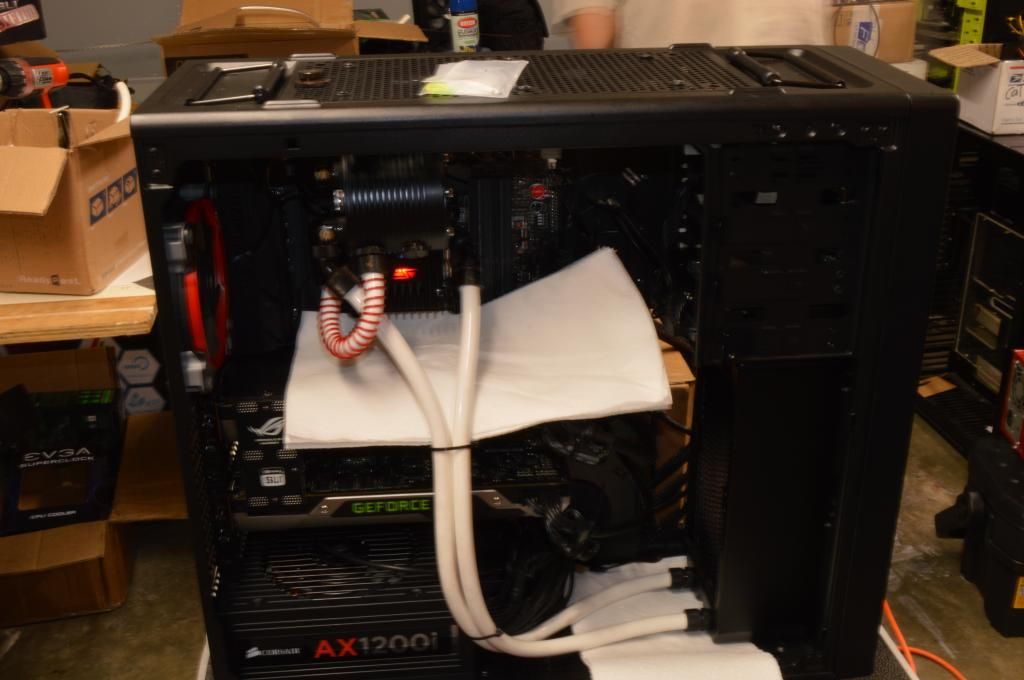
And as I wrap up the build.


Now to turn on the machine I had spent 6 months dreaming and planning. 

 
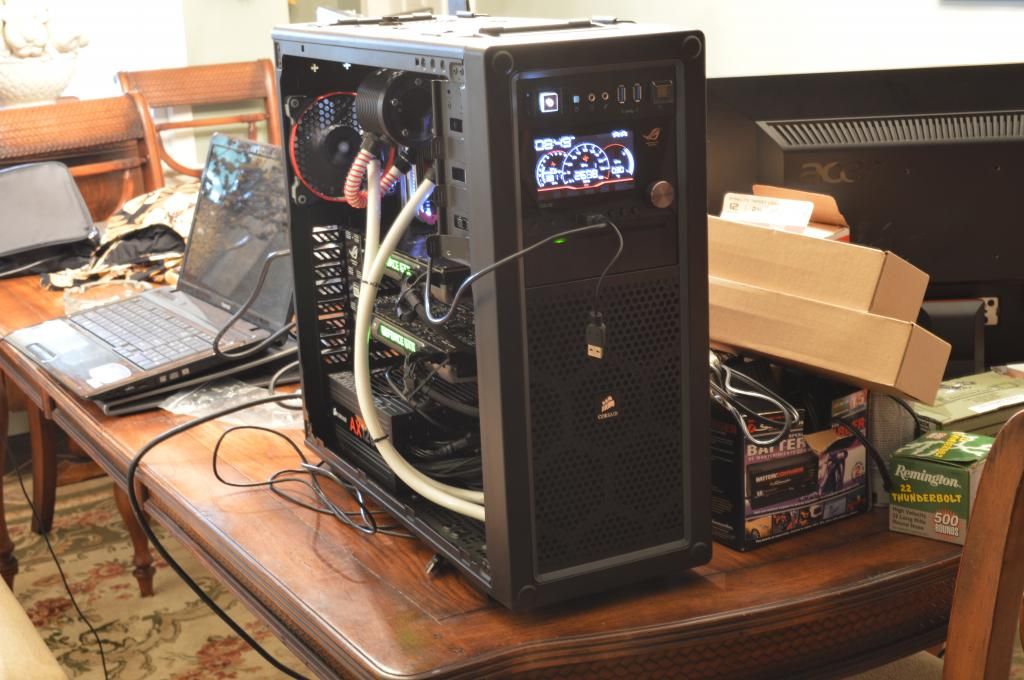
LAAAAAAAAAAAAAAAAAAAAAAAAAAAAAAA!!!!!!

 
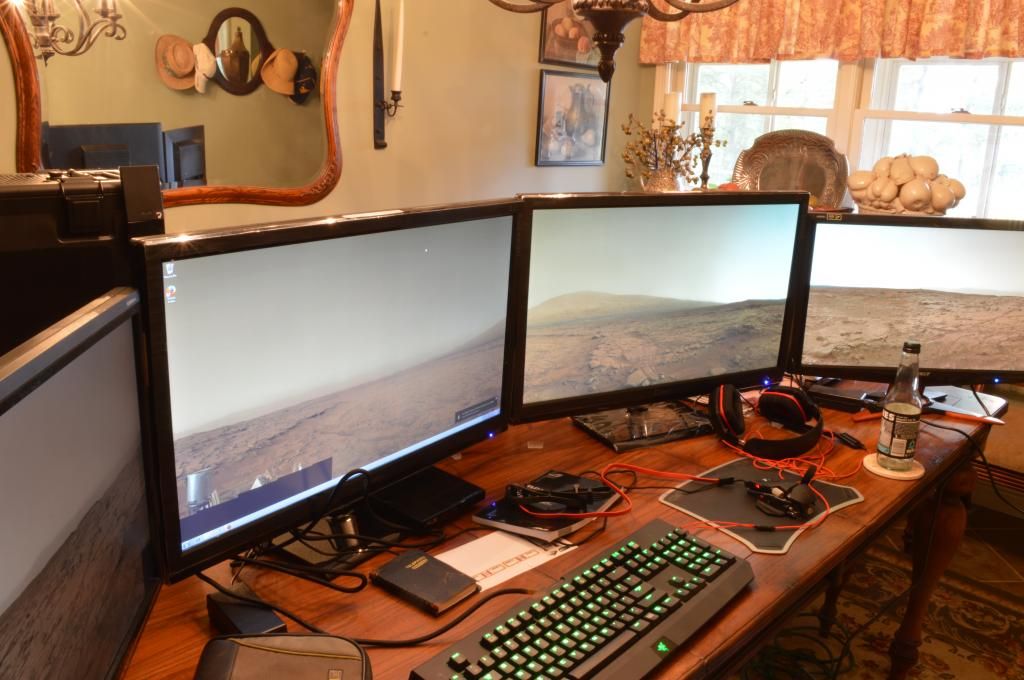
I was pretty excited to have it running even if it was half complete.  Even threw four monitors on it to test the expanse of two 1080ps and two 1440ps.  Needless to say, the in-laws were not uber enthusiastic but they tolerated it for the two days I had it on the dining room table.

 
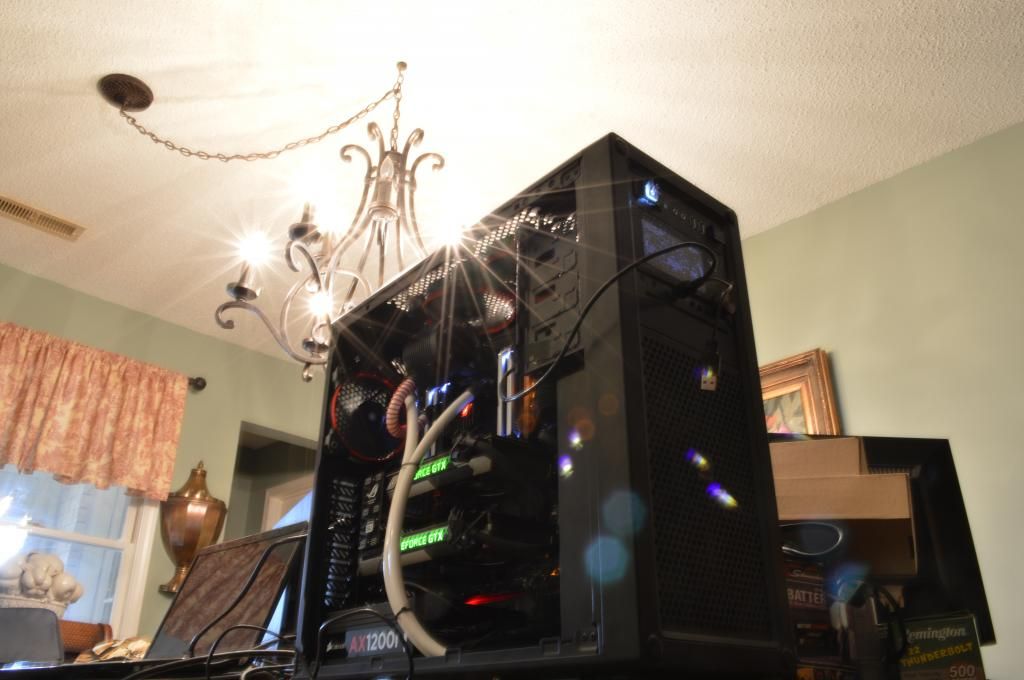
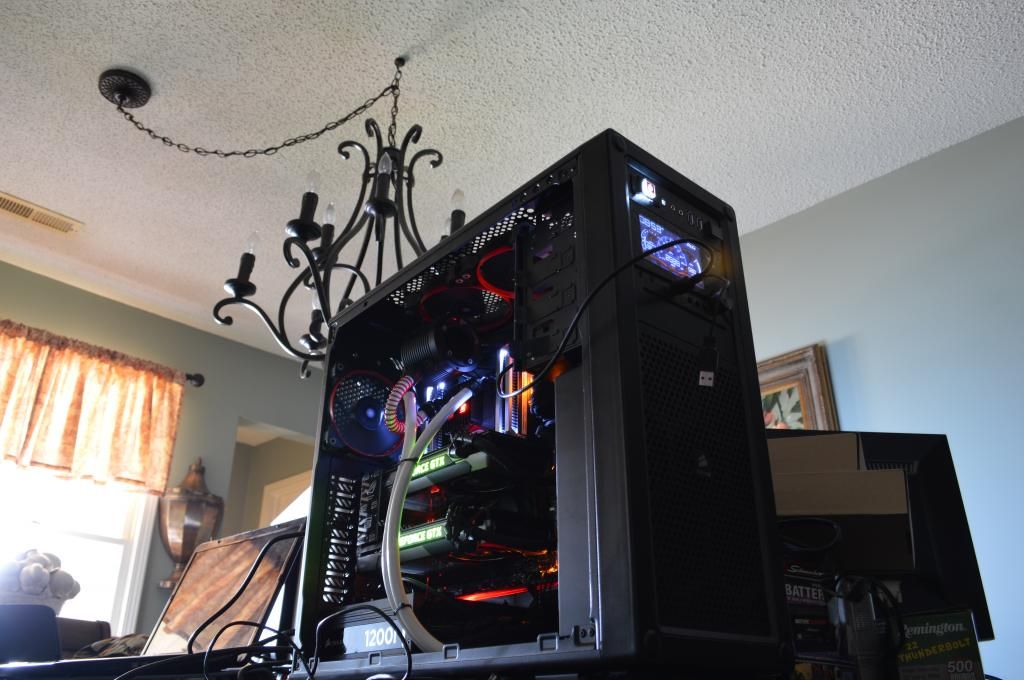
And some final shots of the build until I return home to finish it.


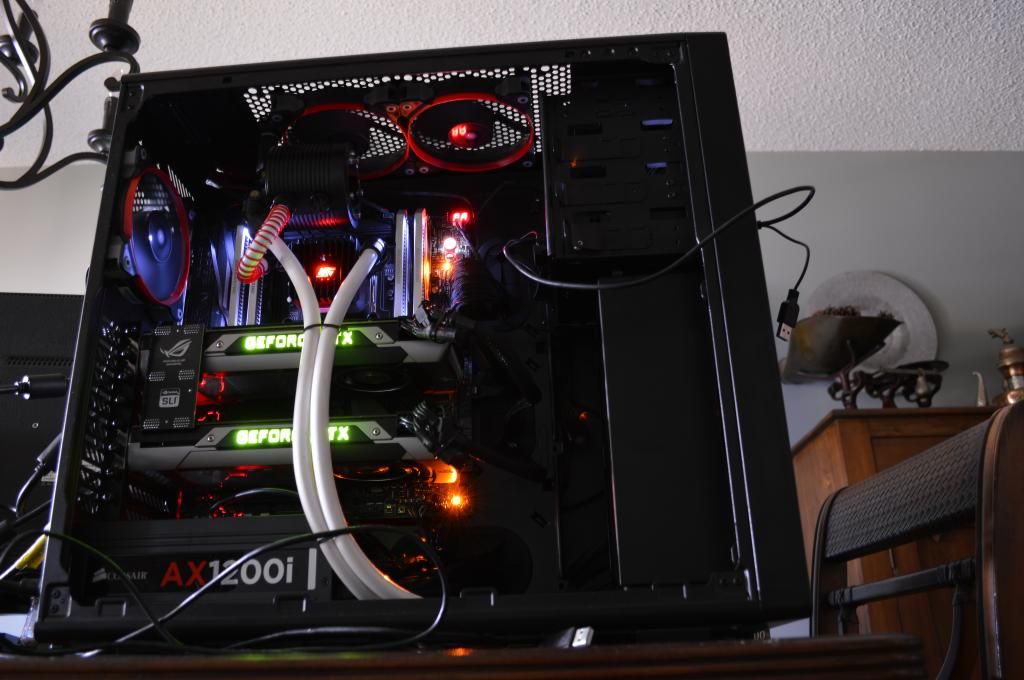
Thanks for reading!  I will update once I complete my work in a few months!


post edited by nikkocortez - 2015/09/20 01:39:00
#1

7 Replies Related Threads

    Chaos_21
    CLASSIFIED Member
    • Total Posts : 4524
    • Reward points : 0
    • Joined: 2005/10/26 17:37:36
    • Location: Redding, Ca
    • Status: offline
    • Ribbons : 10
    Re: Nikko's BLACK Build 2014/09/21 22:26:57 (permalink)
    Nice setup!

    ASUS TUF Gaming Z690-Intel Core i9-12900K- EVGA 360 CLC Cooler-Corsair Vengeance 4 x 16GB 3200mhz-2TB  Solidigm P41 Plus M.2 SSD--Three 1TB 970 EVO SSD's-EVGA GeForce RTX 3080 XC3 ULTRA-Corsair HX1000i-Windows 11 64bit-Corsair iCUE 5000X RGB Case.      
     Steam     Twitter: https://twitter.com/Chaos_21
     Use my associate code: JBGVM12HDYDJPIM to get 5%-10% discount on EVGA purchases.
     
    #2
    pvito
    New Member
    • Total Posts : 29
    • Reward points : 0
    • Joined: 2008/03/15 15:04:39
    • Status: offline
    • Ribbons : 0
    Re: Nikko's BLACK Build 2014/09/22 04:57:17 (permalink)
    Whoa. Nice!
     
    You need a pic of your in-laws eating dinner around your setup on their table. LOL 
    #3
    notfordman
    Omnipotent Enthusiast
    • Total Posts : 10345
    • Reward points : 0
    • Joined: 2007/08/09 23:52:23
    • Location: In a van, down by the
    • Status: offline
    • Ribbons : 28
    Re: Nikko's BLACK Build 2014/09/22 14:53:37 (permalink)
    Looks like it worked out very nicely Nikko! I'm not real fond of where the res is, but like you said it works. Should be a hard core gaming/ we you want rig.  I  got a good chuckle out of pvito's comment. It's cool you got some R&R time hope you enjoyed it.
     
     
    Edit: on the next to last pic, the upper fan is reflecting the LCD poster. Kinda cool! :)
    post edited by notfordman - 2014/09/22 14:57:32
    #4
    nikkocortez
    CLASSIFIED Member
    • Total Posts : 2884
    • Reward points : 0
    • Joined: 2010/02/01 10:04:03
    • Status: offline
    • Ribbons : 14
    Re: Nikko's BLACK Build 2015/09/20 01:13:37 (permalink)
    Well I guess it is finally time for that update.... So it has been a year.  finished the deployment went back to Virgina where I was stationed, bought a house in South Carolina, and not two weeks later was staioned in Mississippi.  Now that I have done the deploying, moving, and house hunting I could actually sit down and focus again on completing the build... but then again when are we ever done building these rigs?  LOL.

    So here it sits with the original water cooling loop I built just over a year ago.  Already pulled the GPU's out, yes two vanilla Titan SC's and a GTX690.

     
    Sniped the line to drain the loop.  the tubing is probably going to be tossed anyways.  The simple distilled water and PT Nuke held up very well over the course of the year and was pretty clear when it came out so no worries of strange gunk from the used tubing or nasty corrosion from the radiator or block.

     
    Just about everything cleared out.  I taped a plastic bag over the PSU to keep small parts or water dropping in through the massive fan opening on the AX1200i.  Using a little LED Puck light helped as the case literally blacks out with the poor lighting in my apartment.

     
    So the intention for this water loop rebuild is to put the two GTX Titans under water.  When I started the build I bought a Swiftech Komodo Luxury edition block for one titan, assuming I was only going to have one but then I bought a second card and didn't get the second block.  It wasn't long after I built the rig that the Komodo LE block went out of production so my dream of water cooling both seemed like it was never going to materialize and I would have to basically take a hit on the $180 block I bought for no reason.  Luckily I found one used on ebay for $70.  I was pretty excited as I was coming up empty searching for some time for the block.  How ever two GTX Titans and an i7-3930K may be a little to much heat for the original alphacool monsta 240mm rad and I am not fond of a loop in the hands of a single pump which lies in the Swiftech Apogee Drive II block on the CPU.  So I needed more rad and another pump... well I had a Swiftech Apogee and two Swiftech Komodos, so why break the cycle.  I got the Swiftech H220-X.


    Only downside is now I have YET ANOTHER Swiftech CPU block in my ever growing collection of CPU blocks(It may be showing up in my For Sale thread soon!)...  I just need the radiator section...
     
    Here I am fitting the major components in the top section.  The reservoir, Apogee Drive II, and the H220-X.

     
    The rez in this build always seemed the biggest mistake as the fill port was just right in the middle of EVERYTHING.  However with some clever use of fittings and about two hours of test fitting I got a good balance of the placement for it.  The build was never meant to be a clean simplistic loop.  I was aiming to make it look more industrial like an engine compartment of a truck.  The round reservoir really adds a nice change in shape with everything else being square and angular so it stands out in the loop... I just hope I never have to replace the RAM behind it though .

     
    Now onto installing the Swiftech Komodos.    The GTX 690 neevr really had a good selection of water blocks and with it being right next to the titan and knowing that the inlets/outlets would most likely never line up I simply will just leave it stock.  The only block even close to the Komodos would be the EVGA Block and those are probably pretty hard to come by with out a card bolted to them already.  But the Titans alone definitely look nice in the sweet Komodo LE's.


    Getting there!

     
    I forgot to buy SLI Fittings but I happened to have a plethora of Koolance QDCs from the abandoned ARSENAL X build...

     
    And go figure they fit perfectly as SLI fittings with the added benefit of modularity to the build.  In fact I added enough QDC's that the GPUs can be completely bypassed or even add lines to an external radiator unit with out the necessity of re-priming or draining the loop...seeing I have two Alphacool 560 radiators I can see the external radiator unit coming in the near future.  

     
    Ready for priming...

     
    Knowing that I may need to maintenance and flush the system in the future I made a dual tailed valved line that can be attached to either the Male or Female QDC fittings.  Leaves me from having undo fittings and having water go all over the place.  and of course a simple G1/4 to funnel line for filling.  Why not since I have amassed a plethora of fittings over the years.

     
    The messy workstation...

     
    Primed and now leak testing.  It was a pretty solid build first time.  Nothing majorly noticeable with leakes but I suspect there will be plenty of little air bubbles in the loop getting worked out for a few days.

     
    It's up and running.  The Titans load temps on air were in the mid to high 70's and the bottom Titan was starving for air being butted up to the GTX690 so it would hit in the low 80s.  The Komodos practically cut the temps in half bringing load temps to about mid 40's for both cards.  I'm very happy with that considering they share the loop with the CPU as well which stays in the 40's under load(this CPU was always a little warm).  Starting from the round rez the loop order is Rez>Apogee Drive II>H220-X>GTX Titans in parallel>Alphacool Monsta 240mm>back to the rez.  There are QDCs between both inlet and outlets of the Titans so they can be bypassed and a set on the return line from the Alphacool Monsta and the round rez so I can flush the system or add the external rad unit.  


     All together a challenging water cooling loop.  Looks like a mess but it has some pretty good function and expandability thanks to those Koolance QDC's.  Total build time was around 6 hours, not including leak testing.
    post edited by nikkocortez - 2015/09/20 01:40:16
    #5
    XrayMan
    Insert Custom Title Here
    • Total Posts : 73000
    • Reward points : 0
    • Joined: 2006/12/14 22:10:06
    • Location: Santa Clarita, Ca.
    • Status: offline
    • Ribbons : 115
    Re: Nikko's BLACK Build 2015/09/20 10:51:55 (permalink)
     
    Sometimes life causes delays. Anyway, looks really nice.          

                My Affiliate Code: 8WEQVXMCJL
     
            Associate Code: VHKH33QN4W77V6A


     &nbsp
    #6
    notfordman
    Omnipotent Enthusiast
    • Total Posts : 10345
    • Reward points : 0
    • Joined: 2007/08/09 23:52:23
    • Location: In a van, down by the
    • Status: offline
    • Ribbons : 28
    Re: Nikko's BLACK Build 2015/09/20 22:52:42 (permalink)
    See now, I knew some water blocks were missing! lol  That's awesome Nikko. I do like the re-placement of the res. It looks better that way. I will always have water cooled components ,if I can help it.  = temps + silence.  I love the QD's, that's cool how they worked out for your SLI. Real nice job, man! :)
    #7
    nikkocortez
    CLASSIFIED Member
    • Total Posts : 2884
    • Reward points : 0
    • Joined: 2010/02/01 10:04:03
    • Status: offline
    • Ribbons : 14
    Re: Nikko's BLACK Build 2015/09/21 08:48:15 (permalink)
    Thanks XrayMan!
    @notfordman- haha yeah there were a few missing!  Yeah that rez was a major pain to work with but I honestly don't like a res at the lowest point in the loop either.  especially since both of the pumps are up high.  Really I dropped it down 10mm with a G1/4 spacer and rotated it 90* so it faced out.  It clears the H220-X just fine.  There was another consideration for it's placement and that was to trap the air bubbles when you are working with the QDC's.  I know they are no-spills but I'm sure there is always a little bit of air getting in the loop when you disconnect them.  With the rez that high on the loop and every QDC installed is in the loop after after the two pumps it will ensure that no air gets cycled back through the system.

    This is also the first time I have put GPU's under water and now I wonder why I never did it before!  It's a 20-30*C drop in load temps but I will say the idle temps are a few degrees higher.  From what I understand the idle temps being a tad higher is some what common though with liquid cooled set ups.

    I did a good 30-40 minutes on the Heaven Benchmark to see how they do and they were climbing to the low 50*C's.  I also noticed they were putting out a lot of heat in the case to I may have to weak some fan settings to get more air through the case as the heat build up in there was pretty significant.  I may check all my fan cables to ensure they are all connected too.  I'll have to also start setting up profiles in the BIO's for the board concerning the cooling and configure the ASUS fan display to monitor the pumps.  In case one dies I will know.

    Other than some wire management tweaks and a few minor aesthetics it's pretty much where I have always wanted my dream machine to be.  Hopefully the components last me a few years until I get settled enough to build a CNC and start prototyping a scratch built case.
    #8
    Jump to:
  • Back to Mobile